Momma Told Me: DIY

Blog Archive

Showing posts with label DIY. Show all posts

Lions And Tigers, And Toddlers, Oh, My! - Little Tikes® Cozy Coupe® Wagon Halloween Transformation


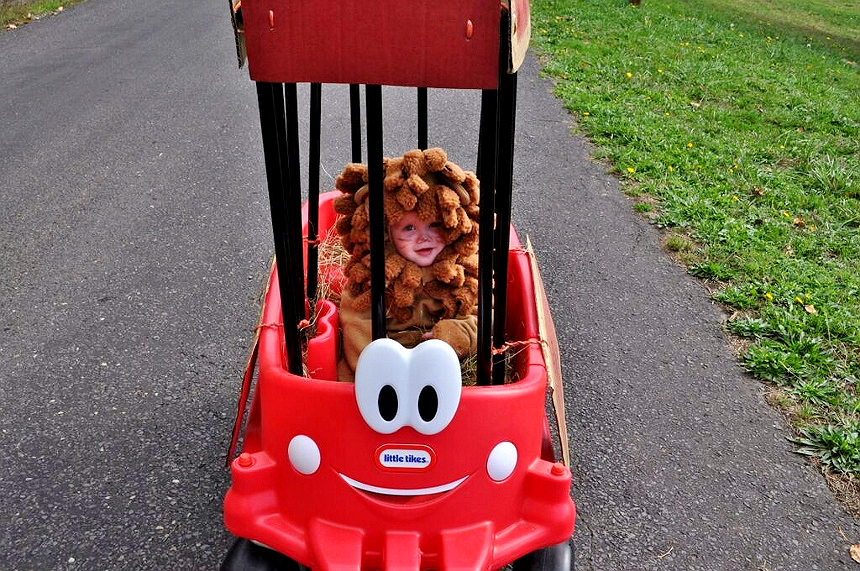
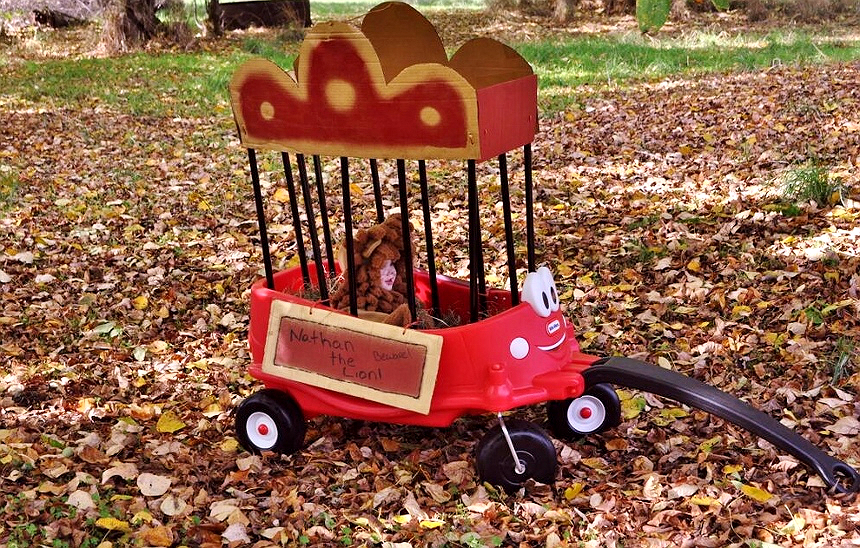
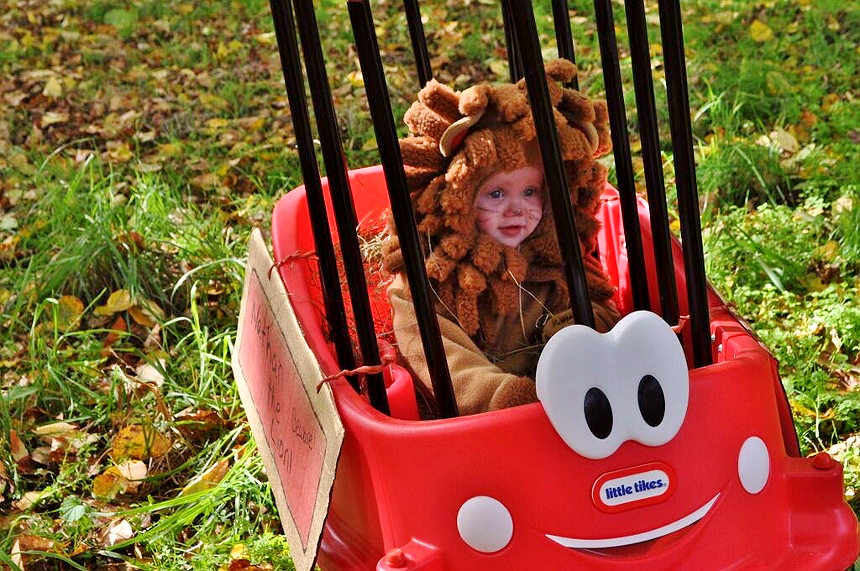
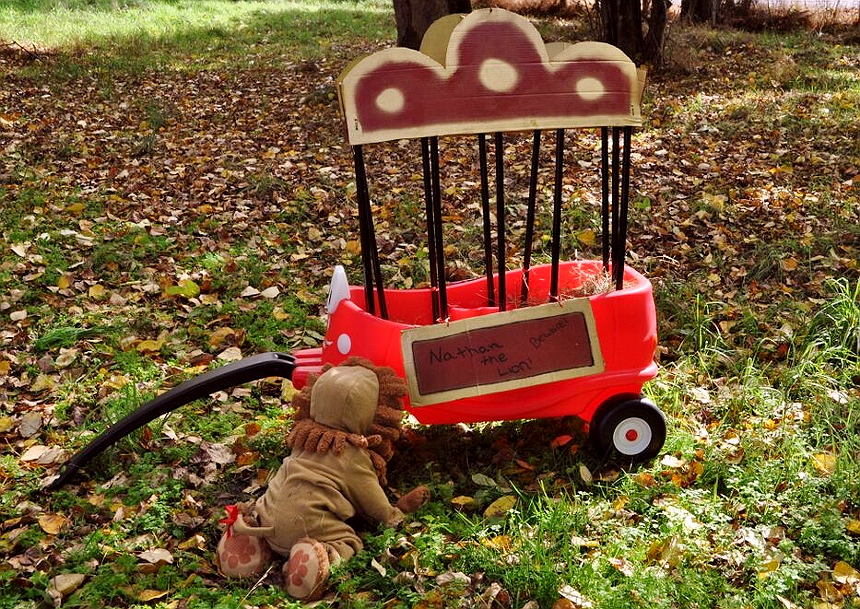
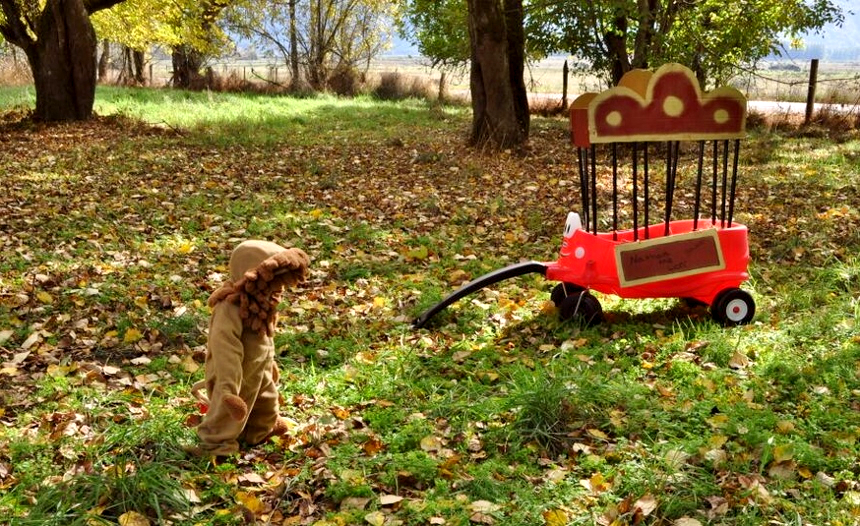
Toddler Lion Costume and Circus Cart- Transform the Little Tikes® Cozy Coupe® Wagon for Fall festivities! (ad)
Momma Told Me: It's a wagon, not a chariot.

As the holidays approach I feel myself getting more and more nostalgic for the rituals involving family and friends. This time of year is marked by sites, smells, and activities that make memories. While I count down the days until Thanksgiving week, when I can finally return to Oregon to visit my mother, sister, and adorable nieces and nephews once again, the miracle of modern technology has also allowed me to keep tabs on those I love through a virtual eye. Born in August, this is Nathan's first 'real' Halloween and his mother's excitement for family traditions is contagious.
Toddler Lion Costume and Circus Cart- Transform the Little Tikes® Cozy Coupe® Wagon for Fall festivities! (ad)
When I was a young girl Momma would take me to the local 'Pick Your Own Farm,' where we could browse thousands of pumpkins over several acres for just the perfect one. My absolute favorite part of the evening was crawling into the red wagons with our pumpkins and watching my father pull me through the fields. Living in Southern California, one has to partake in activities like this to best get in the mindset of the holiday season- the word 'season' hardly exists! Luckily, we live on the coast surrounded by farmland and this time of year the sides of the road are covered in Orange blankets of fresh pumpkins- no need to travel to the farm. However, there are still some of us young enough at heart, to make the trek out of town for the promise of a hay ride and old fashioned corn maze.
Toddler Lion Costume and Circus Cart- Transform the Little Tikes® Cozy Coupe® Wagon for Fall festivities! (ad)
This year Nathan has wheels much cooler than the old farmhouse Radio Flyer, he'll be rolling down the block, and through the pumpkin patch in a chariot all his own thanks to Little Tikes®! I bet you didn't know that the Little Tikes® Cozy Coupe® Wagon can seat 2 toddlers, complete with cup holders, and will hold up to 250lbs in weight! It's the perfect thing to bring along to the Pumpkin Patch or Tree Lot this holiday season. The extra long handle even tucks underneath for storage and transport.
Toddle Lion Costume and Circus Cart- Transform the Little Tikes® Cozy Coupe® Wagon for Fall festivities! (ad)
And let's not forget how convenient it is to have a comfortable ride for your toddlers while Trick-Or-Treating! This year Nathan will be rolling around in style as an adorable lion thanks to a quick Cozy Coupe® Wagon transformation we did with a little PVC pipe and cardboard. Didn't Savannah do an amazing job dressing this wagon up for Halloween? In fact, there are many ways to dress up a Cozy Coupe® Wagon for Halloween from princess carriage to Mickey Mouse car- you'll find hundreds of creative ideas on Pinterest!
Toddler Lion Costume and Circus Cart- Transform the Little Tikes® Cozy Coupe® Wagon for Fall festivities! (ad)
While we know the Little Tikes® Cozy Coupe® Wagon will grow with Nathan, we were a bit aware of the shallow sides along the seating area. While the seated back (in the front seat) is fairly raised, the back seat might not be suitable for younger toddlers. Nathan sits on the floor for now; which is perfectly okay as he doesn't mind not having to share! We would simply like to remind all parents and guardians to always supervise children in the Cozy Coupe® Wagon, and never let siblings pull children around un-attended.
Toddler Lion Costume and Circus Cart- Transform the Little Tikes® Cozy Coupe® Wagon for Fall festivities! (ad)Toddler Lion Costume and Circus Cart- Transform the Little Tikes® Cozy Coupe® Wagon for Fall festivities! (ad)
But back to our Little Cowardly Lion- Living in Oregon for the holidays, Nathan's family is sure to have a lot of walking to do for their Trick-Or-Treating, and plenty of access to beautiful terrain for walking. The 'circus' transformation is lightweight and easy to tear down/put back up, making the transition between play time and utility a piece of cake. Even more important, Nathan is all smiles whenever he has the chance to be escorted around in his shiny new red wagon!
Toddle Lion Costume and Circus Cart- Transform the Little Tikes® Cozy Coupe® Wagon for Fall festivities! (ad)
Whether you're a parent looking for convenience, or something that really stands out- (those first few years really are the only ones we truly get to have a say in the costume department, right?) transforming your Little Tikes® Cozy Coupe® wagon is simple, fun, and a genius idea for Halloween festivities. At the very least, you can haul the dog and the candy around while the littles run up and ring doorbells. And, if your kids prefer self propelled transportation, the classic Little Tikes® Cozy Coupe® makes a wonderful costume accessory as well. Of course, it'll be pretty hard to bet Nathan the Lion and his traveling circus! Have you ever dressed up a wagon or stroller for Halloween?

What Daughter Says: A wagon can be a chariot, and so much more with a little imagination!
  

 Don't Forget To Pin It!

How To Restore Your Headlights (In About An Hour)

How to restore your headlights for about $20 in about an hour!
Momma Told Me: Sometimes you have to take ownership and invest to feel pride in something.

Many of you know now that I was rear ended, at a complete stop, on the freeway this past St. Patrick's Day and was forced to say goodbye to my purple PT Cruise (aka my 'rolling sanctuary'.) After over a month of searching for a replacement car I came across a cream colored PT Cruiser convertible with an exceptionally low odometer reading for it's age. Those who know me well know I dislike white/off white cars, and convertibles- I was simply feeling beat down and decided I needed a familiar car with reliability more than 'the car of my dreams.' Besides, the car was in mint condition, except the headlights which looked as though they had been transplanted from a vehicle 10 years older.
How to restore your headlights for about $20 in about an hour!How to restore your headlights for about $20 in about an hour!
Life being as it is, things don't always turn out as expected, so, upon purchasing this vehicle, I decided I would make it my own so that I could one day take as much pride in it as I did my precious purple PT. The first step was to give it a little extra TLC- to invest a bit of myself into it.

The headlights had to go. Well, they had to at least look like new, as the rest of the car so brilliantly did.

I wasn't the only one who thought so either, both Jay and my father took one look at the car and pointed out the glaring (erm, dull) elephant in the room- the headlights were UV damaged and covered in layers of grime and stains. Weren't there commercials for some miracle product to fix this? Hadn't I seen, on TV, somewhere a woman wiping off her crusty old headlight to reveal a sparkling new one?  Well, for about $20 you can own one of these magical products- but it's a kit- not some miracle single shot treatment.
My headlights most likely weren't near as bad as those belonging to the average person considering this project. I don't live on the East Coast, where my car would be subjected to extreme humidity, salty air, and harsh Winters (though we do live near the beach)- and the car was primarily garaged for the second half of it's life before I purchased it. But the passenger's side headlight was covered in strange splotchy patches of buildup and the driver's side was considerably fogged over. It was clear at one point in it's life the car had received primarily direct sun to the driver's side.
Well, remember that kit I said we invested in? Well it's a bit more involved than just wiping away the years from your headlights- But it does include everything you need (no extra tools required) and will take the average DIYer about an hour to complete both headlights. Keep in mind that, while anyone can do this project, your results will vary depending on how strictly you follow the instructions and if you have an previous experience with restoration or wet sanding. Yes, I said sanding.

Begin by taping off the liner and paint immediately surrounding your headlight with a durable painter's tape. The kit claims that the materials used will not harm paint- but the instructions suggest taping- and I certainly would for 2 reasons: 1.) We noticed the first solution we used took the color off our shop rags, so it seemed to have some sort of acid or bleach in it, 2.) You will eventually be sanding right up against your car's paint- not point in risking anything there. You will also want to start with a clean car.
Next, treat the headlight surface with the Step 1 Activator, generously spraying, and allow it to sit about 30 seconds before washing away. Here's what we noticed about this process- 1.) The spray is very aromatic in a chemical sense- you will need to step back for air, and you should always be working in an open, well aerated, shady area. I highly suggest wearing a simple paper face mask to help diffuse fumes, and that you keep your face as far back from the solution/mist as possible. 2.) You will be using this bottle a total of 4 times, 2 treatments each headlight, so you should expect to use about 1/4 of the bottle each time. 3.) Given the nature of the product and spray we suggest you wear gloves and wipe the solution off with a wet rag to clean the lens before continuing- rather than use a hose which may send the solution flying onto your car and other surfaces.

Once the Activator solution has been cleaned off the lens, and the lens has been dried, it will quickly begin to cloud. This is normal and you will see this after every step from here until the final UV coat.
Now you're ready to begin sanding- the kit includes 3 sheets, 1 each of 2000, 1000, and 400 grit wet sanding paper. You should tear them in half and make note of which is which with a written indicator on the back since you will be using half a sheet for each lens.

My father and I had some disagreement as to whether a mask should be worn through the sanding process- since this is a wet sanding procedure. I am going to suggest you do since we did see quite a bit of kickback debris on clothing and even in his ear after the sanding process.

To wet sand you will want a small bowl of clean water nearby, and a clean cloth (to wipe up any drips that may make their way onto your car's paint. Wet the lens with the wet cloth, and submerge the sanding paper into the water. Begin sanding (you'll start with the 400 grit for the first step) in circular motions from the top corner of the headlight inward. You should expect to continue sanding for approximately 5 minutes- though cars with less build up may require less time. You will be able to tell you are done when the headlight has reached a uniform, smooth, texture, and there are no clear sections visible.
Rinse your headlight and continue with the repeating the above process of sanding, using the 1000 grit sandpaper. Sand in circular motions with a wet lens and sandpaper for approximately 5 minutes, clean, then repeat with the 2000 grit. When you are done sanding you should have a clean, dry, foggy lens.
Next you will apply the Clarifying Compound, which we closely attribute to a sort of buffing wax. Wet your lens with a clean wet rag and apply half of the compound to the provided white towel. Starting at the lower corner of the headlight, in sweeping circular motions, buff the clarifying compound into the lens for approximately 5 minutes.

We were worried this compound would dry out during a 5 minute buff, but it actually seemed to break down and glide even more the longer we worked it into the lens. Once you are done clean and dry the lens. You will begin to notice the lens will maintain a glossy 'wet' look as though it is holding water along the surface.

Harnessing A 'Pop Of Color' With My D.I.Y Floppy Disk Curtain Wall Art


D.I.Y Floppy Disk Curtain Installation inspired by Change Your Home, Change Your Life™ with Color. #LiveLoveColor #AD
Momma Told Me: How does it make you feel?

 Moving into a house has been a transforming experience. In the condo I always felt I had a defined sense of style and direction, yet I frequently found the small spaces easily felt more cluttered than designed. Now that I have more space then I know what to do with it's been hard to really harness my many visions and determine where to start with such a vast, white, canvas. Thankfully Moll Anderson's latest book, Change Your Home, Change Your Life™ with Color  by Moll Anderson has really helped me identify and pursue my unique color story. As someone who tends to rely on a riot of color to express themselves I've been fascinated to take a journey through my own personal color connections and truly identify how to put pops of color to work in my home.
#LiveLoveColor #AD
My biggest fear, when moving into a partially furnished house with rambling white walls was that I would struggle to make my own vision of color style cohesive. It's one thing to dress up for a night with my girlfriends looking like I'm barfing rainbows but my home is an entirely different expression of myself. Color, at it's root, is transforming- and you may be surprised which colors you identify with most, and the power in harnessing them. For example, I always considered yellow one of the boldest statements in the Crayola box, a color I was drawn too, but never really understood how to execute. Change Your Home, Change Your Life™ with Color by Moll Anderson has taught me that there are not only many shades of every color, but many ways to bring color into one's life through playing with textures, light, and more.You may recall, earlier this month, I re-introduced you to Moll Anderson, noted author, dedicated philanthropist and inspiring entrepreneur. Well, her new book Change Your Home, Change Your Life™ with Color by Moll Anderson arrived in stores this week and you can currently find it with the non-fiction best sellers at your local Target. Don't be deceived by the colorful cover, this is more than just another coffee table book. The contents between these pages are life-altering in the sense that they will force you to reconsider the palette around you and how you embrace color as a means of communication and definition. Your color story is something you can change with just a few brush strokes, or an entire renovation. Utilize the book's journal like pages to reflect on your own history with color and unlock the color which identifies you most!
Explore color and it's meaning within your life with Change Your Home, Change Your Life™ with Color, the new book by Moll Anderson. #LiveLoveColor #AD
I always considered 'my color' pink. When asked what my favorite color is, I will always say pink. However, through the pages of Change Your Home, Change Your Life™ with Color by Moll Anderson I discovered some of my first happy memories were deeply rooted in the color yellow. I also realized that I, unintentionally, incorporated the color into many routine aspects of my life without ever noticing. In fact, for me, yellow is a grounding color that reminds me of fresh starts and sunny outlooks. It's hard not to look at yellow and feel instant warmth.
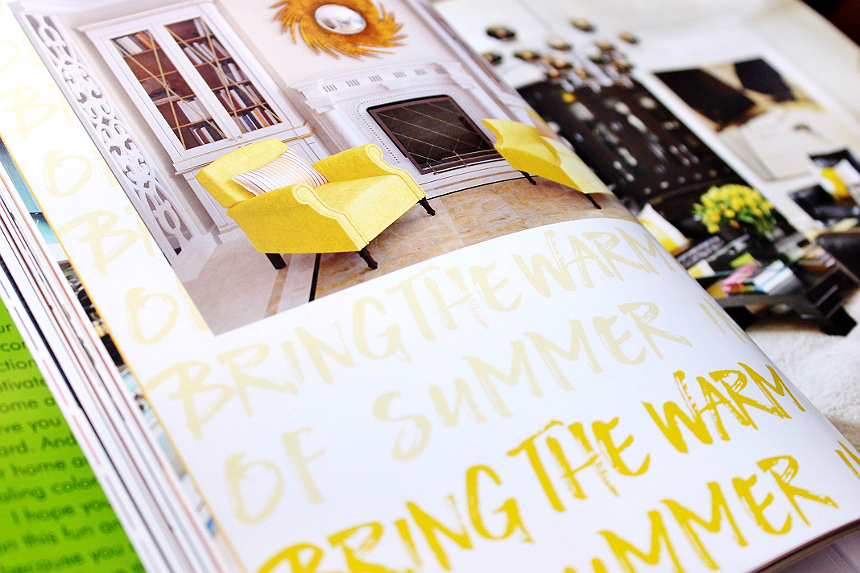
It's for that reason, inspired by Moll Anderson's challenge to explore and embrace color, that I chose to add a dramatic, large, pop of yellow to my main living room. As it stands now the living room you first see upon walking into our home is a muted palette of seafoam green, white walls, and oak wood. It's 'safe' and very bare, so I knew I wanted to go BIG with my project, a millennial tribute, a floppy disk wall art installation. Ironically enough I'd spotted over 100 old floppy disks sitting in my father's office when we moved him last year and, at the time, had felt a calling to hoard them for a special project. Some other supplies I gathered included a lightweight curtain rod, wide key-rings, fishing wire, a drop cloth, particle safe face mask, spray paint, and duck tape that matched my paint color as close as possible.
When I began this project I truly was making the entire thing up from some vision I'd had in my mind. I had no way to know if I'd actually be able to pull it off, or the complications that may or may not arise, but I fell in love with the shade of yellow I'd chosen and was determined to see it through. The first step was to remove the metallic clips from all of my floppy disks. With minimal force they will pop off, along with the spring that holds them in place. I had no idea how many I would ultimately end up using (I used 41 in the end) so I prepared well over 60 expecting there would be some hiccups and less than perfect floppies as I proceeded.
Because I couldn't find a curtain rod in the length I needed, with squared ends to match my square theme, I spray painted my rod to match the metallic floppy clips. The process of spray painting the floppy disks themselves took several days- Though I did my best to avoid sticking or peeling, I lost a handful to quality control. The entire process took 3 and a half cans of spray paint for roughly 50 perfect yellow floppies.
D.I.Y Floppy Disk Curtain Installation inspired by Change Your Home, Change Your Life™ with Color, by Moll Anderson. #LiveLoveColor #AD
Once my disks had dried I reassembled them with fabric gloves to avoid oil smudges and smears on the paint and metal finishes. The clips pop back into place with minimal effort, though some were loose due to the way I'd initially removed them, and those were also set aside.
D.I.Y Floppy Disk Curtain Installation inspired by Change Your Home, Change Your Life™ with Color, by Moll Anderson. #LiveLoveColor #AD
Next I meticulously measured out the spacing of my floppies, laying the final composition on the floor. I began by duck taping the top of my fishing line to the back of my first floppy, then measuring the correct spacing between the next, and repeating the process. 5 in the first row, 4 in the next, and so on, so forth. I found it was essential to make sure the line was taped as close to center as possible, and left plenty of excess line on either end of each strip.
D.I.Y Floppy Disk Curtain Installation inspired by Change Your Home, Change Your Life™ with Color, by Moll Anderson. #LiveLoveColor #AD
Before completing my wall installation I mounted the curtain rod brackets and carefully strung my floppies up to inspect their alignment on the wall. With the key-rings I was able to run the fishing line through without actually tying it off- this enabled me to make adjustments in length and get my 'grid' pattern just right. As expected the floppies wanted to 'spin' and turn freely, exposing the taped backs. I wasn't thrilled about this, but, it turns out almost all of the visible backs can be controlled by twisting the wires and manipulating their position. It just takes a little extra time and patience.
While there are a few tweaks I'd like to make, and I may notice a disk has spun towards the back every now and then, my general reaction to seeing this fun pop of yellow every morning is to smile. As it stands, our mantle is entirely empty at this time, but we've left some extra height between the 'floppy curtain' (as we call it) for some extra special finds. I can't say what will end up there, but I know we will recognize whatever the items are when we see them. Thanks to my keen understanding of color, and the power behind it, from Change Your Home, Change Your Life™ with Color by Moll Anderson I'm certain to style bolder than ever before!
D.I.Y Floppy Disk Curtain Installation inspired by Change Your Home, Change Your Life™ with Color, by Moll Anderson. #LiveLoveColor #AD
We're a long way from being 'done' designing our home. I don't suppose we will ever really be done designing our home, after all, it's a never-ending story that transforms with the seasons of our lives. Wherever my color story takes me I'll surely be more attentive to the impact it has on my life, and more aware of how to harness it for self expression and empowerment. If stringing a curtain of floppy disks feels a bit out of your comfort zone, then maybe you'll want to start with picking up a copy of Moll Anderson's Change Your Home, Change Your Life™ with Color by Moll Anderson book from Target. You never know where your color story will take you....

What Daughter Says: Color can instantly change the mood and direction of any setting- explore how color impacts you and learn how to better harness it within your life.

Affordable Ways To Celebrate Easter With Pets: $5 D.I.Y Teepee, $3 Dog Toys, + More!

This shop has been compensated by Collective Bias, Inc. and its advertiser. All opinions are mine alone. #99YourEaster #DoingThe99 #CollectiveBias
Celebrate Easter with your pets with you shop at 99 Cents Only Stores. Shop adorable Easter baskets and decor, and grab supplies for affordable D.I.Y pet toys! #99YourEaster #DoThe99 #DoingThe99 #AD
Momma Told Me: Why spend more when you can spend less?

If you've been reading Momma Told Me for a while then you know all about Momma's frugal side. How all of my clothing growing up was from the second hand store, every Summer I'd practice mathematics calculating coupon and sale prices, and that the large majority of our gifts were often handmade. The older I grew, the more I'd contemplate this need to save when our family had no seeming need to be quite so frugal. After all we lived in a nice home with new electronics, and our kitchen had the fanciest gadgets and gizmos. That's not to say my father didn't work hard, and very long hours, to support our family- but we surely were not living meal to meal.

The holidays were where I always seemed to feel this frugality the most. If I wanted to have a My Little Pony birthday party it would instead have to be a 'My Friend Pony' party because Momma wasn't about to pay triple the price for the same cartoon horses, just with different names. One holiday season, as I clung to one of the hottest toys of the season, full on melt-down mid-store, I at last let out a scream of frustration, "Why can't we buy the 'good stuff'? It's not like we're poor!" Naturally, being the sort of parent she was, Momma shut the tantrum down promptly, pulling the item from my hand and slapping my wrist as she answered rather calmly, "Because, daughter, you can buy the same exact thing, with a different name, for half the price. Why spend more, when you can spend less?"
Celebrate Easter with your pets with you shop at 99 Cents Only Stores. Shop adorable Easter baskets and decor, and grab supplies for affordable D.I.Y pet toys! #99YourEaster #DoThe99 #DoingThe99 #AD
Naturally that was the beginning of my own monetary awakening. I remember suddenly becoming fascinated by the concept of 'after market,' 'off brand' and even 'overstock' merchandise. Instead of gift cards for major retailers I'd ask instead for cash whenever my birthday came around so I could buy exactly what I wanted, at the best price.

Of course, today, being money smart doesn't mean you have to make compromises. In fact, smart shoppers can save plenty over retail pricing on name brands and products they use every day when they make smart retailer choices. That's exactly why I'm a 99er. Not only are there several 99 Cents Only Stores in my hometown, but their wide range of inventory covers everything from fresh produce to bedding and pet supplies. Even better, their stock is always changing as new items hit the shelves, so I know I'm in for some amazingly fun shopping whenever I visit!
Celebrate Easter with your pets with you shop at 99 Cents Only Stores. Shop adorable Easter baskets and decor, and grab supplies for affordable D.I.Y pet toys! #99YourEaster #DoThe99 #DoingThe99 #AD
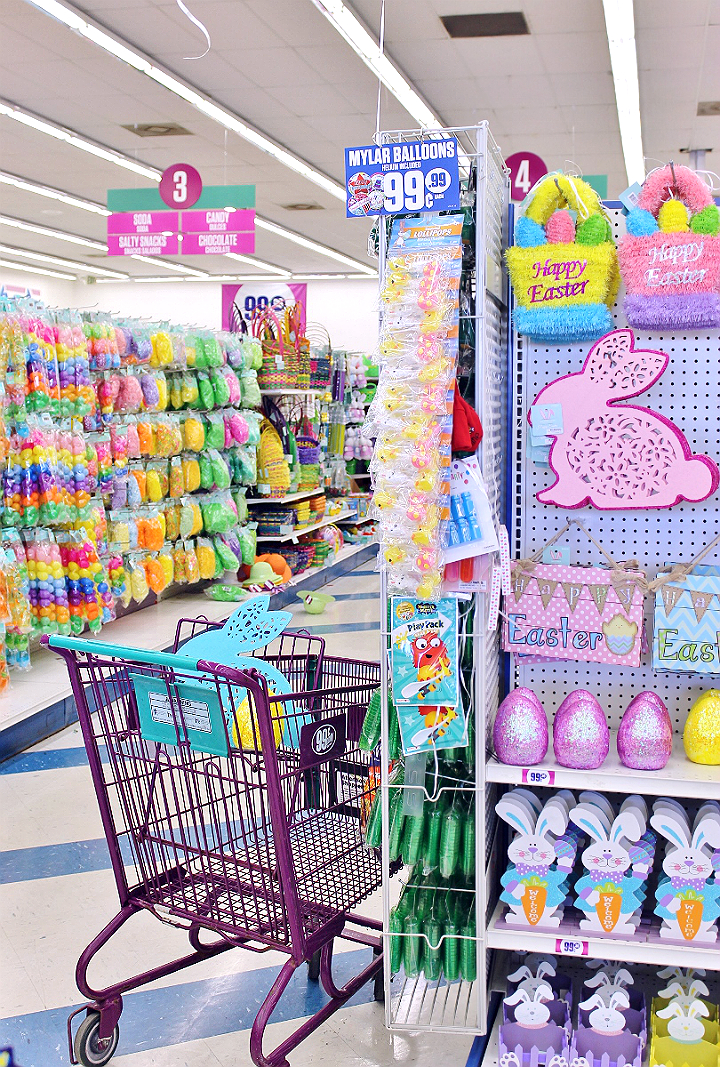
With this being our first year in our house (rather than a condo), I'm extremely excited about the prospect of decorating for, and celebrating, each of the year's holidays. Easter is no exception, and I know I can stretch my budget on everything from delicious treats to adorable decor, and even gifts when I shop my local 99 Cents Only Store. With an entire aisle dedicated to Easter, I practically feel like a kid in a candy store loading up my cart! While I won't be planning any parties for the Spring holiday this year, I've decided to celebrate everything rainbow egg and bunnies with my furry family- the pets. As always, the holidays also bring plenty of yummy treats for the humans, many of which you'll also find at the 99. Be sure to check out The Goody Pet's article "Top 27 Foods That Are Dangerous To Dogs" before planning your next big holiday event!

Celebrate Easter with your pets with you shop at 99 Cents Only Stores. Shop adorable Easter baskets and decor, and grab supplies for affordable D.I.Y pet toys! #99YourEaster #DoThe99 #DoingThe99 #AD
I remember when I first brought Truffles, our cat, home as a kitten it was just over a week before Easter. At the time I was renting a room out to a woman with a young child and there were little plastic eggs strewn all over the house from the little one's play time. Truffles, being the kitten she was, instantly took to swatting them here and there- and even hiding them under pretty much everything in the house. Ever since I've made a point to go shopping for 'the cat's' Easter eggs each year during this holiday. To say that I was overwhelmed by the selection at my local 99 would be an understatement. There were well over 30 styles of Easter eggs to shop from; emoji faces, sheep, carrot shaped, and even jumbo eggs!
Celebrate Easter with your pets with you shop at 99 Cents Only Stores. Shop adorable Easter baskets and decor, and grab supplies for affordable D.I.Y pet toys! #99YourEaster #DoThe99 #DoingThe99 #AD
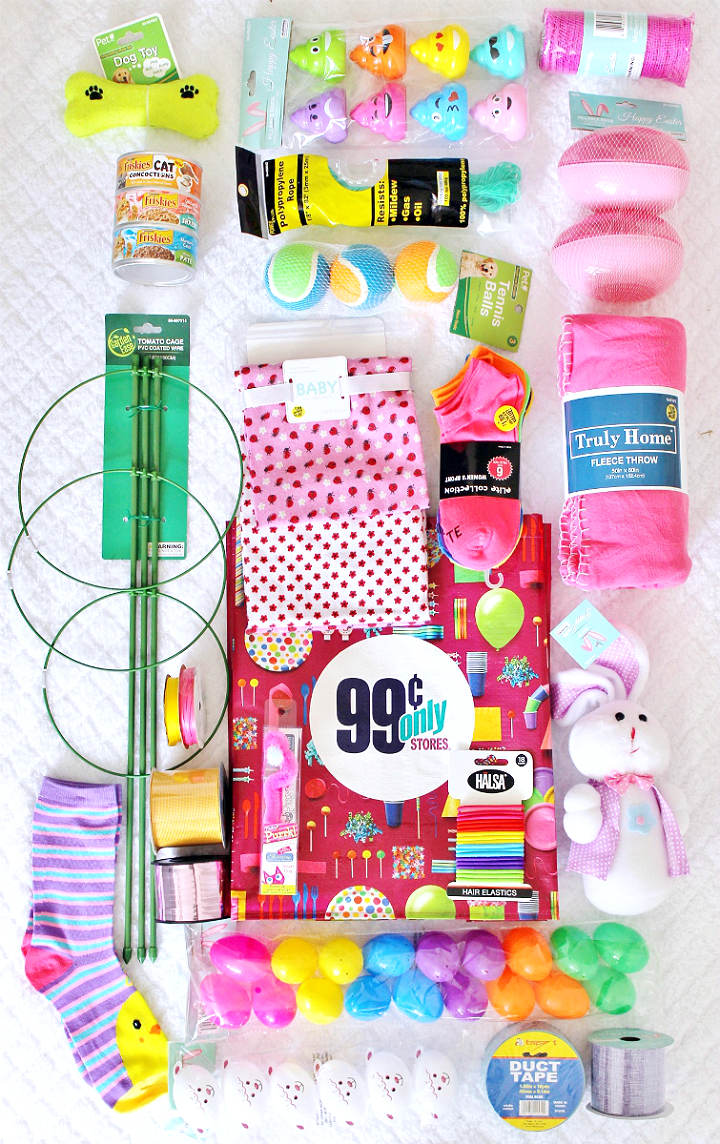
I went way overboard, for someone shopping for their pets, and spent a whopping $30. I'm a bit embarrassed, really, because I bought way more than we needed- but I just had to have a variety of Easter eggs and baskets to choose from when building my Easter baskets for the pets. It's not the end of the world, really, because the leftovers will go into little treats and surprises for the kids at the daycare- 99 Cents Only Stores are a life-saver when it comes to celebrating the holidays with 10 children!
$2 D.I.Y. Tennis Ball Octopus Dog Toy- Celebrate Easter with your pets with you shop at 99 Cents Only Stores. Shop adorable Easter baskets and decor, and grab supplies for affordable D.I.Y pet toys! #99YourEaster #DoThe99 #DoingThe99 #AD
While I love snagging my Cadbury Eggs and Reeses Eggs from the 99, sometimes the real fun in holiday shopping at the 99 is D.I.Y inspiration. I found plenty of Spring prints and themed items on my shopping trip I found I could easily transform into special handmade pet toys to help fill my unique Easter baskets.

In the pet aisle I found a 3 pack of tennis balls for $.99, and in the baby supply department I found a 2-pack of swaddle cloths for $1.99. With these, and a pair of scissors, I was able to make a Springtime version of one of Nora's favorite handmade toys. We like to call this a 'rope octopus,' but you can call it whatever you want. Assemble it by doing the following:

1. Lay your swaddle cloth out, print side down, and place a tennis ball in the middle.

2. Cut diagonally from each corner into the center (towards the ball), leaving about 1" uncut fabric to the tennis ball.

3. Take 2 diagonal corners and tie them across the top of the tennis ball. Repeat with the remaining corners.

4. You should have 4 sectioned corners of fabric. Starting with 1 corner cut the fabric into 6 even width strips. Your lengths will not be the same, this is fine, you can trim when you are done braiding. Be careful with your cuts not to overlap and cut any fabric off.

5. Take 3 of the fabric strips and braid until you've reached the end of the shortest strip, tie a knot and trim any excess, leaving at least 1" of fabric from your securing knot.

6. Repeat with the remaining 3 strips.

Repeat steps 4-6 until all corners are braided with 2 braids each for a total of 8 braids. Don't worry if your braids are different thicknesses or lengths- your dog will enjoy playing with each end uniquely!
$2 D.I.Y. Tennis Ball Octopus Dog Toy- Celebrate Easter with your pets with you shop at 99 Cents Only Stores. Shop adorable Easter baskets and decor, and grab supplies for affordable D.I.Y pet toys! #99YourEaster #DoThe99 #DoingThe99 #AD
If you have a larger breed dog then you may wish to make thicker braids by doubling up each length of fabric, or by using a fleece fabric braid to add thickness. Nora is a small breed dog, but she absolutely loves 'tearing' into these 'octopus' style braided toys and plays for hours with them on their own. Best of all, you can recycle the tennis ball inside if the fabric ever becomes torn or too dirty!
For those looking for an even simpler DIY dog toy- look no further than the classic 'Tennis Ball Sock.' We found some adorable pairs of Easter socks perfect for our Easter basket. Because socks come in pairs of 2, and the tennis balls came in packs of 3, we made 2 toys for just $2, with a tennis ball to spare! It's as easy as placing a tennis ball in your favorite festive sock and tying it off with a knot. Viola! You'll find similar Easter toys at the local pet store for up to 5X as much!
$2 D.I.Y. Tennis Ball Sock Dog Toy- Celebrate Easter with your pets with you shop at 99 Cents Only Stores. Shop adorable Easter baskets and decor, and grab supplies for affordable D.I.Y pet toys! #99YourEaster #DoThe99 #DoingThe99 #AD
I cannot get over how adorable my 1 minute tennis ball sock toy chickadee looks next to Nora's Easter basket. And how about those 'poo emoji' themed Easter eggs? Aren't those perfect for any posh pup? In addition to her handmade toys we also added some dog toys we found in the 99's pet aisle, a few rawhide style treats, and a new blanket (just $2 hanging on the wall with the baby gear).
Make 3 of these Cat Wands for $3! $2 D.I.Y. Tennis Ball Octopus Dog Toy- Celebrate Easter with your pets with you shop at 99 Cents Only Stores. Shop adorable Easter baskets and decor, and grab supplies for affordable D.I.Y pet toys! #99YourEaster #DoThe99 #DoingThe99 #AD
Naturally we didn't forget about Truffles, the cat- it just so happens my local 99 had their spring gardening supplies set up on the other half of the Easter aisle. In a stroke of genius I spotted some tomato plant cages for $.99 I could easily transform into some amazing cat DIY staples! In fact, there happened to be multiple sizes of tomato plant cages and the small size prided 3 poles that were the perfect length for a cat wand! After cutting (regular scissors work fine) off the lightweight plastic clips holding the round cage guides in place I discovered that the plastic caps on either end of the support poles actually popped on and off with a little effort.

Using some ribbon I'd found in the Easter aisle and a cat toy from the pet aisle I actually tied the ribbon to the toy and fed 2" of the opposite end of the ribbon into the hollow pole. With a quick 'pop' I snapped the cap back in place and had an instant cat wand! Naturally one could duct tape or glue the cap on if they were concerned about cat's chewing or playing rough, and handmade 'lure' toys could be made out of multiple ribbons, pom poms, or more!
D.I.Y Cat Wand
I won't lie- Since each tomato cage makes 3 cat wands I plan on playing with a bunch of different 'lures'. We'll have a whole umbrella stand full of handmade cat wands soon enough. Truffles might be a 'senior' cat at 7, but she's still just as fascinated with ribbons and wands as ever! I originally put my completed wand in her Easter basket and had to hide it in the broom closet after finding it in the middle of the living room floor for the 3rd time. Some kids just can't wait for the holiday to unpack their goodies!
$5 No Skill Needed Kitty Teepee- Celebrate Easter with your pets with you shop at 99 Cents Only Stores. Shop adorable Easter baskets and decor, and grab supplies for affordable D.I.Y pet toys! #99YourEaster #DoThe99 #DoingThe99 #AD$5 No Skill Needed Kitty Teepee- Great for small dogs or kids' dolls! Celebrate Easter with your pets with you shop at 99 Cents Only Stores. Shop adorable Easter baskets and decor, and grab supplies for affordable D.I.Y pet toys! #99YourEaster #DoThe99 #DoingThe99 #AD
To complete my Easter display I knew I wanted to make a kitty teepee at long last. I'd seen hundreds on Pinterest and, for a while, before finding the tomato cages I'd pondered using the poles from some yard rakes to accomplish this. At 3 rakes for $.1.99 a piece I'd be hard pressed to find my materials much cheaper elsewhere, but the large tomato cage was just $.99. Even better the tomato cage naturally formed a teepee like structure when I manipulated it's posts- perfect for someone structurally challenged, like me.
$5 No Skill Needed Kitty Teepee- Great for small dogs or kids' dolls! Celebrate Easter with your pets with you shop at 99 Cents Only Stores. Shop adorable Easter baskets and decor, and grab supplies for affordable D.I.Y pet toys! #99YourEaster #DoThe99 #DoingThe99 #AD
If you've ever wanted to make your pet a teepee but found the concept of a free standing structure intimidating, this is your teepee. Head to your local 99 Cents Only Store and purchase a large tomato plant cage, fleece blanket, polypropylene rope (or any type of heavy duty string/rope), and some ribbon and make this teepee for just $5 in 5 minutes.

It's as easy as cutting the lowest supporting rung off (the plastic clips will snip easily with basic scissors), manipulating the top ring at an angle into the middle ring, and evening your posts to the same height at the top. Once you've got your tomato cage in a general shape go ahead and take your rope/cord/string and tie it around the 3 posts at the top. Use your excess string/rope/cord to weave in and out, and around the top posts multiple times until the structure holds on it's own. You should be able to adjust the length of the posts with a little force as needed.

Next drape your blanket over the structure and cut 2 horizontal slits approximately 1" from the edge, and 6" down from the top of your teepee. Run your ribbon of choice through it and tie in a bow to secure the teepee's fabric. Repeat about 6" down from the first bow. Place a pet bed inside, or leave as is for young children to use with dolls and such.

Scroll to the bottom of this post to grab the PINterest strip!
While any of these D.I.Y ideas can be used to make special gifts for your pets during any time of the year I especially love that I can afford holiday themed toys without the prices of seasonal merchandise. I made all of these awesome Spring and Easter themed pet toys for the cost of one small sized pink squirrel with an Easter egg squeaker at my local pet store. I've listed all the supplies I used to prepare for a magical Easter with my pets above, and every single thing I used was purchased at my local 99 Cents Only Stores. I even nabbed new bedding for the dog with a $5.99 comforter score!
Celebrate Easter with your pets with you shop at 99 Cents Only Stores. Shop adorable Easter baskets and decor, and grab supplies for affordable D.I.Y pet toys! #99YourEaster #DoThe99 #DoingThe99 #AD
Don't wait to head into your local 99 Cents Only Store to shop for Easter- the seasonal aisle is full now, and be sure to visit again before the holiday as new products are always being added. I know I'll be heading in a few times to keep collecting items for Easter baskets for the daycare kids, and my bowling league. Sure, it may seem a bit over the top to be 'that person' who always has something small to give everyone in celebration of a holiday, but I rather enjoy being able to afford that, thanks to the 99. Don't have any fur children like me? Just think how adorable an Easter basket would be tucked into one of those DIY teepees for a young girl or boy on Easter morning! Still need more inspiration to 99? Check out this fun video and follow the brand on Instagram!

What Daughter Says: Why spend more when you can spend less, indeed! My local 99 Cents Only Stores have my favorite brands, and new discoveries, at prices that make it fun to shop again!

$5 No Skill Needed Kitty Teepee- Great for small dogs or kids' dolls! Celebrate Easter with your pets with you shop at 99 Cents Only Stores. Shop adorable Easter baskets and decor, and grab supplies for affordable D.I.Y pet toys! #99YourEaster #DoThe99 #DoingThe99 #AD