Momma Told Me: November 2016

Blog Archive

Deck The Cat Tree Tutorial, D.I.Y Yarn Pom-Poms + How To Rock The Holidays With Pets!

This shop has been compensated by Collective Bias, Inc. and its advertiser. All opinions are mine alone. #RollAwayLint #CollectiveBias
#RollAwayLint, Glitter, Catnip, Yarn, Tree Bristles and more this season with these tips to Rock Your Holidays With Pets! AD
Momma Told Me: Sometimes things just get a little...hairy.

If there's one thing every pet parent can relate to, it's the constant juggle to balance your pet's presence in your home with your unique style and flair.

At the risk of sounding like a crazy cat lady, there was a time in my life I considered cat hair more of a statement decoration, than a nuisance such as dust or stains. I simply learned to live with and accept certain things to be true; I would never wear another article of truly white clothing, any electronic I needed to use imminently was the best seat in the house, and stepping on a squeaky toy in the middle of the night beat stepping on a Leggo. Of course, having Jay around, an outsider in my home, made me see there just might be a need to fight the madness. Having pets didn't mean I had to give up fashion, design, or comfort. We could actually co-exist together.
And, while we seem to have found a balance of style and convenience that meets the cat's approval (because, let's face it, the cat's far more picky than the dog ever will be,) the holidays always pose their own unique struggles. This year, on top of them, we're actually moving into our new home smack in the middle of the holiday season. In an effort to dissuade the cat from her usual tree- shenanigans I invested a new, thin, tree which would prove impossible to scale (at least we like to think) and less delicious to the cat. This dream lasted about 2 days, at which time I immediately proceeded to my local Target for some inspiration.
Nothing's ever going to be quite as exciting as a giant cat brush tree, but I knew I could lure the cat back to her intended hangout- the literal cat tree, with a few simple improvisations and pet safe decorations. I also knew there was no way I was inviting my family into my new home for the holidays with a cream color cat tree that actually looked grey. So I made a beeline for the household cleaning supply aisle in hunt of a solid lint roller that could de-fur my household in time for holiday visitors.
We're not talking some ordinary junk drawer emergency lint roller either, we're talking a heavy-duty, multi-purpose utility tool with the power to remove layers of cat hair, dust, fibers, and foreign objects from nearly any soft surface. Available in multiple sizes, the Scotch-Brite™ 50% Stickier Lint Roller is not only stickier than ever (yeah, duh, it's in the name!) it's an easy to grip magical eraser of all your holiday pet shame. Okay, it's a roll of super duper sticker, easy to tear, sheets that conveniently stick to and roll on a variety of surfaces so you can roll and move on with your life- without pulling out the vacuum cleaner. And, as a crafter and Pinterest addict, I use Scotch-Brite™ 50% Stickier 4.8" Lint Rollers to pick up pretty much every wayward material, from glitter and sand to ribbon and yarn.

Pssst! Take advantage of a great Target Cartwheel offer for 15% Off A Scotch-Brite 50% Stickier Lint Roller (11/27-12/3)!
Now for a brief admittance of my failure as a pet mom- Our maltese-yorkie, Nora, loves to dress up- but the cat insists on hunting out her wardrobe and rolling in it like a fresh pile of laundry. Nora never knows the difference, but I feel a twinge of guilt that I let such sibling rivalry go on under my roof. It's embarrassing for me to walk out of the house coated in cat hair, so it doesn't seem right the dog should have to prance around in it. Thankfully my Scotch-Brite™ 50% Stickier Lint Roller 80 sheet 4.8" rollers from Target pull dryer lint, holiday glitter, and cat fur right off Nora's most festive clothes, so she can get back to looking dapper.
And who doesn't think tiny dogs belong in tiny sweaters during the holidays? I like to think Nora was one the best dressed at our family's Thanksgiving meal! She might be getting a little shaggy with her Winter coat, but her holiday style is on fleek ya'll!
Meanwhile, the cat continued her calculated assault on our new Christmas tree. Quickly she decided, just because the branches would not support her weight to lounge and climb didn't mean she wouldn't meticulously pull and bend as many of them downward as possible. I can only turn the flattened side of the tree to the wall twice before I have to 'build' the entire tree again!
So part 2 of my master plan was set into motion- With an old pot, water, red food dye, gloves, and 10' of sisal rope, I began preparations for operation 'Christmas Cat Tree.' Of course, what I wasn't counting on was for Southern California to have 1 of it's 5 days of annual rain on the day I'd intended to dry my stained rope- so the rope I'd placed out on the grass to dry in the sun quickly became drenched, and faded. While my rope underwent Take 2, I proceeded to make some yarn cat pom-poms to adorn my completed cat tree.
Making large, cat safe, yarn pom-poms is relatively easy and can be done by anyone with a hand, scissors, and yarn.

1. Begin by wrapping the yarn of your choice around your 4 out-stretched fingers 100-120 times.
2. Carefully remove the roll of yarn and place it on a flat surface.
3. Cut a strip of yarn approximately 9" long and feed it through the center of your yarn roll.
4. Bring both ends of the cut yarn up towards you and tie in a tight double knot.
5. Turn the roll of yarn over and tie the yarn, once again, in the same direction across the middle. Double knot the yarn, ensuring the bundle is tied tight.
6. Your yarn should resemble a bun. Feed your scissors in to the many loops, cutting down the middle all the way around to create a messy pom-pom.
7. Trim the edges of your pom-pom to shape as you desire.
Keep your cats busy, all year round with these D.I.Y cat yarn pom-poms. #RollAwayLint AD
Yarn pom poms can be made in a variety of sizes and, when made tight, can be played with by event he most enthusiastic of 'prey' hunting cats. Consider making them from white yarn to resemble snowballs for the Winter season. Treat them as unwanted scraps, discarding them on the floor casually, or leaving them on the edge of ledges and tables to help incite excitement from your cat.
I find I can make 10-15 pom-poms in about an hour chilling on the couch watching the Twilight Zone- but all the trimming and shaping of the yarn really makes a mess. Tiny little fibers tend to go everywhere, and soon I look like I'm shedding, myself. A quick swipe with my Scotch-Brite™ 50% Stickier Lint Roller picks up stray threads off any nearby blankets, couch cushions, carpet, or even my sushi leggings.
Would you ever decorate your cat tree for the holiday season? Deck The Cat Tree with this simple and fun tutorial! #RollAwayLint AD
So now that we've had some fun preparing our decorations it's time to truly trim the cat tree. Gather all of your supplies and expect to be interrupted every step of the way. If your home is anything like mine items will continually disappear whenever you turn your back. Here's what you'll need:

1 yard of holiday print fabric/fleece
Cat safe (wire free) ribbon- I prefer burlap
Handmade, or bought, felt holiday light garland
Scotch-Brite™ 50% Stickier Lint Roller 60 Sheet 8" Roller
Candy Cane Red (hand dyed) sisal rope
Damage free decor/photo hanging hooks
Hot glue gun
Cat yarn pom-poms
Miscellaneous seasonal pet toys
First thing's first, take your Scotch-Brite™ 50% Stickier Lint Roller and roll the heck out of your old hairy cat tree. It took me 9 sheets to restore our medium sized cat tree to it's former glory- a good portion of the first swipes collecting larger debris such as sisal rope shreddings and cat nip.
Nest, cover your cat tree's largest cubby/hideout with your chosen fabric. Most cat trees screw together with a hex wrench and can be easily dis-assembled with minimal effort. If you can remove any attachments on top of the hideout temporarily, your handi-work will look a little cleaner.

Drape the fabric over the edges of the hangout/perch/cube and trim it so that it just drapes over the edges by 4-5". Tie a knot in each corner to adjust the length of the cover to match the end of the surface. Cut a pinhole in the center of each corner, and attach them to individual (damage free) photo/decor hooks. Attach the hooks to the bottom of your cat tree. You may need to wipe down this surface prior to application to ensure the best stick.

Cut any needed slits in side panels to ensure your cat can freely enter and leave their favorite hideout.
Deck The Cat Tree with this simple and fun tutorial! #RollAwayLint AD
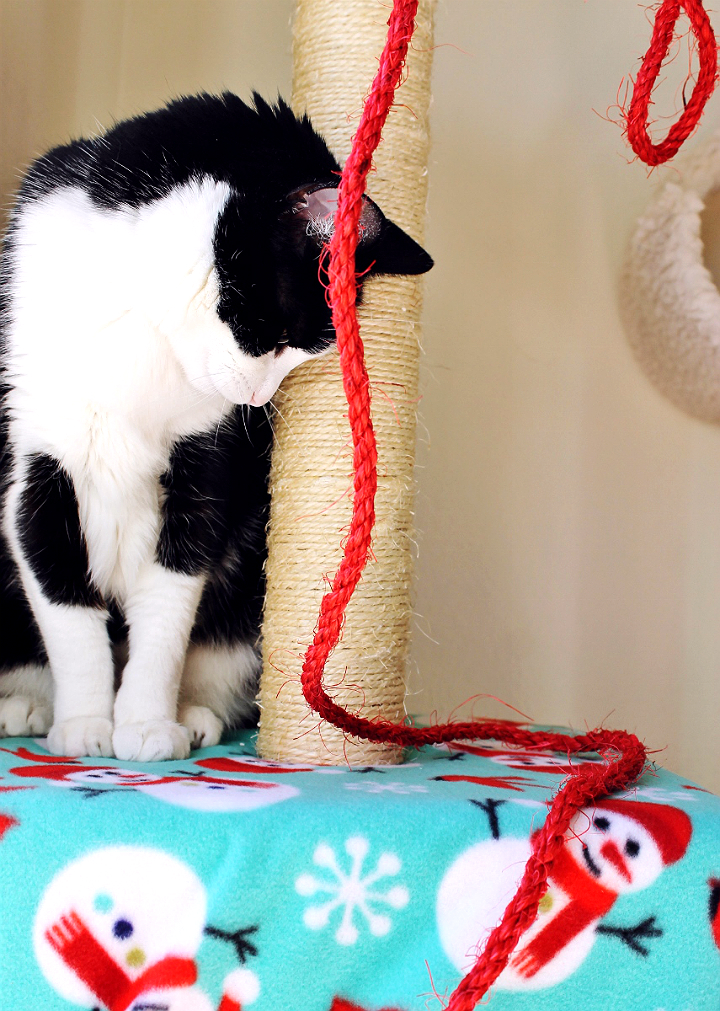
Next you'll grab your beautiful red rope- or, in my case, you're follow the rope through the house until your find the end, attached to the cat. Well, at least the cat had the right idea- Yes, please DO play with this, and NOT the delicious looking gingerbread tree.
Now it's time to plug in your trusty hot glue gun. Note: The dog will not be impressed, more than likely she's wondering how exactly it is that the cat bends you to her every will like this.

Regardless, carry on and begin wrapping the red sisal rope diagonally across your cat tree's main scratching post, as to create a 'candy cane' swirl illusion. Since the rope I'd chosen to use was on the thinner side, I doubled two wraps around for my final effect. Apply anchoring glue to the ends of the rope, and once in the middle- the glued rope will easily remove without leaving marks at the end of the season- or when your cat deems it simply must go.
I'd originally intended to use my burlap (wire free) ribbon to add a 'bow' to my 'wrapped' cat cubicle 'gift,' but instead thought it would make a nice accent to the 'much too tiny for any adult cat' perch. A big, sloppy bow was about as fancy as I got here.
If you really want to hit the decor jackpot invest in, or make, a simple felt holiday light garland to tie around your cat tree's highest point. It just so happened this was the perch atop the pillar I'd wrapped like a candy cane, so it all worked out rather nice. I also placed a reindeer chew toy in the useless tiny cat perch, and tossed several of my handmade cat pom-poms on the tree and nearby.
Deck The Cat Tree with this simple and fun tutorial! #RollAwayLint AD
I have to say, the cat tree is now officially more festive than our actual holiday tree, and I couldn't be happier with how it turned out. Prior to it's seasonal renovations Truffles, the cat, hardly paid notice to the cat tree but to stop and watch a stray bird now and then. Now it's the happening place to watch humans from a snowman cat cave alongside the flickering holiday lights. And it's one tree I don't mind getting destroyed!
Deck The Cat Tree with this simple and fun tutorial! #RollAwayLint AD
So there you have it- my best tips for surviving the holidays as a pet parent, with a little sanity, and style in tact. And, if you're not quite feeling all Martha- Stewart (though dressing up the cat tree took about 30 minutes and no skill what-so-ever) you simply must invest in Scotch-Brite™ 50% Stickier Lint Rollers. They're like an immediate makeover for all of your pet-accessible surfaces! Now, tell me, what sort of things would you refresh with all new Scotch-Brite™ 50% Stickier Lint Rollers from Target this holiday season? Need a little more inspiration? Check out what some other creative bloggers are doing with theirs this holiday season in the Social Hub!

What Daughter Says: Don't let hair, fur, or glitter get in the way of your holiday style, re-imagine the holidays with pets and more!


Make Your Holiday Gatherings #EasyCheesy With Stella®- Baked Pepper Romano Crisps Recipe

Easy 1-Ingredient Black Pepper Romano Baked Cheese Crisps to make any Holiday gathering a success! #EasyCheesy
Momma Told Me: Who has time for that?

Growing up my mother's most popular recipes often involved 4 ingredients or less.

I recall, one holiday season, walking into my classroom's holiday play banquet- card tables lined up with Crock Pots and foiled platters. And, at the end of the line, on the dessert table, there was a beautiful tray of hand iced homemade sugar cookies with each child's name and silhouette on them. They looked as though they'd taken forever to make. Momma, however, was quick to comment under her breath how the mother who'd brought them should have put more time into how they tasted- not how they looked. But, truthfully, great holiday treats can do both- taste and look delicious, and you really only need one key secret ingredient- cheese.
https://ooh.li/237ec6f
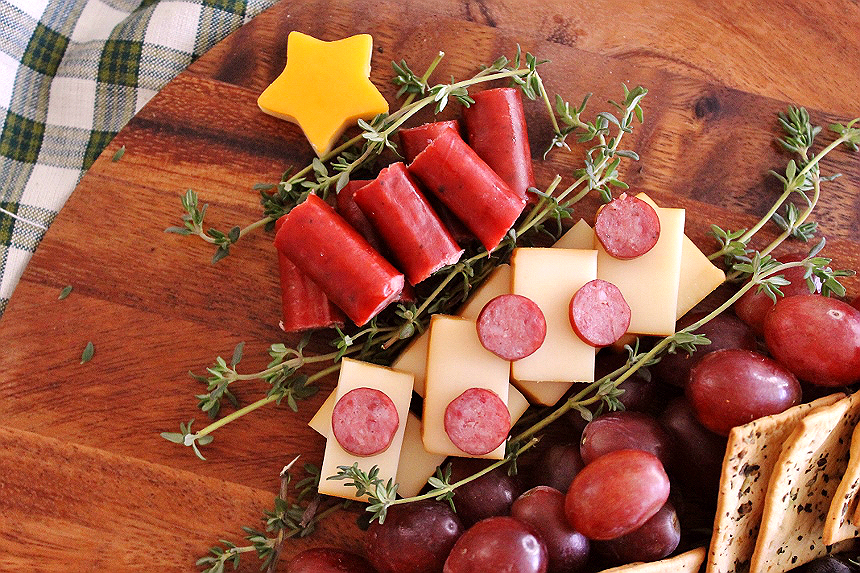
Every year I attend countless holiday pot lucks, house warmings, family affairs, and seasonal affairs where I am expected to bring something tasty. There's always that pretense of  'it's the thought that counts' and bringing something is 'better than nothing' but as Pinterest inspires more than Martha Stewart ever dreamed to reach, expectations are definitely felt. I can't just slap some deli meat and cheese on a platter and call it festive- so I take a few extra minutes to layer my platter to look like a tree- with a few sprigs of fresh thyme in between. It never ceases to WOW everyone who walks by.
https://ooh.li/237ec6f
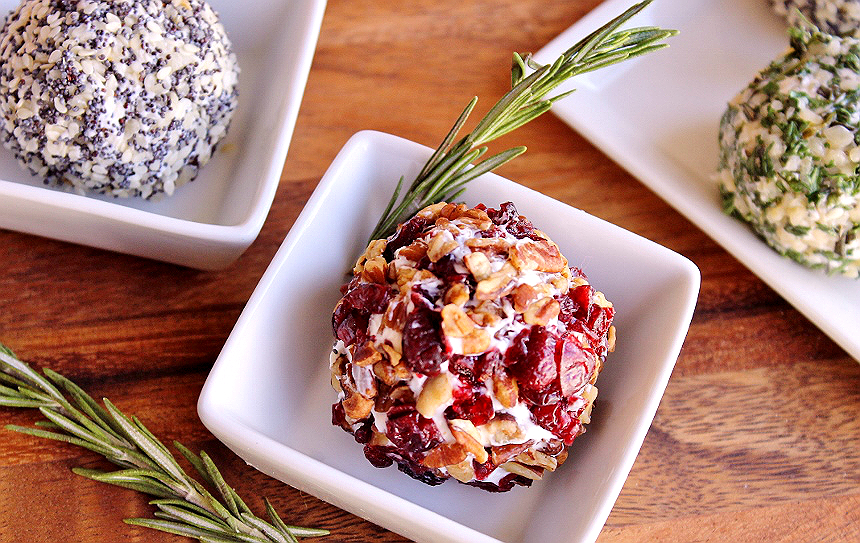
If your crowd isn't quite the finger food, platter type- perhaps you have an affair with some delicious wine involved? Making a delicious cheese ball out of your favorite soft cheese is the perfect way to seem pretentious when all you did was roll balls of cheese in colorful toppings. Cheese balls have been gaining in popularity over the past few years and can really become the centerpiece of a spread whether you go small with variety, or big with decor. In fact, I saw a cheese ball decorated with almonds to look like a pine-cone I intend on trying next Fall.
For those who like to feel like they've done a little more than take something delicious and slap it on a plate with fancy presentation, a delicious fondue-style cheese dip does wonders to elevate your culinary standing. Goat Cheese or Gorgonzola, for example, melts beautifully with fresh blueberries, and browns in the most delicious of bubbly ways. The purple color of the cooked blueberries is almost as delightful as the tart flavors mixed with the slightly sweet pungent cheeses. Serve with some sourdough crisps for a delicious pairing.
Of course my personal favorite way to serve cheese for a holiday gathering requires only one ingredient, and relies on truly delicious cheese, as it is the one and only star. I always keep an eye out for Stella® brand cheese, a brand with rich Italian heritage dating back to 1923. Their portfolio of fine cheeses includes everything from Blue Cheese and Feta or Fontina to Ricotta, Provolone, and Swiss. I find them locally in the deli cheese (that's craft and specialty cheese) cases at my favorite Ralphs or Vons, but you can find your nearest retailer here.
Stella Black Pepper Romano
On my most recent shopping trip I happened across a few specialty varieties of Stella® Romano, including Black Pepper Romano, with the most inviting cracked peppercorn rind. I don't often bring hard cheeses to seasonal events- it's something I'll typically pair with wine, or use to highlight a recipe. However, when I tasted this particular variation I new it would be the perfect excuse to make 1-Ingredient Baked Pepper Romano Cheese Crisps.
https://ooh.li/237ec6f
Are you ready for my top secret recipe?

Grab your Stella® Black Pepper Romano cheese and grate it fine- about half  an 8oz wedge will yield 1 cup of loosely packed fine shredded cheese, and will make about 15 1.5" baked cheese crisps. Preheat your oven to 315F and line a baking sheet with parchment paper (preferred, foil may be used but will cause cheese to continue cooking after removal and could cause issues with sticking.) Sprinkle 1-2 tablespoons of fine shredded Stella® Black Pepper Romano approximately 1" apart on your lined baking sheet. Don't heap your cheese, an even circle will bake most uniform.

Once your cheese begins to flatten and bubble, as to create pockets in the cheese, your crisps are about done. This typically takes about 3-4 minutes, but will vary depending on your cooking surface and style of sprinkling. If the cheese begins to turn 3-4 shades darker then you are ready to take them out and transfer them to cool- do not let your cheese brown or it will become bitter.

These single ingredient Stella® Black Pepper Baked Romano Cheese crisps make a delicious snack at any party, or can be crumbled on a variety of seasonal dishes, or even salads. Unfortunately, they never last very long though- nobody can ever eat just 1 or 2!

If you're as passionate as I am about fine cheese being a champion ingredient then head on over to Stella® Cheeses and enter to win a trip for 2 to Napa Valley, California!

What Daughter Says: Delicious doesn't have to be complicated during the holidays.

D.I.Y. Bubble Wrap Corn Sun Catcher Craft

These DIY bubble wrap sun catchers make great sensory crafts and can be re-used next year thanks to the contact paper they're mounted on!
Momma Told Me: Time to get crafty.


When I was young my favorite thing about any holiday was the craft projects my teachers, or mother, would inevitably come up with. Was there truly anything more epic than macaroni art in kindergarten? I argue, no, there was not. And every November, for 5 years straight we'd make those darn construction paper turkeys from the outline of our hand, and run to the car after school to show them proudly off to our parents, who'd smile with all the enthusiasm of someone who'd never actually seen them before.
They say 'There's nothing new under the sun,' and it's true, just about anything has been done to some variation before. But some things have been done so much they're expected. When Fall finally arrived this year I wanted to do something more than fill a plastic glove with popcorn and draw a face on the fingers. So I set out in search of bubble wrap crafts. And these D.I.Y Corn Sun Catchers combine a little bit of many things that make childhood magical- the fun and mess of painting, the stimulus of sensory bubble wrap, the warmth of sun peeking through the clouds and trees, and a chance to create a character all your own.
Anyone can make these and, with the exception of contact paper, you probably have most of the materials already laying around:

Small Bubble Wrap (Scraps from packing will do, or a roll is about $5 on Amazon)
3-4 Warm Shades of Paint (Keep in mind child-safe paints for younger kids)
Any Form Of Brush/Sponge Brush OR Fingers!
A Marker (Permanent is best)
Green Construction Paper
Scissors
Sheet of Contact Paper (Found in the drafting aisle of the craft store)
Dropcloth + Baby Wipes for Messes

Start by taking a 10" x 10" square of bubble wrap, bubble side up, and layering shades of yellow, orange, and red across it. For younger kids feel free to go with yellow and red to teach a lesson about colors. Encourage kids to paint light, and choose their color mixing with purpose. Provide a clean brush, or even paper towels to wipe away paint in places and layer in others. Finger painting on bubble wrap makes a fabulous sensory project for sensory kids!
Your bubble wrap will need to dry. Depending on the paints used, and how much paint your little applied, drying will take anywhere from 2-12 hours. For multiple kids, keep track of who's bubble wrap belongs to whom by marking initials on the back corners in permanent marker.

Once your bubble wrap is dry cut corn shape ovals out- let your kids experiment with lengths and sizes, then have them choose 1 or 2 'corn' cuts as their favorites. Place the corn cutouts on the green construction paper and trace a husk around the outside, leaving a 1-1.5" border along the edges of the corn. Carefully cut out your husks, making sure to cut a hollow in the middle, but being sure to leave that 1-1.5" husk edge.
Place your husks on top of the contact paper sheet and cut a rough oval around the outside, again leaving a 1-1.5" border of extra contact paper on all sides of your husk.  Carefully peel the sticky contact paper from the backing and arrange the bubble wrap corn in the center (bubbles facing down against the sticky side) then the husk positioned over it. At this point you have a giant corn sticker you can immediately put onto the window, or carefully place back onto the contact paper backing and store to take home, or gift.
But corn isn't quite as magical without a little personality- so we let our kids grab a Sharpie (washable markers are just as fine, but will fade quicker in the direct sun) and draw faces on their corn. In fact, the girls naturally created characters, and even back stories, for their corn creations!
These DIY bubble wrap sun catchers make great sensory crafts and can be re-used next year thanks to the contact paper they're mounted on!
I, personally, decided to make a mini corn family for our window while some found it fun to play with goofy expressions, or to try and draw a face that reminded them of the person they were giving their corn to.
These DIY bubble wrap sun catchers make great sensory crafts and can be re-used next year thanks to the contact paper they're mounted on!
These were a huge it. Each girl made 2-3 and they were begging to make more. The only reason we stopped is because I want this project to seem just as fun and exciting when I re-purpose the concept for snowman next month! And the parents? They loved them just as much- handmade art ready to mount!
These DIY bubble wrap sun catchers make great sensory crafts and can be re-used next year thanks to the contact paper they're mounted on!
Do these really catch the sun? Yes. They almost glow when they're in direct sunlight- but don't expect them to be casting big rays of color like a piece of stained glass. They are also re-useable- Ours have been up for 2 weeks, and I just peeled one down and put it on it's backing with plenty of stick. So these might even be reusable next year! Now, tell me, did you ever craft with bubble wrap as a child? Popping the bubbles next to your mother's ear might have been an experiment, but doesn't count!

What Daughter Says: Create a new tradition with bubble wrap crafts.