Momma Told Me: September 2018

Blog Archive

Unicorn Apple Donuts + 4 Other Quick & Healthy Snack Time Solutions With #RCDairy

This post is sponsored by Real California Milk but the content and opinions expressed here are my own.
I love my dairy. But, in a world of alternatives, and mass selection, so many of my favorite dairy products come in so many options. A cheese loving gal can really feel a bit overwhelmed browsing the cold case at her local grocer!

And, with so many brands, dairy products, flavors, and varieties, it can be tough to know which dairy products should make it in the cart. For me, the answer is simple- I look for the products with the Real California Milk Seal. As someone raised in, and currently a resident of, California I not only look for the seal to ensure my dairy foods are coming from a sustainable and local source, but take pride in knowing that 99% of California dairies are family owned.
You can spot the seal on many of your favorite dairy products from cottage cheese and cream cheese to liquid milk, drinkable yogurt, ice cream, and so much more. Check out the Real California Milk Seal locator here, or visit some of my preferred local retailers such as Sprouts, Smart & Final, or Vons. When you spot the seal on a product you know you can take pride in your selection knowing California dairy is a healthy source of protein, and California milk is a healthy, tasty, way to get essential vitamins and minerals.
https://ooh.li/ee3e1ff
If, like me, you truly love having quality dairy products as a part of your daily diet, but simply don't know what ingredient to start with, or how to find the time to incorporate it into your day- then look no further than this post. I'm about to share with you several delicious, simple, ways to incorporate several types of dairy into your everyday healthy snacking routine. Once you've loaded your cart with some of the very best products featuring the Real California Milk Seal, you truly can't go wrong.
Let's start with a simple 3 ingredient Peanut Butter Apple Dip- You know what they say about an apple a day, so why not pair it with some delicious Greek Yogurt featuring the Real California Milk Seal? This dip is fluffy, creamy, and the perfect balance of tangy and sweet to curb those afternoon hunger pangs. Best of all you can make a single serving, or make an entire jar ahead of time, so snack time is always a breeze. Dip some fresh cut apple slices, or any other fruit your heart desires!

3 Ingredient Peanut Butter Apple Dip
(Single Serving)

Ingredients:

1 TBS Greek (or Lowfat Vanilla) Real California Yogurt
1/2 TBS Honey
1 TBS Peanut Butter

Directions:

Combine all well in a small bowl with a spoon. Recipe may be made in larger quantity and stored in a well sealed container, in the fridge, for up to 1 week.
While you have your yogurt out why not prepare a snack you can enjoy direct from the freezer at any time. Frozen yogurt may be so 2017, but we're shaking things up with an entirely different kind of frozen yogurt- the literal kind. Did you know you can slather your favorite thick yogurt over fresh skewered fruit and with just an hour in the freezer have instant fro-yo berry bliss?
While the East Coast may be busting out the chunky sweaters and PSLs we're still living it up Summer style here in SoCal. In fact, Southern California is known for it's seemingly never-ending Summer season, and that means temperatures are often still in the 90s this time of the year (especially inland.) But we don't let the October heat rain on our parade, we chill out in style with simple snacking solutions just like these Frozen Yogurt Berries. After all, isn't everything better on a stick?
To prepare your very own delicious frozen yogurt berries you simple need to wash and dry a cup of your favorite berries. Locally blackberries, raspberries, and strawberries are still in season at our nearby pick-your-own farm. Deciding on a yogurt could be tough, with all the flavor options out there- we chose a nice thick Vanilla Greek with the Real California Milk Seal. Thanks to the thick Greek Yogurt texture I was able to spoon the yogurt over our skewed berries and get a nice thick costing that stuck. I placed our skewers on a parchment paper lined plate and tossed them in the freezer for an hour. Viola! Sweet, refreshing, Yogurt Covered Berries (an a stick!)
Of course the Fall and Winter holidays will in fact come, whether the complimentary weather does or does not. That means plenty of parties, potlucks, and home entertaining. Help keep a hungry crowd snacking happy with this simple Cucumber Sandwich finger food spread featuring your favorite Real California Milk Seal cheese varieties.
This one's pretty self explanatory, and our family's favorite way to enjoy some dairy while watching a big game. Using a potato peeler alternate peeling vertical lines along the edge of your cucumber, then cut it horizontally into 1/4" slices. Add your favorite deli cuts, cheese squares, and even baby tomatoes if so inspired. There simply is no way to do a meat, cheese, and veggie plate wrong when you have great cheese in the house.
 If you're the sort of snacker that prefers to get your protein and nutrients while sipping on the go, then a delicious, green, smoothie is perfect for you. Our favorite PBK Smoothie is full of rich textures and flavors that trick your mind into thinking it's enjoying a shake or dessert, rather than energy packed snack time solution.

PBK Oat Smoothie
Makes 2 Servings
***Click here for printable PBK Oat Smoothie recipe
Ingredients:
1 C Ice
1/2 C Peanut Butter
1/2 C Instant or Rolled Oats
3/4 C Greek or Low Fat Real CaliforniaYogurt
1 Banana, Sliced
1 C Kale
2 TBS Chia Seeds
Directions:
Add all items in a blender and blend on pulse until well combined. Garnish with banana medallions and a sprinkle of chia seeds.
And, for those with little ones at home, or simply true kids at heart, my final simple and healthy snack offering features more seasonal Fall apples, and one of my favorite types of dairy, cream cheese. You'll fool even the pickiest of eaters on first glance with these gorgeous slices apple rings and their 'faux' cream cheese frosting. Simply portion your cream cheese into 3 bowls and add a drop or two of food coloring to each. I find pink/red, blue, and purple blend beautifully to make some magical unicorn like hues. While you can find many flavors of cream cheese featuring the Real California Milk Seal, I rather enjoy original cream cheese. Of course a drop of organic vanilla extract will add an extra touchy of delicious whimsy too.
Since I decided to decorate my faux donuts with sanding sugar in a variety of rainbow hues I did not add any other sugar or flavoring to my cream cheese or apple slices. My horns were made of slivered almonds, and the eyelashes were actually shark shaped confetti sprinkles- but you really can get as creative as you want with these. While these can be prepared ahead an refrigerated to serve later in the day, sanding sugar, as opposed to sprinkles, will tend to bleed, and make the spread crack a little over time. As a result these look best when prepared and eaten immediately. If you are struggling to get the cream cheese to adhere to your apple slices be sure to pat the slices with a dry paper towel prior to spreading for a nice clean, dry, surface.
Jay is pretty vocal that apples are not his preferred fruit, but even he wolfed several of these Unicorn Apple Donuts down without prompt. Apple donuts, in general a fun idea any time of the year- consider trying these with a touch of pumpkin spice sprinkled atop! And, thanks to the many types of apples, you can enjoy your simple snack as naturally sweet, or sour, as you like it.
Of course, sometimes you don't need any preparation at all to enjoy your favorite dairy foods as a snack. There are many ways to enjoy snacking with delicious dairy bearing the Real California Milk Seal, but the first step is to check the store locator and find some products near you. You just might be surprised that some of your favorite ways to enjoy dairy already feature the Real California Milk Seal. Now, tell me, what is your favorite healthy snacking option?

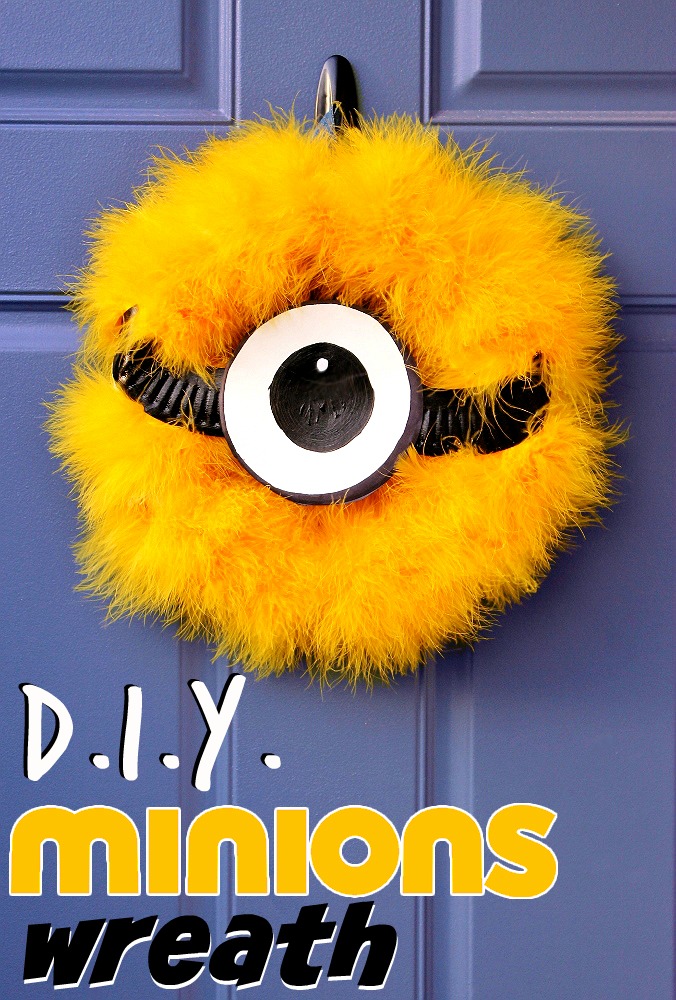
D.I.Y. Minions Wreath Tutorial

D.I.Y. Minions Wreath for Under $10 In 15 Minutes!
Momma Told Me: Be a little different.


It's no secret we're a little 'off color' here at Momma Told Me- while we appreciate tradition, there are some things we prefer to break free and stand out from the crowd on. Unique seasonal door decor is one of them. Yes, we're talking wreaths. For year I have wanted to make my own Fall wreath, but lacked the patience, or budget, for the more elaborate 'professional' style D.I.Y. wreath. Don't get me wrong, Martha Stewart is great for most people- but when I sit down to create something I'm going to display in (or on) my home, I want it to be immediately obvious that is' home made. A lot of the gorgeous wreath tutorials out there cost just as much as the store bought one's to make, and look slick enough to be store bought when done. My friends, you will not find a Minion wreath in any store, and it is crazy easy to make.
D.I.Y. Minions Wreath for Under $10 In 15 Minutes!
Start with a medium foam ring from your typical craft store. This will be the bulk of your materials cost, as these can run $6-$8- but I'll let you in on a little secret. If you head online to Micheals/JoAnns/Hobby Lobby you can often print a coupon to save 40-50% on a single item and knock that price to just a few dollars. The second most expensive supply, the boas, are about $3-$4 a piece- you'll need 2. Again, bring the hubby, or the kids and use multiple coupons in your trip (it's usually 1 per person.) The rest of the supplies you likely have hanging around; a hot glue gun, some ribbon (for hanging,) black acrylic paint, a paper plate, a paint brush (I use disposable foam brushes) and some newspapers to cover your work space.
D.I.Y. Minions Wreath for Under $10 In 15 Minutes!
Are you ready? It just might have taken you longer to gather your supplies and protect your work space than to assemble this wreath, because this bad boy goes together with no skill level and faster than I can say 'banana' 3 times. Start by taking the end of one boa and hot gluing it to the back of your wreath foam ring. Next, loosely wrap the boa around the foam ring so that the feathers cover the ring, but there is enough give to move the boa to the side as needed for the later steps. Tack the loose end of the boa onto the foam ring and repeat with the 2nd boa, end to end.
D.I.Y. Minions Wreath for Under $10 In 15 Minutes!D.I.Y. Minions Wreath for Under $10 In 15 Minutes!
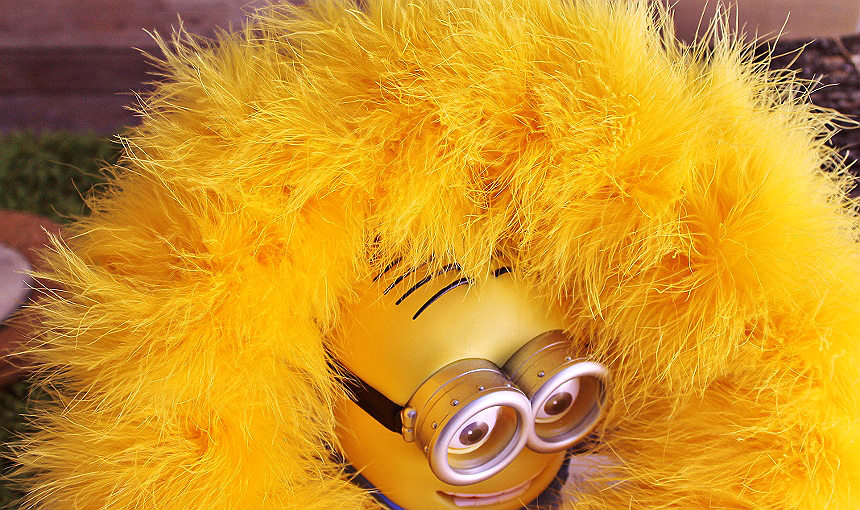
You should have what looks like the beginnings of a fabulous Carnivale hat, or at least a wreath that resembles an abstract Tweety Bird. Go ahead and shake it back and forth like a 3rd crader fascinated by the movement of the feathers (I won't judge,) it's impossible not to feel happy when playing with feathers!
Next, grab your paper plate and cut the ridged rim off of the inner circle. Take your foam paint brush and dip it in your black paint. Place it in the center of your round (flat) plate piece so that the tip and wooden end are vertical- give it one smooth spin while applying pressure. If you want to be less fancy- "Take a paint brush and paint a black circle in the center of your round plate cut out." Cut 5-6" strips from the ridged plate rim and paint those black as well. Allow you pieces to dry, or pull out the blow dryer if you're impatient (like me.)
If you want to get a little fancy pants you can add some detailing to the eye. Using your black paint go ahead and draw a black rim along the outside of your round (flat) eye and make one of the border's edges a little thicker to indicate the traditional Minions goggle frame. Take a daub of white paint/white paint pen/white out and draw a little circle of reflective light in the iris of your eye. Glue your dried black painted plate strips to the inner eye circle evenly.

Attach your goggles/eye to the wreath by gently separating the wrapped boa and gluing the paper plate portion directly to the foam ring. Repeat on the opposite end and even out the feather distribution to hide your handy work. Next, loop a few inches of ribbon and glue it to the top (back) portion of your wreath- paying attention to glue directly to the foam ring again, or the ribbon will not adhere.
D.I.Y. Minions Wreath for Under $10 In 15 Minutes!D.I.Y. Minions Wreath for Under $10 In 15 Minutes!
Congratulations- you've just made a Minion! Wouldn't these be cute in purple as well for the 'monster' minions from the Despicable Me 2 movie? How about doing this with 2 small foam tubes and chaining them all together to make Bobe, Stuart, and Kevin? The possibilities are endless and the work is truly minimal; just my type of D.I.Y. craft. And you better believe the compliments from delivery workers, neighbors, and friends are plenty! Best of all, this is a fun wreath for the Halloween season that isn't spooky or scary at all! What type of seasonal decorations do you like to make?

What Daughter Says: Fall leaves, ribbons, and acorns are nice, but this wreath truly makes me smile every time I come home!


How To Restore Your Headlights (In About An Hour)

How to restore your headlights for about $20 in about an hour!
Momma Told Me: Sometimes you have to take ownership and invest to feel pride in something.

Many of you know now that I was rear ended, at a complete stop, on the freeway this past St. Patrick's Day and was forced to say goodbye to my purple PT Cruise (aka my 'rolling sanctuary'.) After over a month of searching for a replacement car I came across a cream colored PT Cruiser convertible with an exceptionally low odometer reading for it's age. Those who know me well know I dislike white/off white cars, and convertibles- I was simply feeling beat down and decided I needed a familiar car with reliability more than 'the car of my dreams.' Besides, the car was in mint condition, except the headlights which looked as though they had been transplanted from a vehicle 10 years older.
How to restore your headlights for about $20 in about an hour!How to restore your headlights for about $20 in about an hour!
Life being as it is, things don't always turn out as expected, so, upon purchasing this vehicle, I decided I would make it my own so that I could one day take as much pride in it as I did my precious purple PT. The first step was to give it a little extra TLC- to invest a bit of myself into it.

The headlights had to go. Well, they had to at least look like new, as the rest of the car so brilliantly did.

I wasn't the only one who thought so either, both Jay and my father took one look at the car and pointed out the glaring (erm, dull) elephant in the room- the headlights were UV damaged and covered in layers of grime and stains. Weren't there commercials for some miracle product to fix this? Hadn't I seen, on TV, somewhere a woman wiping off her crusty old headlight to reveal a sparkling new one?  Well, for about $20 you can own one of these magical products- but it's a kit- not some miracle single shot treatment.
My headlights most likely weren't near as bad as those belonging to the average person considering this project. I don't live on the East Coast, where my car would be subjected to extreme humidity, salty air, and harsh Winters (though we do live near the beach)- and the car was primarily garaged for the second half of it's life before I purchased it. But the passenger's side headlight was covered in strange splotchy patches of buildup and the driver's side was considerably fogged over. It was clear at one point in it's life the car had received primarily direct sun to the driver's side.
Well, remember that kit I said we invested in? Well it's a bit more involved than just wiping away the years from your headlights- But it does include everything you need (no extra tools required) and will take the average DIYer about an hour to complete both headlights. Keep in mind that, while anyone can do this project, your results will vary depending on how strictly you follow the instructions and if you have an previous experience with restoration or wet sanding. Yes, I said sanding.

Begin by taping off the liner and paint immediately surrounding your headlight with a durable painter's tape. The kit claims that the materials used will not harm paint- but the instructions suggest taping- and I certainly would for 2 reasons: 1.) We noticed the first solution we used took the color off our shop rags, so it seemed to have some sort of acid or bleach in it, 2.) You will eventually be sanding right up against your car's paint- not point in risking anything there. You will also want to start with a clean car.
Next, treat the headlight surface with the Step 1 Activator, generously spraying, and allow it to sit about 30 seconds before washing away. Here's what we noticed about this process- 1.) The spray is very aromatic in a chemical sense- you will need to step back for air, and you should always be working in an open, well aerated, shady area. I highly suggest wearing a simple paper face mask to help diffuse fumes, and that you keep your face as far back from the solution/mist as possible. 2.) You will be using this bottle a total of 4 times, 2 treatments each headlight, so you should expect to use about 1/4 of the bottle each time. 3.) Given the nature of the product and spray we suggest you wear gloves and wipe the solution off with a wet rag to clean the lens before continuing- rather than use a hose which may send the solution flying onto your car and other surfaces.

Once the Activator solution has been cleaned off the lens, and the lens has been dried, it will quickly begin to cloud. This is normal and you will see this after every step from here until the final UV coat.
Now you're ready to begin sanding- the kit includes 3 sheets, 1 each of 2000, 1000, and 400 grit wet sanding paper. You should tear them in half and make note of which is which with a written indicator on the back since you will be using half a sheet for each lens.

My father and I had some disagreement as to whether a mask should be worn through the sanding process- since this is a wet sanding procedure. I am going to suggest you do since we did see quite a bit of kickback debris on clothing and even in his ear after the sanding process.

To wet sand you will want a small bowl of clean water nearby, and a clean cloth (to wipe up any drips that may make their way onto your car's paint. Wet the lens with the wet cloth, and submerge the sanding paper into the water. Begin sanding (you'll start with the 400 grit for the first step) in circular motions from the top corner of the headlight inward. You should expect to continue sanding for approximately 5 minutes- though cars with less build up may require less time. You will be able to tell you are done when the headlight has reached a uniform, smooth, texture, and there are no clear sections visible.
Rinse your headlight and continue with the repeating the above process of sanding, using the 1000 grit sandpaper. Sand in circular motions with a wet lens and sandpaper for approximately 5 minutes, clean, then repeat with the 2000 grit. When you are done sanding you should have a clean, dry, foggy lens.
Next you will apply the Clarifying Compound, which we closely attribute to a sort of buffing wax. Wet your lens with a clean wet rag and apply half of the compound to the provided white towel. Starting at the lower corner of the headlight, in sweeping circular motions, buff the clarifying compound into the lens for approximately 5 minutes.

We were worried this compound would dry out during a 5 minute buff, but it actually seemed to break down and glide even more the longer we worked it into the lens. Once you are done clean and dry the lens. You will begin to notice the lens will maintain a glossy 'wet' look as though it is holding water along the surface.