This shop has been compensated by Collective Bias, Inc. and its
advertiser. All opinions are mine alone. #FRAMFreshBreeze
#CollectiveBias
Momma Told Me: The air's fresher outside.
I'm the sort of person who pays attention to the air I'm breathing.
In our living room we have a portable air purifier, as well as on the night-stand in the master bathroom. Though we have a cat and a (allergy friendly/fur free) dog I am constantly vacuuming and lint rolling away the traces of them. And, of course, I keep an eye on the local pollen counts and air advisories. Living in Southern California we're also at risk for long periods of ash falling from the sky, during brush fire season, and notorious for poor air quality in the form of smog. Thankfully, we live a good 40 miles from the main 'inland' cities, on the coast, so pet dander, pollen, and the occasional ash are my most common concerns.
In our home we clean vents, replace air filters, and keep the windows closed on poor air quality days. I like to think we maintain the (allergen/irritant) risk factors quite well. And, for many people, this is quite common in modern times. However, how do we maintain a pleasant breathing experience when we are on the go? Arguably, our car, is one of the places we are potentially subject to the most, and widest range of, air pollutants.
I keep a lot of air fresheners in my car because I like a 'stinky drive', as Jay likes to put it. But, as much as I like to envision flowers growing out of my vents, the term air freshener might be deceiving and without proper air filtration I might literally be breathing in irritating pollen as the flowers bloom over the next 6 months. Air fresheners really don't do much but mask odors- odors commonly caused by smells (bacteria) lingering in various aspects of your car. (Yuck!)

When I bought my current vehicle last year it was the newest (for me) vehicle I'd ever owned. While it was a 2005 model it had had but one owner (a grandmother who used it for casual cruising when the grand-kids were in town.) It had a whopping 54k miles on it and had been garaged nearly all it's life. Because it was in such impressive condition, I began investing more time than usual on maintaining it's quality with a few small automotive DIY projects. We refurbished the headlights, I replaced a few simple parts, bought new windshield wipers, and took it in for a full tune-up and oil change at my local Walmart automotive center. Even the mechanic complimented the condition the car had been kept in, but we were both surprised to learn one item was still in 'like new' condition. The
cabin air filter compartment sat there, under my hood, with the original manufacturer's seal sticker still taped over the front. The previous owner had never decided to install one.
In fact, you just might be surprised how many people could be driving around without a cabin air filter in their car. Certain makes/models don't include cabin air filters off the lot- despite having a perfectly functional designated space for one. And many people get the cabin air filter confused with their engine air filter- they are NOT the same thing. Just as your engine air filter is important to ensure your engine is breathing nice clean air the cabin air filter directly controls the quality of air that is pulled from outside your vehicle, inside, through your car's air conditioning and vent system. Even more alarming the air inside your vehicle can be up to 6x dirtier than the air outside!
Thankfully, I was able to browse the in-store automotive department at Walmart on my last trip. I was a bit overwhelmed by the sheer number of Fresh Breeze® cabin air filter stocked on the shelves, so an employee was happy to assist me. In fact, he not only helped me find the right air filter for the year, make, and model of my car, but he assured me that most cabin air filter replacements could be done by owners with little to no car care experience. He also told me that Fresh Breeze® cabin air filters help filter up to 98% of dust, dirt, and allergens entering my car, and are the only cabin air filters that use the natural deodorizing qualities of ARM & HAMMER® baking soda.
I'll admit, while I've been doing more and more 'at home' car maintenance lately, I always get a bit of anxiety whenever I have to go under the hood. The first-most important thing when preparing to install your FRAM Fresh Breeze® cabin air filter is that you have the proper filter for your car- refer to
FRAMFreshBreeze.com to determine the appropriate model number, and local Walmart availability, for your particular vehicle. While I'm about to share the simple process involved in changing my 2005 Chrysler PT Cruiser (Convertible, Turbo)'s cabin air filter you will find more specific instructions and installation videos by part number on the FRAMFreshBreeze.com website.
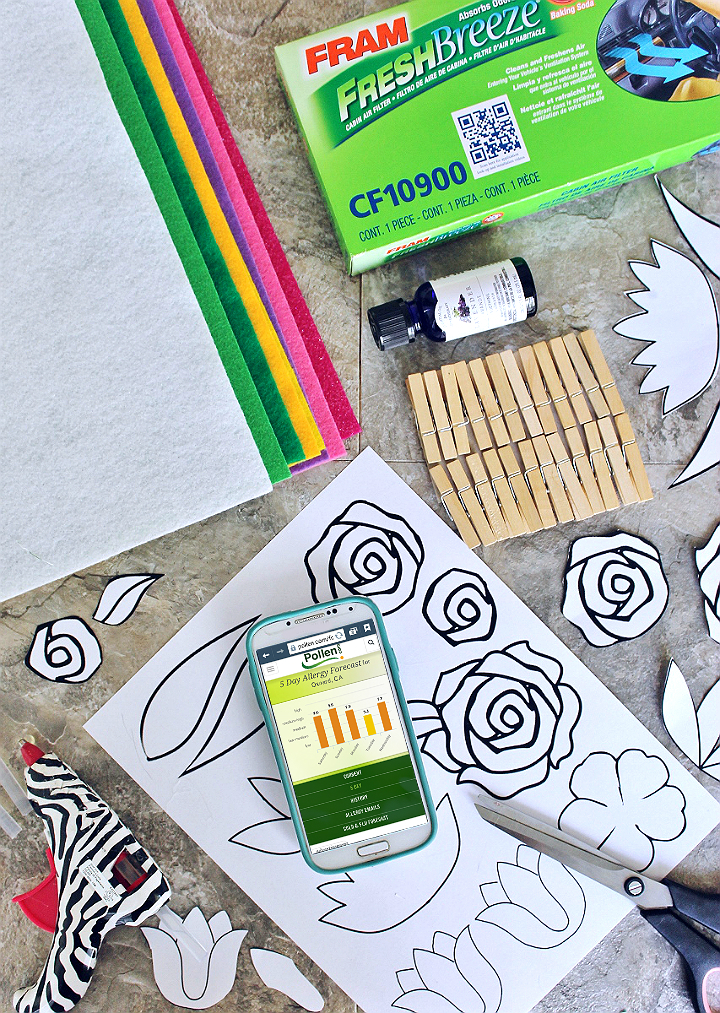
Here's what I used for the job:
*FRAM Fresh Breeze® Cabin Air Filter CF10900
*Needle Nose Pliers,
*Both A Phillips and Slot HEAD Screwdrivers
*A Large Bowl/Container (For Loose Parts)
*Some Baby Wipes/Paper Towels
*Good Music/Companionship Optional
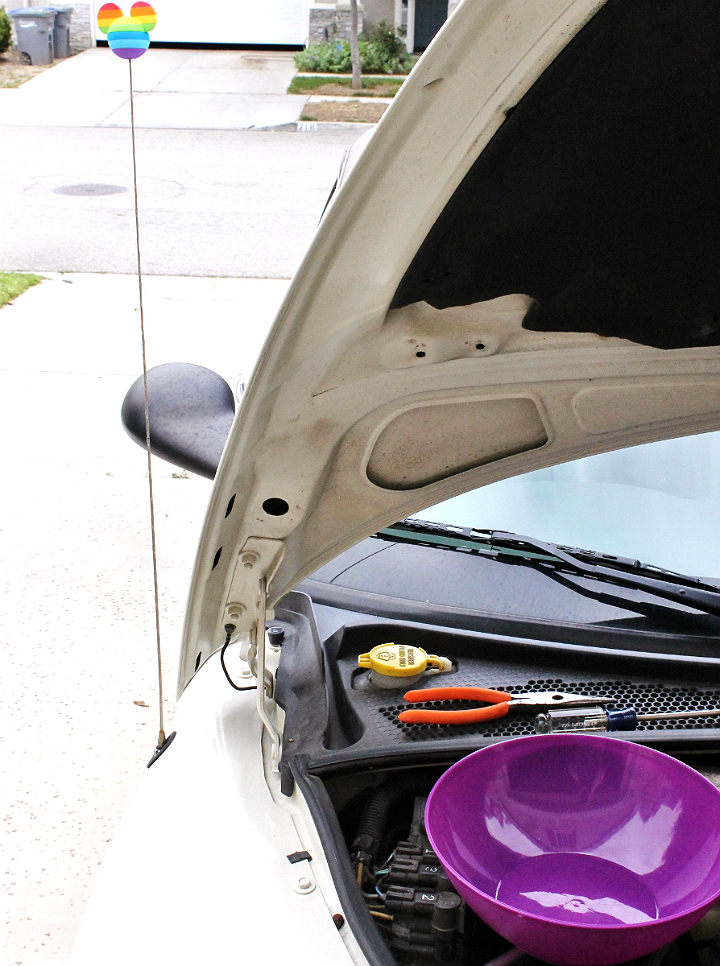
In my 2005 Chrysler PT Cruise the cabin air filter is located under the hood in the upper left (passenger's side) corner of the engine compartment. PT Cruiser vehicles are notoriously annoying for any sort of 'under the hood' work as the engine compartment is very compact and things can be touch to get to/navigate. In some vehicles the cabin air filter may need to be accessed through a glove compartment.


To get to the cabin air filter box I had to first remove the top grill
of my engine compartment. This is a 2-piece, long, grated plastic cover
that interlocks in the middle and has both top and side screws. The
screws are inserted into caps and both the screws and caps will have to
be carefully removed in order to pull the grill. Depending on the age of
your vehicle the plastic caps your screws are inserted into may be
brittle and subject to breaking. Carefully use a pair of needle-nosed
pliers to remove them without damage. There were a total of 5 screws,
and 5 screw caps on our vehicle. We kept an oversized bowl in the middle of the engine compartment to hold our screws while we continued the project.

As with all 'under the hood' projects you'll want to be mindful of your hands, and how greasy they may become. You may be tempted to rest your hands, or lean, on the outside of your car. Since my car is cream, and I didn't feel like adding a full afternoon of detailing to my chore list that day, I kept my wrists on the outer engine seal whenever I needed to brace myself for a better look.
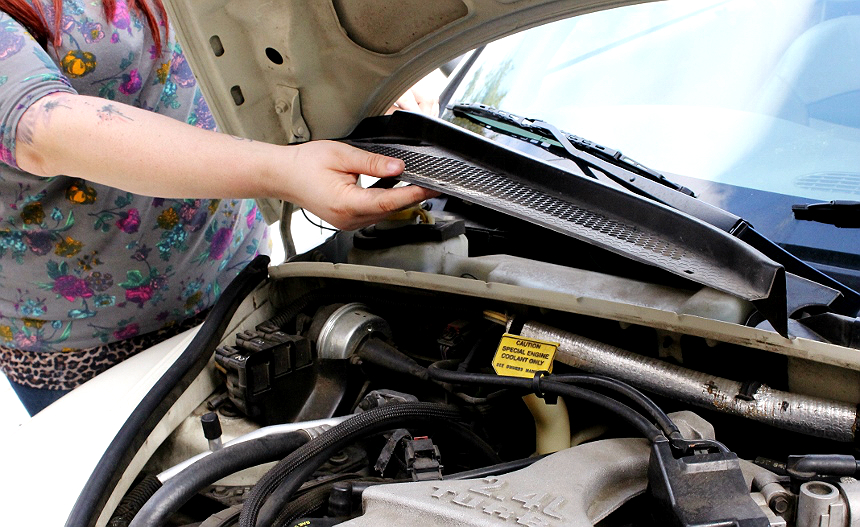
While you can get away with only removing one half of this upper engine grill/cover you will be best served to remove both as they interlock in the middle and it takes a bit of coaxing to get the passengers side free. We ended up partially closing the hood to allow better rotation access in the upper left corner. Once I'd tiltes the back corner up it twisted out and the panel was easy to lift out.
With the upper engine compartment open I could immediately see the (in our case empty) cabin air filter box. With a flat head screwdriver I easily popped the two tabs holding the front cover in place and pulled it out. Be sure to keep one hand on the cover as you do this to prevent it from falling down into the compact engine compartment.
So, in about 8 minutes of prep-work I was ready to install my brand new FRAM Fresh Breeze® cabin air filter at last! The air filter was clearly labeled indicating which way should face in towards the cabin for proper air flow. Install your air filter with the arrows facing in towards the inside of your car, with the lighter side of the filter facing out towards you.
Again, PT Cruisers are notorious for tight engine spaces and having the washer fluid basin directly up against this compartment made for some colorful language on my part. You may want to clean your hands, and the area around the air filter prior to attempting installation. If you have a second set of hands to gently pull the washer tank back, every 1/4 inch of leeway helps when sliding this chunky air filter into it's new home.
Once your
FRAM Fresh Breeze® cabin air filter is happily seated in it's new home you can begin moving backwards to reassemble that which you disassembled. Again, the only tricky part is getting the two upper panels to interlock, then it's just pop the screws back in and you're done until next year, or about 12,000 miles (when it's suggested you replace your cabin air filter again). *Follow recommended change intervals as noted in your vehicle owner’s manual.
In celebration of my new FRAM Fresh Breeze® cabin air filter and the 9.5 pollen rating forecast for the upcoming week I decided to revamp one of my favorite automotive DIY projects with Spring and Summer in mind. Pretty much anyone can literally make flowers spring from their car's air vents with this simple Vent Clip Air Freshener tutorial. Here's what you'll need:
*3-4 Sheets of Colored Felt- I prefer to have at least 1'stiff' felt sheet for my base layer
*Small Clothespins
*Hot Glue Gun/Sticks
*Essential Oil of choice (I used Lavender)
It may seem complicated but piecing these felt flowers together is easy- just print 2 copies of our
FREE flower template printable and cut the outer shape of your flower of choice into 3 layers of felt at the same time. If you can choose a base layer that is the stiff kind of felt sheet and top with 2 layer of the traditional softer felt. This will make cutting and assembly much easier all around.
Reserve your bottom (single piece) layer and set aside. Next cut the most obvious, outer, shapes from the template on the second layer of pre-cut felt. Lastly, cut the 'background' layer/shapes into the 3rd. Everything from layers 2 and 3 will fit together like a puzzle, just mix and match however you'd like the colors to pop through. With the rose template you'll want to cut all the shaped out of both the 2nd and 3rd layers then just place them together into 1 single layer (leaving half leftover for a second rose) and glue them directly onto a single layer base.
You can go simple with your leafs- they mainly serve to act as a small pop of color and the portion that will stick primarily into your car's air vent. Securely glue them together, over-lapping partially, then glue them onto 2 clothes pins. Lastly, glue your completed flower onto the leaves.
Add a few drops of essential oil to the felt flower- preferably at the top where fingers won't have to directly touch to pinch and insert the clips into your vent. Or course you can also clip the flower into your vent and apply the essential oils after. Depending on the quality of fragrance (and where you're in a warmer climate where your car might 'bake' during the day) a few drops will last a week of more for fragrance. These little air freshener clips can be re-used endlessly, just add more essential oils.
I like to make these vent-clip air fresheners as gifts, and seasonally to add a handcrafted touch to my vehicle. They're quite affordable to make and I find 4 felt sheets will make about 6-7 with scraps left over. Best of all they're the perfect compliment to my new FRAM Fresh Breeze® filtered air!
With the warmer months upon us I'm sure we will all be driving more, to some pretty exciting places and adventures. When was the last time your cabin's air system had a refreshing? Chances are it's long overdue. I'll admit, I was pretty horrified when we opened up our engine compartment to see we'd been breathing the air through our car vent system without and form of filtration! Thanks to FRAM Fresh Breeze®
cabin air filters at Walmart the entire family can breathe a sigh of relief- and, thanks to my adorable vent clips it smells FABulous.
Now, dish- did you know your car had a cabin air filter? When was the last time it was replaced?
What Daughter Says: The air inside your car could be 6x more contaminated than the air outside. Maintain your car's cabin air filtration system for a better in car air experience.