The post is brought to you in part by Chick-fil-A and the CFA Mom’s
Panel DIY Upcycling Challenge. All ideas and opinions below are mine and should not be taken as religious or political agenda. #ChickFilAMomsDIY
Momma Told Me: Find new purpose in old things.
Some of you may or may not know that I am a member of the Chick-Fil-A
® Moms group, a collection of influential women who help shape the company's many family friendly initiatives, and kid's meal prizes, through insight and feedback. I don't, personally, have a story of growing up with the chain. In fact, I only discovered the brand a few years back when my hometown opened a shiny new location devoted to inspiring the locals to 'Eat-Moar-Chickn,' in a family oriented atmosphere. I don't eat 'fast casual' a lot- in fact, I've cut it dramatically in recent years. Having health minded grilled chicken selections at my local Chick-Fil-A is always a real treat- and the lady at the drive-through says 'Absolutely!' to just about anything I ask.

Well, one of the the selections I've been particularly crushing on lately are the newer salad offerings. I've actually made a habit of stopping by after league for a Kale Superfood Side (Salad,) their small side veggie offering sold solo or as an alternative to fries. It's made with delicious fresh kale, broccolini, walnuts, and dried sour cherries tossed in a sweet and tangy maple vinaigrette. It's Ah-May-Zing.
So, when the Chick-Fil-A Moms group challenged me to try their
Spicy Southwest Salad, and up-cycle the container into something awesome, I grabbed my fork and rose to the challenge. I really wasn't expecting this full size (meal) salad to bring the heat quite like it did. My taste-buds were seriously awakened with the slices of spicy grilled chicken, roasted corn, black beans, chili lime pepitas, and creamy salsa dressing. Together these elements make for one flavorful, spicy, chicken salad.
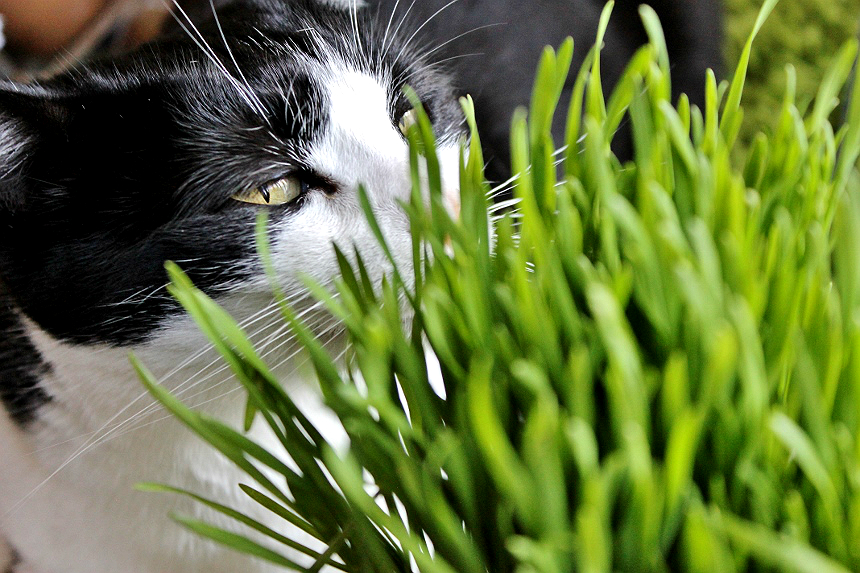
The inspiration behind my up-cycle was my cat, Truffles. Surprised right?
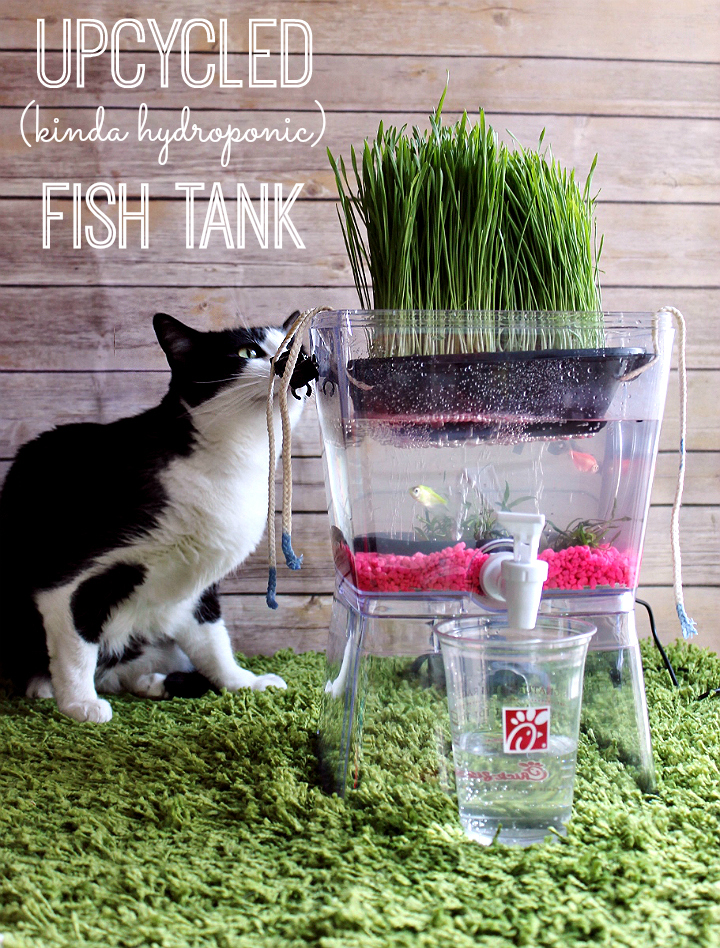
I really had no idea exactly how I'd tackle the project at first, but I wanted it to be something extremely simple to build, as the concept of caring for, and creating an appropriate environment for, fish is a bit of work in itself. My Upcycles (Kinda Hydroponic) Cat Grass Fish Tank can function with Guppies, but I highly suggest anyone who is not intermediately skilled in fish care start with a single beta fish, which is much less maintenance. Keep in mind a Beta fish needs to always be housed solo, and requires the water's surface to breath, as they are surface breathers- Guppies prefer to live in schools, making this tank suitable for 3 max, and 2 suggested. alternatively, if you have a larger (main) tank and want to use this as a raising/acclimation tank, you can do so too.
Here are the materials I used:
1 Chick-Fil-A Spicy Southwest Chicken Salad Container, Cleaned + Washed
An Old Beverage Dispenser (1.5-2 Gallon Capacity)
2 lbs Aquarium Gravel
Scissors
3.5-4" Nail
1/8" Cotton Rope (Wax To Dip Tips, Optional)
PH Meter/Water Conditioner For Tank Startup
2 C Organic Potting Soil (No Fertilizers)
1/2 C Cat (Wheatgrass) Seeds
Square Foot of Fine Mesh/Screen
***If housing a Beta do NOT use a bubbler or current system to oxygenate the water as it can by rough on their fins, and hard to swim against. For any other freshwater (Guppy-like) fish, consult your local pet store owner for necessary food and conditioning aids. Your tank WILL require aeration and a filtration system- I recommend the Small World Pump + Filter Kit (sold on Amazon.)
Step 1: Begin by poking approximately 12 holes around the perimeter of the bottom of both your clear and black Chick-Fil-A salad trays using the nail set aside. I found the black (bottom) tray was much easier to puncture, while the clear one required finessing as to not crack it under too much force.
Step 2: Using one blade of your scissors poke a slice into each corner of both trays, approximately 1/2" wide. Cut your rope into 14" sections. Feed your rope vertically through one of the punctures, and across the tray to the other side, as to create 4 separate pull tab handles from 2 sections of rope.
Step 3: If desired you may dip the frayed ends of your rope in warm wax to help seal the ends and prevent them from sliding or fraying further. Test both the clear and black tray inside your empty drink dispenser to determine which will sit the highest inside. I found my clear tray worked well for initial germination, while the black tray worked well to transfer my grass as the root system became heavier and more intricate.
Step 4: You will easily locate fine mesh screen at your local hardware store, though you may run into difficulty finding patch pieces small enough for your project. While the screen should be easy to trim, I found the simplest plan was to get a splatter screen from the dollar store kitchen department and trim my piece from that. Regardless, you will want to ensure that your screen sits comfortably at the bottom of your beverage dispenser/tank, just under the nozzle draw. This will help ensure that there is always a water reservoir below the rock level, to draw from.
Step 5: Add your water to the tank/beverage dispenser. You will likely only be able to fill it about 3/4 of the way to meet the sitting level of your prepared tray. The tray will initially float when empty, this is fine. Make sure to treat and prepare the water for your fish before adding any to the tank. It takes a minimum of 10 days for water to properly cycle- water tablets and drops may be purchased at the local pet supply store to speed up the process, but I highly suggest allowing your water to sit a minimum of 72 hours, even when using these 'quick' treatments. If you have an existing main tank you can help the transition by sourcing half of your water from the established tank.
***Never put fish directly into tap water, the chlorine levels can be toxic- treat water appropriately or follow the correct procedures for cycling. Allow your fish to 'acclimate' by floating inside their travel (sale) bag for an hour before adding them, to ensure the water temperatures have evened.
Step 6: Once your tank has a filtration system and air system (if not using a Beta,) and the water had been appropriately cycled you will add your fish, and can begin growing your cat grass. Add half your organic soil to your prepared up-cycled tray. Sprinkle your cat/wheat grass seeds directly across this layer of soil and cover with the remaining soil. Float the tray on the surface of the tank's water. When using the 1.5-2 gallon beverage dispenser you should notice the container will wedge itself at a maximum depth once it has slowly absorbed enough moisture through the tray's 'breathing' holes. This should leave the bottom of the tray approximately 1.5" submerged, and a generous rim of water surface around for fish to surface as desired.
Step #7: Once your cat grass soil has soaked initially you'll want to begin a daily cycle of soaking/floating the tray for a few hours a day, and 'docking' it on the lid of the tank/beverage dispenser for the rest. When the seeds begin sprouting and the grass has reached a height of about 2-3" you will want to stop cycling the tray through the water and begin a fresh tray.
Step #8: Use the dispenser's spout, at the bottom of the tank to drain half the
water during weekly tank water changes to water your sprouted/growing
cat grass. This nutrient rich water will contain traces of natural
nitrates and other nutrients plants can benefit from in processing- use
your fish water to water house and garden plants!
Step 9: Enjoy your tank garden and continue to cycle through trays as your cat enjoys the home-grown grass.With a little bit of research you can even refine a method that will allow you to keep recycling the wheat grass seeds indefinitely, making this one eco-friendly project!
If that project seems like it's a bit out of your league, and I promise, the only complicated thing about it is knowing some basic fish care and tank processing practices, I have another up-ycle you can throw together in 2 minutes! Ready? Let's get started!
D.I.Y Up-Cylced Catnip Marinator + Toy
1 Small Chick-Fil-A Superfood Side OR Kid's Nugget Tray
2' of Paracord
Scissors
Organic Catnip
Cat Toy Of Choice
Step 1: Using 1 blade of your scissors puncture a hole approximately 1/4" down from the rim, and 1/2" in width, in each corner of your clean Chick-Fil-A tray.
Step 2: Cut your paracord into 2 1' pieces. Tie a knot approximately 4" from one end of your paracord, on each of the 2 pieces of cording. Feed each end of your cord through the container slit diagonal to it as to create a criss-cross of cording.
 Step 3:
 Pour a generous portion of catnip in the bottom of your black container and place an appropriately sized toy inside. Close the lid atop, sealing efficiently. Toss the container onto the ground with disregard and proceed to ignore it's existence.
If your completed project resembles trash with some colorful strings coming out of it, you've accomplished your goal. The slits will allow some of the catnip fragrance to seep out, while the closed container will saturate your toy of choice with fresh catnip 'flavor.' Let your cat knock it around and chew on the paracord for a few days then swap the toy inside out with a fresh one. It's a toy AND a catnip marinator!
Well, there you have it, my best ideas for putting those old Chick-Fil-A trays to good use. I always feel bad tossing them out, they are so sturdy and practical, we typically keep a few clean ones on hand to run leftovers to a sick neighbor or bring to a potluck. As it turns out there is a plethora of things you can do with these nifty containers once you've enjoyed the delicious-ness within. Check out the blog hop at the bottom of this post for more inspiration and D.I.Y up-cycling!
What Daughter Says: I love to imagine a new life for forgotten things- everything can have a purpose if you look at it in a new way!
PSST! Score a FREE Sandwich at Chick-Fil-A when you download the new app, for a limited time! http://bit.ly/1P5fyde