Momma Told Me

Blog Archive

Make Your Holiday Gatherings #EasyCheesy With Stella®- Baked Pepper Romano Crisps Recipe

Easy 1-Ingredient Black Pepper Romano Baked Cheese Crisps to make any Holiday gathering a success! #EasyCheesy
Momma Told Me: Who has time for that?

Growing up my mother's most popular recipes often involved 4 ingredients or less.

I recall, one holiday season, walking into my classroom's holiday play banquet- card tables lined up with Crock Pots and foiled platters. And, at the end of the line, on the dessert table, there was a beautiful tray of hand iced homemade sugar cookies with each child's name and silhouette on them. They looked as though they'd taken forever to make. Momma, however, was quick to comment under her breath how the mother who'd brought them should have put more time into how they tasted- not how they looked. But, truthfully, great holiday treats can do both- taste and look delicious, and you really only need one key secret ingredient- cheese.
https://ooh.li/237ec6f
Every year I attend countless holiday pot lucks, house warmings, family affairs, and seasonal affairs where I am expected to bring something tasty. There's always that pretense of  'it's the thought that counts' and bringing something is 'better than nothing' but as Pinterest inspires more than Martha Stewart ever dreamed to reach, expectations are definitely felt. I can't just slap some deli meat and cheese on a platter and call it festive- so I take a few extra minutes to layer my platter to look like a tree- with a few sprigs of fresh thyme in between. It never ceases to WOW everyone who walks by.
https://ooh.li/237ec6f
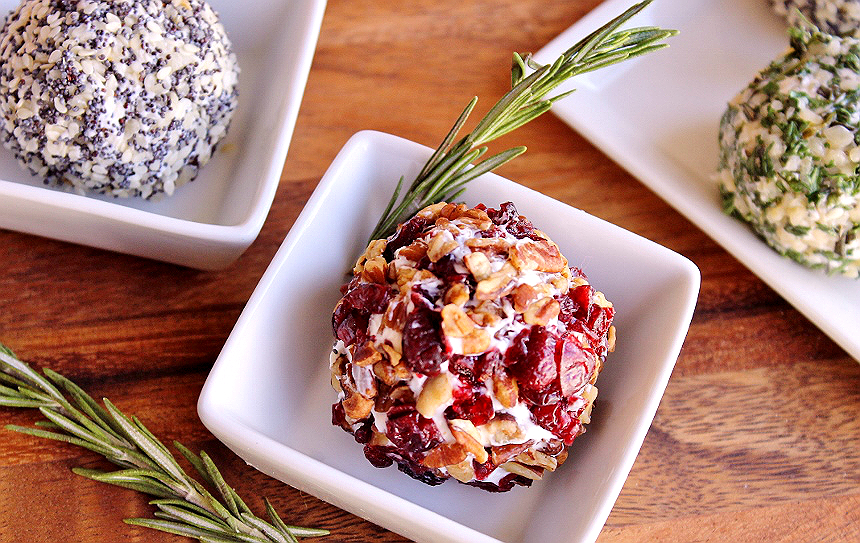
If your crowd isn't quite the finger food, platter type- perhaps you have an affair with some delicious wine involved? Making a delicious cheese ball out of your favorite soft cheese is the perfect way to seem pretentious when all you did was roll balls of cheese in colorful toppings. Cheese balls have been gaining in popularity over the past few years and can really become the centerpiece of a spread whether you go small with variety, or big with decor. In fact, I saw a cheese ball decorated with almonds to look like a pine-cone I intend on trying next Fall.
For those who like to feel like they've done a little more than take something delicious and slap it on a plate with fancy presentation, a delicious fondue-style cheese dip does wonders to elevate your culinary standing. Goat Cheese or Gorgonzola, for example, melts beautifully with fresh blueberries, and browns in the most delicious of bubbly ways. The purple color of the cooked blueberries is almost as delightful as the tart flavors mixed with the slightly sweet pungent cheeses. Serve with some sourdough crisps for a delicious pairing.
Of course my personal favorite way to serve cheese for a holiday gathering requires only one ingredient, and relies on truly delicious cheese, as it is the one and only star. I always keep an eye out for Stella® brand cheese, a brand with rich Italian heritage dating back to 1923. Their portfolio of fine cheeses includes everything from Blue Cheese and Feta or Fontina to Ricotta, Provolone, and Swiss. I find them locally in the deli cheese (that's craft and specialty cheese) cases at my favorite Ralphs or Vons, but you can find your nearest retailer here.
Stella Black Pepper Romano
On my most recent shopping trip I happened across a few specialty varieties of Stella® Romano, including Black Pepper Romano, with the most inviting cracked peppercorn rind. I don't often bring hard cheeses to seasonal events- it's something I'll typically pair with wine, or use to highlight a recipe. However, when I tasted this particular variation I new it would be the perfect excuse to make 1-Ingredient Baked Pepper Romano Cheese Crisps.
https://ooh.li/237ec6f
Are you ready for my top secret recipe?

Grab your Stella® Black Pepper Romano cheese and grate it fine- about half  an 8oz wedge will yield 1 cup of loosely packed fine shredded cheese, and will make about 15 1.5" baked cheese crisps. Preheat your oven to 315F and line a baking sheet with parchment paper (preferred, foil may be used but will cause cheese to continue cooking after removal and could cause issues with sticking.) Sprinkle 1-2 tablespoons of fine shredded Stella® Black Pepper Romano approximately 1" apart on your lined baking sheet. Don't heap your cheese, an even circle will bake most uniform.

Once your cheese begins to flatten and bubble, as to create pockets in the cheese, your crisps are about done. This typically takes about 3-4 minutes, but will vary depending on your cooking surface and style of sprinkling. If the cheese begins to turn 3-4 shades darker then you are ready to take them out and transfer them to cool- do not let your cheese brown or it will become bitter.

These single ingredient Stella® Black Pepper Baked Romano Cheese crisps make a delicious snack at any party, or can be crumbled on a variety of seasonal dishes, or even salads. Unfortunately, they never last very long though- nobody can ever eat just 1 or 2!

If you're as passionate as I am about fine cheese being a champion ingredient then head on over to Stella® Cheeses and enter to win a trip for 2 to Napa Valley, California!

What Daughter Says: Delicious doesn't have to be complicated during the holidays.

D.I.Y. Bubble Wrap Corn Sun Catcher Craft

These DIY bubble wrap sun catchers make great sensory crafts and can be re-used next year thanks to the contact paper they're mounted on!
Momma Told Me: Time to get crafty.


When I was young my favorite thing about any holiday was the craft projects my teachers, or mother, would inevitably come up with. Was there truly anything more epic than macaroni art in kindergarten? I argue, no, there was not. And every November, for 5 years straight we'd make those darn construction paper turkeys from the outline of our hand, and run to the car after school to show them proudly off to our parents, who'd smile with all the enthusiasm of someone who'd never actually seen them before.
They say 'There's nothing new under the sun,' and it's true, just about anything has been done to some variation before. But some things have been done so much they're expected. When Fall finally arrived this year I wanted to do something more than fill a plastic glove with popcorn and draw a face on the fingers. So I set out in search of bubble wrap crafts. And these D.I.Y Corn Sun Catchers combine a little bit of many things that make childhood magical- the fun and mess of painting, the stimulus of sensory bubble wrap, the warmth of sun peeking through the clouds and trees, and a chance to create a character all your own.
Anyone can make these and, with the exception of contact paper, you probably have most of the materials already laying around:

Small Bubble Wrap (Scraps from packing will do, or a roll is about $5 on Amazon)
3-4 Warm Shades of Paint (Keep in mind child-safe paints for younger kids)
Any Form Of Brush/Sponge Brush OR Fingers!
A Marker (Permanent is best)
Green Construction Paper
Scissors
Sheet of Contact Paper (Found in the drafting aisle of the craft store)
Dropcloth + Baby Wipes for Messes

Start by taking a 10" x 10" square of bubble wrap, bubble side up, and layering shades of yellow, orange, and red across it. For younger kids feel free to go with yellow and red to teach a lesson about colors. Encourage kids to paint light, and choose their color mixing with purpose. Provide a clean brush, or even paper towels to wipe away paint in places and layer in others. Finger painting on bubble wrap makes a fabulous sensory project for sensory kids!
Your bubble wrap will need to dry. Depending on the paints used, and how much paint your little applied, drying will take anywhere from 2-12 hours. For multiple kids, keep track of who's bubble wrap belongs to whom by marking initials on the back corners in permanent marker.

Once your bubble wrap is dry cut corn shape ovals out- let your kids experiment with lengths and sizes, then have them choose 1 or 2 'corn' cuts as their favorites. Place the corn cutouts on the green construction paper and trace a husk around the outside, leaving a 1-1.5" border along the edges of the corn. Carefully cut out your husks, making sure to cut a hollow in the middle, but being sure to leave that 1-1.5" husk edge.
Place your husks on top of the contact paper sheet and cut a rough oval around the outside, again leaving a 1-1.5" border of extra contact paper on all sides of your husk.  Carefully peel the sticky contact paper from the backing and arrange the bubble wrap corn in the center (bubbles facing down against the sticky side) then the husk positioned over it. At this point you have a giant corn sticker you can immediately put onto the window, or carefully place back onto the contact paper backing and store to take home, or gift.
But corn isn't quite as magical without a little personality- so we let our kids grab a Sharpie (washable markers are just as fine, but will fade quicker in the direct sun) and draw faces on their corn. In fact, the girls naturally created characters, and even back stories, for their corn creations!
These DIY bubble wrap sun catchers make great sensory crafts and can be re-used next year thanks to the contact paper they're mounted on!
I, personally, decided to make a mini corn family for our window while some found it fun to play with goofy expressions, or to try and draw a face that reminded them of the person they were giving their corn to.
These DIY bubble wrap sun catchers make great sensory crafts and can be re-used next year thanks to the contact paper they're mounted on!
These were a huge it. Each girl made 2-3 and they were begging to make more. The only reason we stopped is because I want this project to seem just as fun and exciting when I re-purpose the concept for snowman next month! And the parents? They loved them just as much- handmade art ready to mount!
These DIY bubble wrap sun catchers make great sensory crafts and can be re-used next year thanks to the contact paper they're mounted on!
Do these really catch the sun? Yes. They almost glow when they're in direct sunlight- but don't expect them to be casting big rays of color like a piece of stained glass. They are also re-useable- Ours have been up for 2 weeks, and I just peeled one down and put it on it's backing with plenty of stick. So these might even be reusable next year! Now, tell me, did you ever craft with bubble wrap as a child? Popping the bubbles next to your mother's ear might have been an experiment, but doesn't count!

What Daughter Says: Create a new tradition with bubble wrap crafts.

D.I.Y Car Elfing Kit + Trapped Elf Vent Air Freshener Holiday Car Hacks

This shop has been compensated by Collective Bias, Inc. and its advertiser. All opinions are mine alone. #FallForPennzoil #CollectiveBias
DIY Car Elfing Kit- Spread cheer and help refresh a stranger's car during one of the most hectic seasons of the year! DIY Trapped Air Vent Elf Air Freshener Tutorial inside! #FallForPennzoil AD
Momma Told Me: I could certainly use an elf or two around here!

When my car was totaled (before you panic no one was harmed but my beautiful purple P.T.'s undercarriage) on St.Patrick's Day I was devastated. Vehicles are just things, and things can be replaced, but my car is my rolling sanctuary. It's my place where all is zen, and I'm completely in control of the music, the sights, the smells. And I take immaculate care of my car- whenever I can fit in the time. So, when I ended up getting a replacement vehicle with 60k less miles it was not only the 'newest' car I'd ever owned, it was a bit stressful to know how to properly care for and maintain it. For example, in the past, I'd always walked in and asked for the standard high mile Pennzoil® oil change, but now I had a younger engine, a Turbo engine, and it was ticking it's way towards past due on those regular maintenance services when I took possession of it.
I'd intended to drive it straight from signing the papers to my local Walmart, but somehow life got in the way and 1 round trip road trip to Oregon to visit Momma, and I found myself past due! And every day that ticks closer to the holidays I wind up with more and more on my plate and less time to juggle everything on my honey do list. Thankfully I'm at my local Walmart at least once, if not twice, a week. It's my one-stop-shop to knock multiple things off my seasonal checklist. From prescription refills to a new Winter jacket or just some party snacks for the big game, I can achieve a lot all at once.
So you won't be surprised to hear I brought my new wheels into my local Walmart Automotive department and they had a good chuckle at the fact this is now the 6th car I've brought to them for regular service. (Just try and guess how many emergency tires I purchased there in the past year.) It started a few years ago when I was trying to drop my car off at a local lube and oil chain but simply didn't have time to sit around and wait for more than an hour. After my first Walmart oil change I was hooked by not just the convenience of being able to shop while I waited, but also the ability to follow my car's progress while shopping, and the amazing prices on quality Pennzoil® Platinum Full Synthetic Motor Oil change packages. And now even more states can enjoy the convenience of Pennzoil Platinum Full Synthetic thanks to Walmart locations in Florida, Georgia, South Carolina, North Carolina and Tennessee expanding to offer these services!
And it was during a recent shopping trip, and Walmart automotive service, visit that I was inspired by this sentiment, and the theme of the season. You see, I give back a lot when I'm in my car. It may seem strange but I stop at intersections, or near fast food joints all the time and buy meals, or give money, to outstretched hands in our community. I'm also that person who regularly pays for the order behind me in a drive-thru.

 I believe in paying things forward and spreading unexpected cheer, and few times are as stressful as the holidays, no matter how much cheer they bring. So I picked up a cute greeting card, a tire pressure gauge, some craft supplies, and a Walmart gift card with $44.88 on it. Yes, $44.88, the precise amount to help another shopper check of their upcoming oil change while getting some holiday shopping done thanks the the rollback ($49.88 to $44.88) on Pennzoil Platinum Full Synthetic oil changes now through December 27, 2016.
My favorite DIY projects are also ones I can share, so I knew my Flattened Elf Vent Air Freshener was going to be the perfect handmade touch to complete my little car 'Elfing' kit. All you need to get started is:


Pair of Scissors
Hot Glue Gun (Mini is fine)
Small Clothespins
1 Sheet Red, Green And 2 Sheets White Felt
Peppermint (Or Your Fragrance of Choice) Essential Oil
Small Bells
Pencil (NOTE: I used a marker and the oil made residual ink bleed over time)
Optional Markers or Fabric Paint To Decorate
Start by pulling up a few reference photos of elf legs to decide on the style you want to go with. You don't have to be a world class artist- feel free to take some creative liberties when drawing your leg and feet outline on one of your white felt sheets. TIP 1: For your white 'base' felt go with the stiffer felt sheet over the soft fabric style felt. This will help give your finishes product more stability when you glue your bells on at the end. TIP 2: Place your clothespin on your fabric when planning the length of your elf legs. Ideally your clothes pin will run along the length of the leg, and not exceed the leg in width.
Cut your legs out carefully and use the stiff white leg cutout as a template to trace your feet onto your green felt, and your pants onto your secondary (softer) white felt sheet. Once your white pants are cutout trace the pants onto the red felt and cut a second pair of identical pants. TIP 3: This project will make 2 Flattened Elf Vent Air Fresheners- Just cut a second 'base' pant/leg template from your stiff white felt, and a second pair of green shoes, and you will have everything you need to assemble 2- no need to cut out extra white or red pants.

Next use your hot glue gun to attach your green shoes to the bottom of your elf legs base. Place your red pants over your white pants, lined up identical. Carefully cut slightly angled strips across your (layered) pants. This will create two sets of interlocking stripes in each color, with which you will use to make your elves' stockings.
The next part can get a little tricky, so be careful to arrange your strips in ascending order from largest to smallest (sort of to create the illusion of striped long johns). One at a time place your strips from smallest to largest, skipping a size between each color, alternating red and white. Don't get frustrated if you start to get straggler glue strings, they'll clean up easily when you're done.
Once all of your felt pieces are glued on you will have an extra set of alternating red and white stripes perfect to make a second elf, if desired. Flip your pants over and glue a clothespin on each leg, paying attention to angle them just right to allow room for both to clip without hitting each other. Flip your pants over and glue your bells onto the tips of your elf shoes. Lastly, add a few drops of Peppermint Essential Oil to the legs. Only 2-3 drops are more than enough to keep your car smelling great for weeks! If you really want to go the extra mile when gifting you can give your recipient a bottle of essential oil to refresh their elf legs all season long!
DIY Car Elfing Kit- Spread cheer and help refresh a stranger's car during one of the most hectic seasons of the year! DIY Trapped Air Vent Elf Air Freshener Tutorial inside! #FallForPennzoil AD
Now that my car was smelling great, and running great thanks to it's recent Pennzoil Platinum Full Synthetic Motor Oil change, it was time to spread a little holiday cheer and share some of the joy of a happy car during the holidays. I wrote a little note in my greeting card explaining a little about who I was and why I wanted to do something nice for a stranger, tucked my Walmart gift card inside, and tied it up with the tire gauge and handmade air freshener.
DIY Car Elfing Kit- Spread cheer and help refresh a stranger's car during one of the most hectic seasons of the year! DIY Trapped Air Vent Elf Air Freshener Tutorial inside! #FallForPennzoil AD
I'm not going to lie, I get butterflies everything I 'stop and drop' something like a 'boo kit' or 'elfing kit'- I always worry I'll get caught in the act and some stranger will come rushing out of a store or their house with the wrong impression. So I tried to keep my photos brief here, haha! Really all I did was pull up to a random parking spot and tuck my Elfing Kit into the windshield wiper on the vehicle next to me. It was that easy. And just think how awesome it will be for someone to discover this on their windshield instead of one of those classic business card or advertisement spam flyers! P.S. How adorbs does the elf air freshener look sticking out of my air vent???
This DIY Trapped Air Vent Elf Air Freshener is easy to make with a hot glue gun, some felt, and your favorite essential oil (we suggest peppermint)! Check out the tutorial! #FallForPennzoil AD
Of course there is no season for giving- it's important (to me) to give back all year round- it's my way of helping to make the universe a little brighter. But there is a season of dinner parties, frantic gift list shopping, family photos, and road trips- and it's easy to let your regular car care slide in the middle of it. Naturally its' also one of the most dangerous seasons to ignore regular vehicle maintenance, so make sure you bring your car by the Walmart Automotive Care department during your next shopping trip. Remember, for a limited time you can take advantage of that great Pennzoil® Platinum Full Synthetic Oil change rollback of $44.88 through December 27th, 2016! So, go ahead and dish- what have you been overlooking when it comes to your car care as the holidays sneak closer?

What Daughter Says: Be someone's elf this season and surprise a stranger with a little extra cheer- then let Walmart be your elf and save you time while you shop.