Momma Told Me: crafts

Blog Archive

Showing posts with label crafts. Show all posts

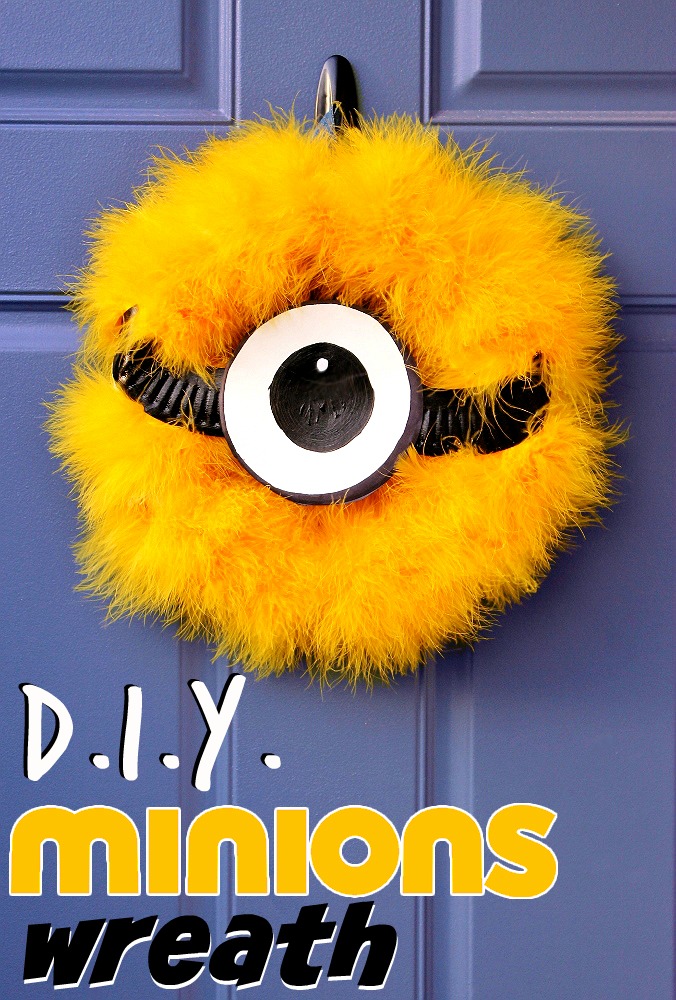
D.I.Y. Minions Wreath Tutorial

D.I.Y. Minions Wreath for Under $10 In 15 Minutes!
Momma Told Me: Be a little different.


It's no secret we're a little 'off color' here at Momma Told Me- while we appreciate tradition, there are some things we prefer to break free and stand out from the crowd on. Unique seasonal door decor is one of them. Yes, we're talking wreaths. For year I have wanted to make my own Fall wreath, but lacked the patience, or budget, for the more elaborate 'professional' style D.I.Y. wreath. Don't get me wrong, Martha Stewart is great for most people- but when I sit down to create something I'm going to display in (or on) my home, I want it to be immediately obvious that is' home made. A lot of the gorgeous wreath tutorials out there cost just as much as the store bought one's to make, and look slick enough to be store bought when done. My friends, you will not find a Minion wreath in any store, and it is crazy easy to make.
D.I.Y. Minions Wreath for Under $10 In 15 Minutes!
Start with a medium foam ring from your typical craft store. This will be the bulk of your materials cost, as these can run $6-$8- but I'll let you in on a little secret. If you head online to Micheals/JoAnns/Hobby Lobby you can often print a coupon to save 40-50% on a single item and knock that price to just a few dollars. The second most expensive supply, the boas, are about $3-$4 a piece- you'll need 2. Again, bring the hubby, or the kids and use multiple coupons in your trip (it's usually 1 per person.) The rest of the supplies you likely have hanging around; a hot glue gun, some ribbon (for hanging,) black acrylic paint, a paper plate, a paint brush (I use disposable foam brushes) and some newspapers to cover your work space.
D.I.Y. Minions Wreath for Under $10 In 15 Minutes!
Are you ready? It just might have taken you longer to gather your supplies and protect your work space than to assemble this wreath, because this bad boy goes together with no skill level and faster than I can say 'banana' 3 times. Start by taking the end of one boa and hot gluing it to the back of your wreath foam ring. Next, loosely wrap the boa around the foam ring so that the feathers cover the ring, but there is enough give to move the boa to the side as needed for the later steps. Tack the loose end of the boa onto the foam ring and repeat with the 2nd boa, end to end.
D.I.Y. Minions Wreath for Under $10 In 15 Minutes!D.I.Y. Minions Wreath for Under $10 In 15 Minutes!
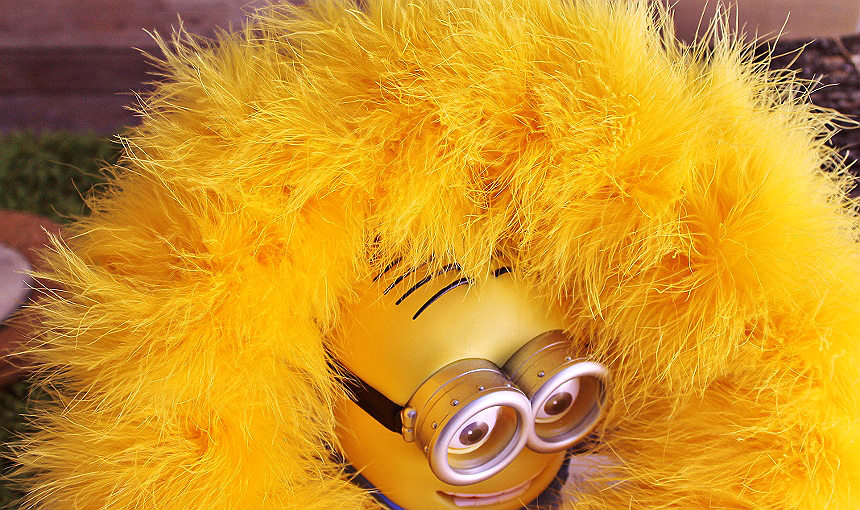
You should have what looks like the beginnings of a fabulous Carnivale hat, or at least a wreath that resembles an abstract Tweety Bird. Go ahead and shake it back and forth like a 3rd crader fascinated by the movement of the feathers (I won't judge,) it's impossible not to feel happy when playing with feathers!
Next, grab your paper plate and cut the ridged rim off of the inner circle. Take your foam paint brush and dip it in your black paint. Place it in the center of your round (flat) plate piece so that the tip and wooden end are vertical- give it one smooth spin while applying pressure. If you want to be less fancy- "Take a paint brush and paint a black circle in the center of your round plate cut out." Cut 5-6" strips from the ridged plate rim and paint those black as well. Allow you pieces to dry, or pull out the blow dryer if you're impatient (like me.)
If you want to get a little fancy pants you can add some detailing to the eye. Using your black paint go ahead and draw a black rim along the outside of your round (flat) eye and make one of the border's edges a little thicker to indicate the traditional Minions goggle frame. Take a daub of white paint/white paint pen/white out and draw a little circle of reflective light in the iris of your eye. Glue your dried black painted plate strips to the inner eye circle evenly.

Attach your goggles/eye to the wreath by gently separating the wrapped boa and gluing the paper plate portion directly to the foam ring. Repeat on the opposite end and even out the feather distribution to hide your handy work. Next, loop a few inches of ribbon and glue it to the top (back) portion of your wreath- paying attention to glue directly to the foam ring again, or the ribbon will not adhere.
D.I.Y. Minions Wreath for Under $10 In 15 Minutes!D.I.Y. Minions Wreath for Under $10 In 15 Minutes!
Congratulations- you've just made a Minion! Wouldn't these be cute in purple as well for the 'monster' minions from the Despicable Me 2 movie? How about doing this with 2 small foam tubes and chaining them all together to make Bobe, Stuart, and Kevin? The possibilities are endless and the work is truly minimal; just my type of D.I.Y. craft. And you better believe the compliments from delivery workers, neighbors, and friends are plenty! Best of all, this is a fun wreath for the Halloween season that isn't spooky or scary at all! What type of seasonal decorations do you like to make?

What Daughter Says: Fall leaves, ribbons, and acorns are nice, but this wreath truly makes me smile every time I come home!


At Home Photo Booth Fun

D.I.Y Photo Booth for Emotional Growth and Cooperative Play
Momma Told Me: Express yourself.

I don't have kids.

Every time I say that I feel like it's a bit of a lie. Every time I fill out a survey or form and it asks me to list my children, there are at least 20 that come to mind. Sure, I can't claim them because I didn't give birth to them, and they don't go to sleep under my roof- but, whether they're blood related (nieces/nephews) or just children from the daycare, I feel a bit of a stake in the quality of their lives. I don't have children, yet, I would do just about anything to see the children in my life happy. And, really, there's a reason they say 'It takes a village.'

But, before this post gets off on an entirely different tangent, about how people can have consciously chosen not to give birth to children, at this point in their life so far, and it doesn't mean they don't like children- (Yes, that is a stereotype I get a lot) Let us all agree that it takes next to nothing to make a child happy. In most cases, simply your time. And that the time spent is always minimal compared to the rewards.
So, whether you have children of your own, or nieces or nephews, or maybe are a childcare provider- you likely know that 1. Kids can find fun in just about anything if you point them in the right direction, 2. Kids have amazing personalities and 3. As constantly changing as children are, it's important to capture every moment you can.

When I was a child I was obsessed with capturing the world on camera- Momma and Pop had a Polaroid that was my absolute favorite, but I was only permitted to take 1 photo a week, given the cost. Of course I had a disposable camera too, and it always seemed like an eternity to get my prints back from the drug store. These days it's free, and easier than ever, to capture moments and memories in images thanks to smart phones and electronic devices with built in cameras.
One would think this would make the concept of taking photos a dull one, to the modern kid- but I've found there's still something magical about having the camera turned on them. It may be a little vain, but the kind of kids I hang around just adore to see themselves on screen, or in print. This is great because, as easy as it is for the modern parent to chronicle the childhood of their children most parents often don't think to stop and take photos that will actually be displayed. Sure, you pay ridiculous prices for the digital format of your children's school photos- but do they really capture the essence of who your child is in that particular moment and year?

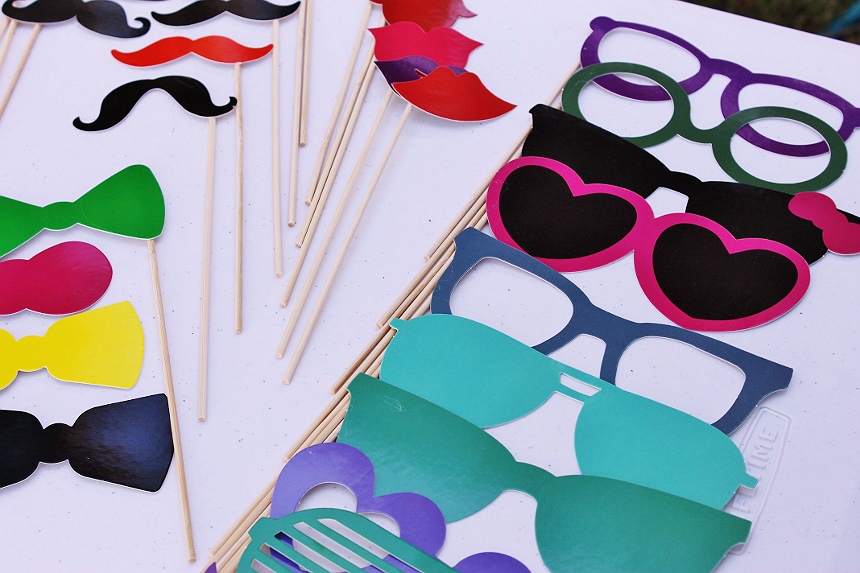
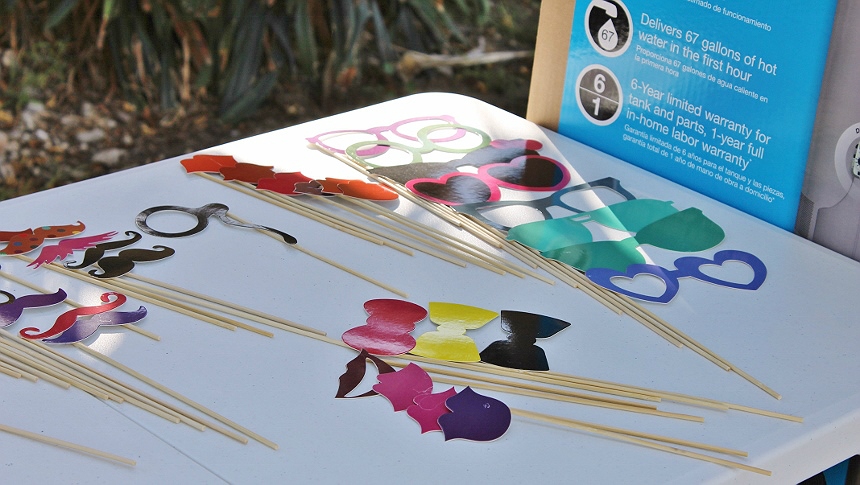
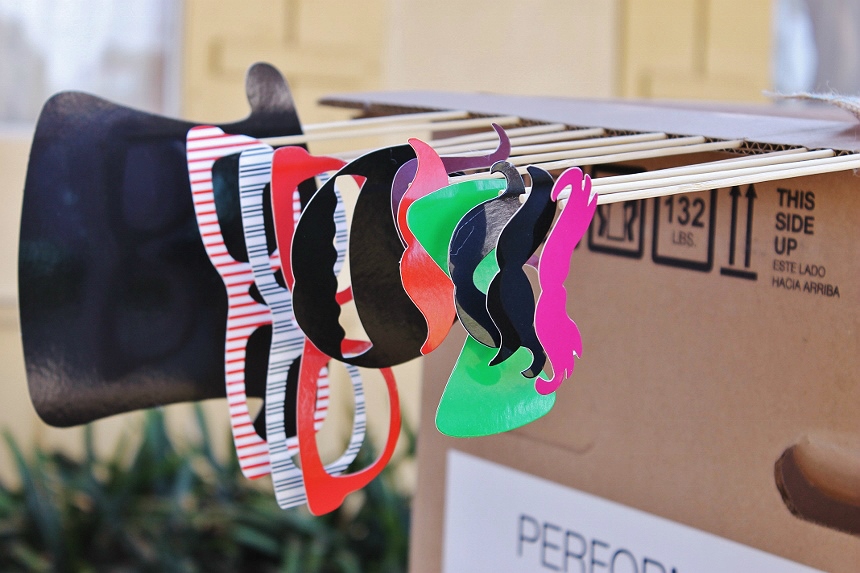
And that's exactly why I decided our activity of the week, at the daycare, would be a carnival themed photo booth. It may sound a bit elaborate, but it really cost me less than $15. Photo props can be purchased on Amazon quite cheap; I bought a 65 piece set for just over $10. For our 'booth' we really just set up a background by clipping some leftover fabric to an oversized appliance box. To really help the kids' personalities shine I even offered to do a little face painting.
D.I.Y Photo Booth for Emotional Growth and Cooperative Play
I might not be the world's best artist, but I truly enjoyed listening to each child talk about what they wanted, and how the painting's subject inspired or empowered them. Sure Spiderman or 'rainbow triangles' (the 3 year-old's request) might not be 'in' next year, but that's the fun of capturing this day in time on film.
D.I.Y Photo Booth for Emotional Growth and Cooperative Play
At first some of the kids were a little shy. Though we'd broken the ice with some face painting, many of the children expressed that photos were for 'nice faces' and only taken when something important happened at school, or for a holiday. As soon as they got the idea that they could truly bring any mood to life, things really began to get fun.
D.I.Y Photo Booth for Emotional Growth and Cooperative Play
"Photo Booth" is now the most requested Thursday activity in our little group- and, while I don't want it to lose it's special charm and become novel, we're always looking for ways to take this simple concept and work it into something else.For example, a photo booth can be a great way to discuss emotions, build creative play and cooperative skills, or help boost self confidence in diversity and individuality. Of course, the best part of this little project was printing out the photos for parents to take home. Now, tell me a little bit about your favorite photo of your child, or your favorite photo of yourself from growing up! Mine is a photo of 2 year-old me with a stuffed beaver backpack, in diapers with my hair a hot mess, standing in my mother's shoes, just crying red hot crocodile tears. I always knew turning on the waterworks would get attention from my father, haha!

What Daughter Says: Treasure every moment, capture everyday character!


Making A Timeless Mother's Day Gift (Under $10)

This shop has been compensated by Collective Bias, Inc. and its advertiser. All opinions are mine alone. #DoingThe99 #99YourMothersDay #CollectiveBias
This elegant vanity tray was made with materials from the 99 Cents Only Stores for just $6, and everything on it was only another $6! #99YourMothersDay #DoingThe99 #AD
My mother and I don't really do gifts.

There was a time when I would actually get scolded for spending money on her- and not in a cute "oh you shouldn't have" manner, in a very real "I gave birth to you and you'll do as your told, you've offended me greatly" manner.

Through the years she's mellowed a bit. (Don't tell her I said that though, she has a staunch reputation to maintain.) We still do bare minimal for most holidays, and Mother's Day is no exception- but I've found that handmade gifts are accepted much more graciously. After all, she might smack me upside the head for buying her a new blu-ray player but there's not much she can do when I present her with something I crafted from my own two hands.....accept tell me to spend less time and money on it next time.

We have a special relationship.
That being said, whether you are a mother yourself, are the grown child of a mother, or have a friend who is a mother, Mother's Day is rapidly approaching and it's always nice to have a gift in mind that looks like a million bucks but cost you more like a 100 Grand (the candy bar). Regardless of who you're shopping for this Sunday May 14th, you likely need a little inspiration. After all, a macaroni pencil holder or salt dough portrait doesn't quite fly when you're 30.

Luckily, being the savvy 99er that I am, I'm always looking for inspiration for a fun and unique project that would make a great gift. We try to stop by our local 99 Cents Only Stores at least twice a week, since new and exciting things are always hitting the shelves, and the aisles are always packed with amazing essentials as well as seasonal decor and necessities. One of these days I'll make a fresh fruit bouquet from all of the amazing fruit in the produce department! You really can't go wrong whether you're looking to fill in holes on your grocery list or build a gift basket last minute- there are plenty of name brands at amazing prices.
So a few weeks back on Pinterest I saw some 'suggested for you' PINs pop into my feed and one was of a handmade vanity tray. The tray looked amazing, but when I clicked through to check out the materials things began adding up very quickly. The blogger had essentially used a bought tray ($20) and painted/refinished it to fit her decor. It was cute, but I knew I could do better for much cheaper.

The toughest part of my mission, or so I thought, would be finding a sturdy and sizeable surface to be functional at a vanity, or by the tub, while still holding a decent amount of weight without falling apart. Our local 99 Cents Only Store always has a section of aisle (usually across from the kitchen-wares) with home decor such as frames, mirrors, plaques, canvas art and more. Surprisingly I found 3 different options for my tray base that suited my needs.
I ended up deciding on a framed personal wall mirror for $1.99- it had a nice stylish pink border which would have worked great in my home, but not so much my mother's. I knew I wanted to give the tray handles of some kind, to make it easily transportable, but they had to adhere on their own since the tray's surface was essentially a mirror. In the electronics and accessories aisle I found some adorable smartphone 'rings' intended to support up 4lbs weight (each), which self adhered thanks to a sticky back. Then all I needed to do was decide on a color to paint my frame, and pick up a few accents to adorn my finished product.
To begin this very simple, anybody can do it, project I first taped along the inner edges of the mirror to protect from any paint residue during the process of painting the frame. I also wanted to dress up the mirror surface a little so I used my tape to make an inner 'frame' which I could paint over to reveal a designed pattern.
I'd picked up some decorative baubles at my local 99 and wanted to tie in my copper color to them as well- giving the edges, or entire objects, a quick coat of paint really helped tie my finished product together and elevate it to a whole new classy level. How adorable is that ceramic pineapple and sea turtle?
Once my paint had dried I carefully peeled off the tape- it's okay if you weren't perfect on your lines, the mirror surface will often be covered and imperfections give it a handmade feel. You may want to give your mirror a clear coat finish if you are worried about scuffs or scratches in use.

Next I pulled out my smartphone 'rings' and applied them in the center of each of the mirror's shortest ends. Voila! Instant tray! I was surprised how strong the grip of these rings were, and they easily carried a full load of items.
This elegant vanity tray was made with materials from the 99 Cents Only Stores for just $6, and everything on it was only another $6! #99YourMothersDay #DoingThe99 #AD
I have to say pictures don't do this beautiful tray justice. The metallic paint really pops and you can't tell I only spent $6 on it- I definitely want to make one for my own home now, too! It is incredibly sturdy and functional, and if it ever gets damaged no tears will be shed. I don't know about you- but those are some magical features to a mother!
This elegant vanity tray was made with materials from the 99 Cents Only Stores for just $6, and everything on it was only another $6! #99YourMothersDay #DoingThe99 #ADThis elegant vanity tray was made with materials from the 99 Cents Only Stores for just $6, and everything on it was only another $6! #99YourMothersDay #DoingThe99 #AD
I'll admit, I really 'broke the bank' spending an extra couple of bucks at the 99 Cents Only Stores on my accents. What can I say- everything on the tray itself was a whopping $7. I included a few moisturizers and a bamboo bath scrubber to add some functionality to my gift, as well as Godiva chocolates to sweeten the sentiment. This is definitely a gift I'd love to receive; and I know my mother will be proud of (when she hears how little I spent.)
This elegant vanity tray was made with materials from the 99 Cents Only Stores for just $6, and everything on it was only another $6! #99YourMothersDay #DoingThe99 #AD
Some of life's luxuries can still look expensive without really breaking the bank- that's something my frugal mother taught me. Mother's Day  is definitely a day to pamper the mothers in our lives and this $6 Custom Vanity Tray does just that! Of course if I haven't inspired you to creative-ness, you can also visit your local 99 and make an amazing gift basket your mother will love. Now, tell me, what are your plans for this Mother's Day?