Momma Told Me: cooking

Blog Archive

Showing posts with label cooking. Show all posts

How To Make Red Velvet Cheesecake Bars For Valentine's Day

Red Velvet Cheesecake Bars for Valentine's Day Dessert
Momma Told Me: Bake from the heart.

Baking is something I have enjoyed since I was a young girl. The satisfaction of beginning with several mundane ingredients and finishing with a work of art that is not only tantalizing but wholly indulgent just speaks to my soul. I take pride in doing things 'by hand' and from scratch, whether it's sifting my flour or giving batter 200 stirs. Even in Momma's kitchen, making boxed brownies (the kind that was favored for a 'just ad water' recipe which enabled gratuitous spoon licking,) I would patiently mix the lumps and bubbles out of our batter until it was perfectly smooth. And, as I shoved an always crumbly, misshapen, square of brownie in my father face, as he arrived home, I would beam with pride, declaring, "I made these!"
But the end result is not the only satisfaction I find in baking. There are numerous techniques and methods that prove much harder to master than they sound. The trials and tribulations of substitutes, measurements, and appliances with finicky temperatures all provide a challenge I happily embrace. Then there's the rhythm of the kitchen how the measuring and prep to end result has a comforting ebb and flow; an exact science that must be done just right. In fact, baking IS a science. And one of my favorite recipes, Red Velvet Cheesecake Bars, clearly resembles this with mad scientist like preparation.
The Red Velvet portion of this particular recipe is more of a brownie in end result- and requires a thick batter that presents a very fun preparation. Because all the wet ingredients for the batter are combined, yet different densities, the level of microscopic separation in 'mixing' makes for an almost surreal and very romantic show. I like to play around, adding each wet ingredient into a different corner of the vegetable oil, watching the playful bubbles absorb the red food coloring with different intensities. Adding the milk last introduces tiny bubbles of white for added depth to your kitchen  creation.
When the wet ingredients are introduced to the dry ingredients of your batter the Red Velvet mixture becomes quite elastic. It will hold shapes and forms for several seconds before sinking back to it's original form, and appears alarmingly thick and dough like, yet free flowing and malleable. I had fun mixing this batter with gloves (to prevent staining from the food coloring) and now any child would be equally transfixed by it's unique properties.
Red Velvet Cheesecake Bars for Valentine's Day Dessert
Next, a portion of the red velvet batter gets gently spread into the bottom of a spring form pan, reserving a 3/4 cup for the final preparation step. Blending the cheesecake mixture is best done in a stand mixer, where it can be left unattended for several minutes to whip and fill with air. Refrain from licking the blade, though, there are eggs in this cheesecake batter! Next, I poured the cheesecake over the Red Velvet base and added the last of my milk to my reserve Red Velvet batter. This helps thin out the dough like mixture to allow easier dolloping. Evenly drop the remaining Red Velvet batter in rows of dots along the top of the Cheesecake layer.
Red Velvet Cheesecake Bars for Valentine's Day Dessert
Next you are allowed more artistic creativity as you drag a butter knife through the red and white batters to create a romantic marble pattern that will sit atop your bars. Bake your pan for about 30 minutes at 350F, or until the outer edges begin to separate and brown. If the center of your cheesecake bars begins to crack or ripple you have cooked it a little too long and should remove the pan from the oven immediately. Allow cheesecake bars to cool entirely before cutting; use a stainless steel cookie cutter to cut shapes if desired.

This dessert not only turns out satisfying to behold, but is equally indulgent in taste with a rich later of cheesecake atop; a small wedge is more than enough!

What Daughter Says: I enjoy baking more than eating that which I bake!

Red Velvet Cheesecake Bars for Valentine's Day Dessert
Red Velvet Cheesecake Bars
***Click here for printable Red Velvet Cheesecake Bars Recipe

Baked Ham + Cheese Wheels, They're What's For Dinner Tonight!

Baked Ham + Cheese Wheels With Dijon Glaze
Momma Told Me: I don't have all day to stand around in the kitchen!

Some of my favorite childhood dishes were meals Momma whipped up with leftovers and a bit of ingenuity. They were haphazard, unlikely, meals that quickly became favorite weeknight solutions for their touch of gluttony and simple composition. There were the Tuesday night trash tacos made of just about any meat, veggie, or condiment Momma happened to have lying around in the fridge before doing the week's grocery shopping the following morning. Sometimes these 'tacos' included frozen chicken nuggets, flattened slices of bread ('tortillas') and even leftover Hamburger Helper. But my favorite was always the impromptu Bagel Pizza nights where I could build faces out of cheese and veggies under the premise we were having a family pizza night.
My point here, folks, is that meals are what you make of them, quite literally. Whether you're a busy mom just trying to serve 3 squares a day, or a laid back millennial trying to find the motivation to cook for just 2 when reaching for TV trays seems so much more simpler. It's nice to sit down to a fine dining experience at home, from time to time, but it's equally as rewarding to know you didn't slave over a meal and it still turned out amazingly delicious. The secret? Minimal ingredients- the less ingredients you have to handle the more you can enjoy the flavor of each individual ingredient, the less time you spend handling the food in the kitchen.
Baked Ham + Cheese Wheels With Dijon Glaze
Refrigerated dough can be a lifesaver, providing countless meal hacks for the modern home cook. Did you know you can even get flat sheets of rolled 'pizza' dough in the cold case at your local supermarket? This past week Black Forest Honey Ham was on special at our neighborhood deli and I picked up a pound shaved extra thin for one of my favorite quick fix meals; Baked Ham + Cheese Wheels. I prefer the flavors of ham and Swiss, but you can also pair White Cheddar or even Provolone to suit your own tastes. Preparation is as simple as rolling out a refrigerated pizza crust into a rectangular shape, layering ham and cheese, and rolling tightly. Next cut 1.5" sections off of the roll and place your prepared wheels into a casserole baking dish.
Baked Ham + Cheese Wheels With Dijon Glaze
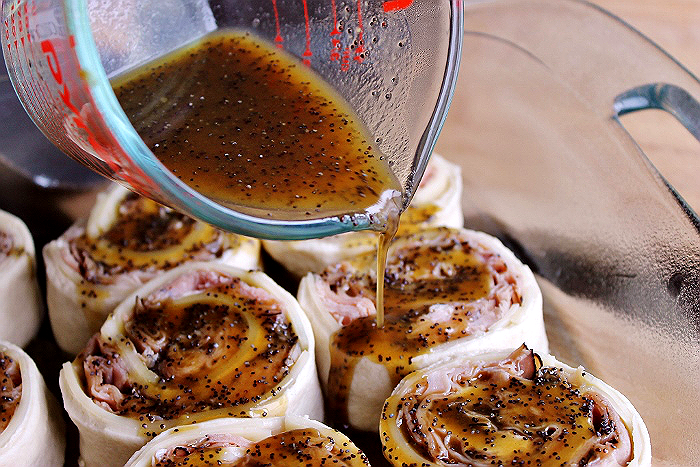
The real magic to this recipe happens when you make the extra special glaze with Worcestershire Sauce, Butter, Dijon Mustard, Brown Sugar, and Poppy Seeds. Melt them together in a microwave safe measuring cup, stir well, and pour over the top of your prepared wheels. Let the glaze work it's way into the folds of the wheels and even pool down over the sides. Bake your Ham + Cheese Wheels in the oven for 20 MINS, or until the tops begin to turn a golden brown. We like our 'crust' a little chewy, don't be afraid to go extra golden for that flaky dough!
Baked Ham + Cheese Wheels With Dijon Glaze
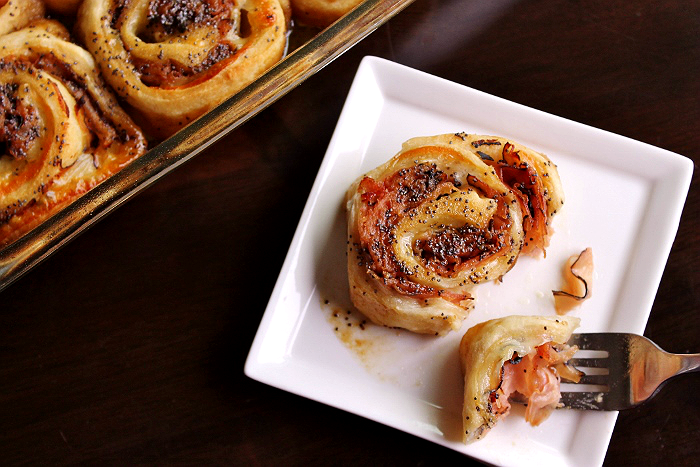
Not only do these Ham + Cheese Wheels look have a gourmet appearance, but they're incredibly easy to make ahead and freeze. One recipe's worth serves the two of us for several lunches when refrigerated, or they may be frozen after cooking and thawed at a later time. I would even wager that these would taste delicious over an egg with a cup of coffee the first thing in the morning. The possibilities are endless but your taste buds will thank you!

What Daughter Says:  Flawless food doesn't have to take 5 hours.

Baked Ham + Cheese Wheels With Dijon Glaze
Baked Ham + Cheese Wheels
***Click here for printable Baked Ham + Cheese Wheels Recipe.

An (Air) Fried Banana Split? They Do Exist! Avalon Bay Air Fryer 100W Feature #Ad

I received an Avalon Bay Air Fryer for the purpose of this review. This post was made possible by Mom Spark Media. Thoughts are my own.
Enjoy an Air Fried Banana Split with Cinnamon Fried Bananas. This indulgent dessert is made healthier with the process of air frying, which super heats air for fast circulation around food in dry cooking. No oil or grease, and all the texture and flavor! #AvalonBayAirFryer #Ad
Momma Told Me: There's no such thing as 'healthy' fried anything.

Many of you know I grew up in a household full of modern appliances and gadgets. It seemed, growing up, every other month there was a trip planned to the local Sears showroom or Dak outlet to shop for a new kitchen or home entertainment 'toy.' However, one thing we never had was an Air Fryer. Now, that may be in part due the fact my father, to this day, swears there is quite simply something 'not right' about calling a food 'fried' when it has not in fact been fried in a fat. Or perhaps it is because the very notion of 'fried' food has such a negative connotation, health wise, Momma never dared encourage the term be used on a regular basis.
Enjoy an Air Fried Banana Split with Cinnamon Fried Bananas. This indulgent dessert is made healthier with the process of air frying, which super heats air for fast circulation around food in dry cooking. No oil or grease, and all the texture and flavor! #AvalonBayAirFryer #Ad
Regardless, as a young girl, I made several attempts to bargain for fried foods, every year at the County Fair. In fact, there was an entire booth dedicated to frying the most delicious foods (most of them already quite sinful in themselves.) From funnel cakes and candy bars to deep fried Kool-Aid, I'd stare wide eyed up at the colorful list of treats. One year I felt I'd grown rather smart- I decided I would ask for the fried fruit basket, a selection of strawberries, bananas, and fried kiwis. Momma was quick to shoot that down, proclaiming, "There is no such thing as healthy fried food, it is ALL bad for you!"
As an adult I've always felt quite guilty putting a french fry in my mouth, or eating 'fast food' options I know are cooked in oil. At home I seek alternative recipes that often involve broiling and baking in the oven, but it's never quite the same. Let's just say, inevitably, one side of whatever I'm cooking always turns up more well done than another.

Enter the Avalon Bay Air Fryer 100W- A highly affordable, and compact, appliance who's only drawback has been the capacity of preparation allowed. I suspect, however, the compact size and 2-3 serving preparation lends itself to the efficiency of the air frying process. And just what is Air Frying? It's an entirely dry cooking process which uses a top grill to circulate heated air around the food of your choice via a suspended basket. This circulated air is so super-heated it surrounds every surface with an evenly distributed blanket of 'cooking' air.
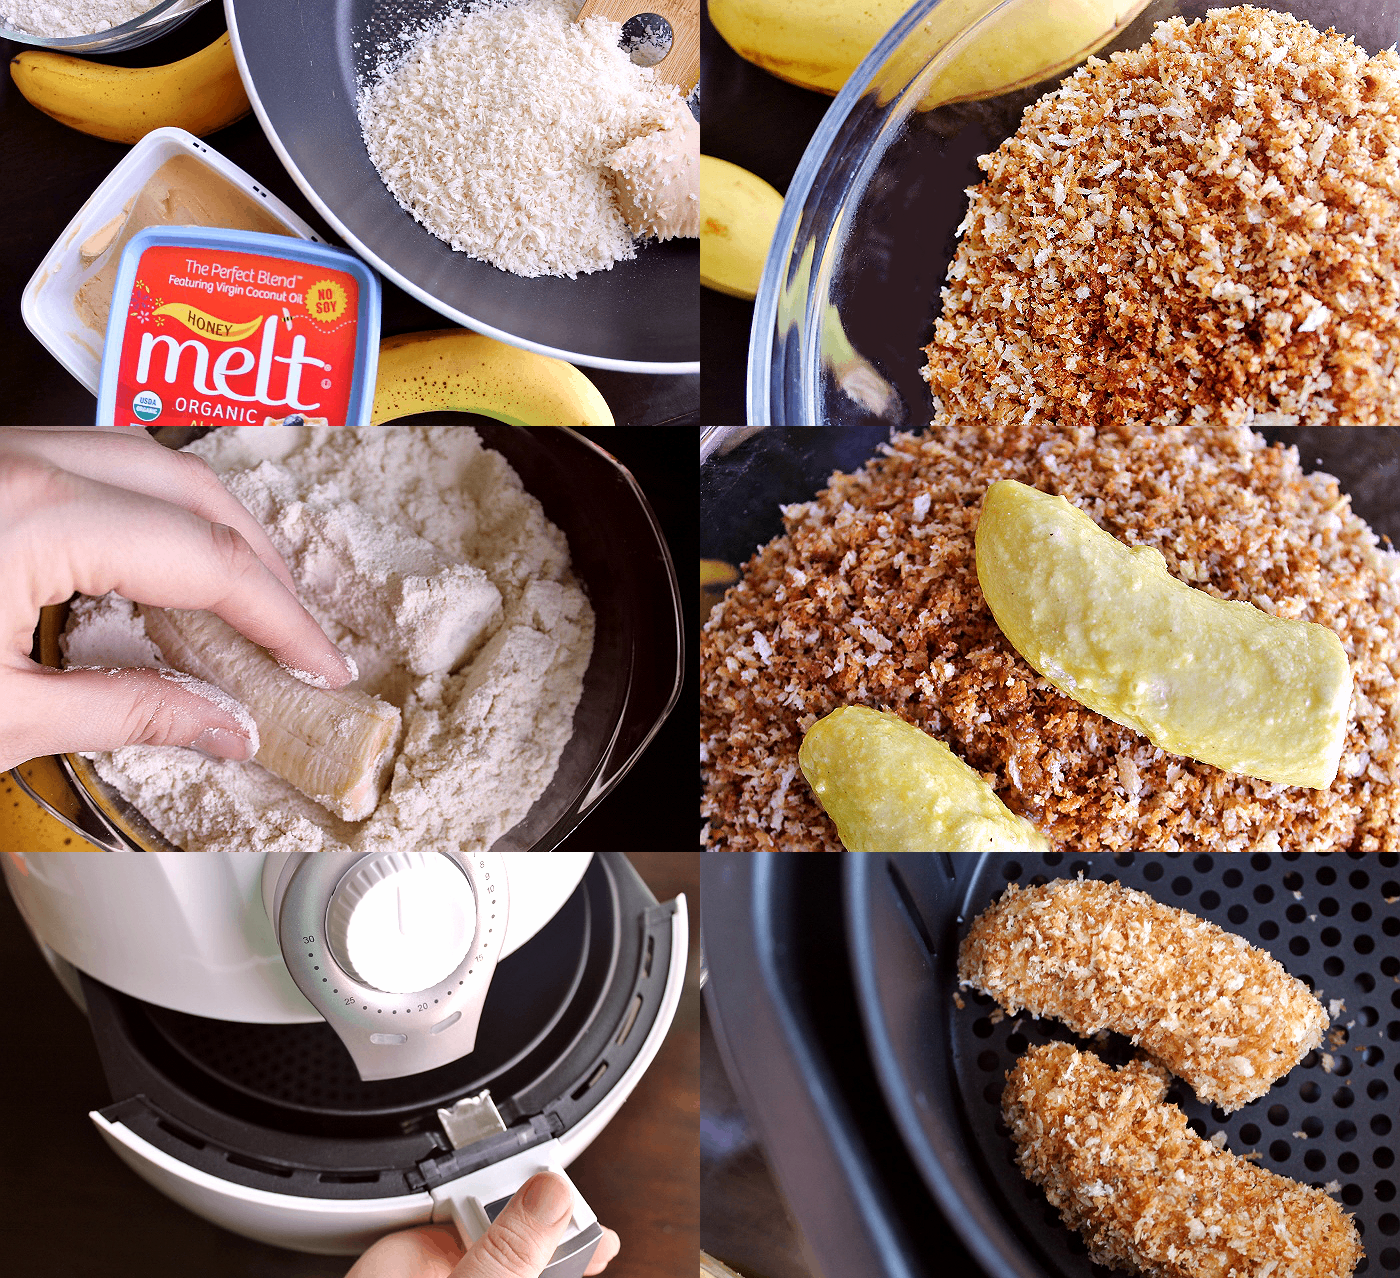
The process for Air Frying Cinnamon Bananas with the Avalon Bay Air Fryer 100W. #Ad
You won't get the flavor my father attributes to 'fried' foods, but you will get efficiently cooked food with amazing texture, every time. Best of all the process is quite consistent, so not more burnt or dried pieces. And the unit itself is extremely intuitive to use, with a temperature guide located on the top, offering general heat and timing guidelines for common foods. Cooking can begin from a cold-start appliance, simply add 2-3 minutes to the timer and ensure that the proper temperate is set. The Avalon Bay Air Fryer 100W will do the rest!
Enjoy an Air Fried Banana Split with Cinnamon Fried Bananas. This indulgent dessert is made healthier with the process of air frying, which super heats air for fast circulation around food in dry cooking. No oil or grease, and all the texture and flavor! #AvalonBayAirFryer #AdEnjoy an Air Fried Banana Split with Cinnamon Fried Bananas. This indulgent dessert is made healthier with the process of air frying, which super heats air for fast circulation around food in dry cooking. No oil or grease, and all the texture and flavor! #AvalonBayAirFryer #Ad
One of the first things I made with my new Air Fryer was what I call a Fried Banana Split. Using simply ingredients you likely already have in your pantry I added an amazing texture to a classic banana split by Air Frying Cinnamon Bananas. For a simulated 'fried' coloring you can even plan cook your bread crumbs in a Vegan Coconut Oil Spread prior to breading! Not only did the Honey Coconut Oil Spread smell amazing melting in the pan but it gave my air fried bananas the perfect color! The rest as as easy as dipping ripe bananas in flour, egg, and bread crumbs (we use Panko,) then dusting in cinnamon sugar. The Avalon Bay Air Fryer did the rest!
Enjoy an Air Fried Banana Split with Cinnamon Fried Bananas. This indulgent dessert is made healthier with the process of air frying, which super heats air for fast circulation around food in dry cooking. No oil or grease, and all the texture and flavor! #AvalonBayAirFryer #Ad
Always remember that your Air Fryer needs to 'dry cook' ingredients to work most effectively, so work with a dry-wet-dry pattern when breading foods. This will mean a flour, egg, crumb layer in most recipes. In just 10 minutes, from a cold-start appliance, our Cinnamon Air Fried Bananas were ready. I simply removed the Air Fryer tray, separated the basket via the easy lift button, and shook and excess crumbs through the basket's grate into the collection chamber below. And cleaning up the appliance took 2 minutes- no messy grease!

Even if you're not a big banana person, these churro like bananas hit the spot, warm on the inside, against a pile of ice cream and fresh fruit. It's definitely the BEST way to enjoy a banana split with just a little extra indulgence and no extra guilt. In fact, you can cut up to 80% of the added fat out when air frying, over traditional oil based frying. What would you love to make first in an Air Fryer?

What Daughter Says: Enjoy the fried texture without the fried guilt when you Air Fry.


Enjoy an Air Fried Banana Split with Cinnamon Fried Bananas. This indulgent dessert is made healthier with the process of air frying, which super heats air for fast circulation around food in dry cooking. No oil or grease, and all the texture and flavor! #AvalonBayAirFryer #Ad
Air Fried Cinnamon Bananas
***Click here for printable Air Fried Bananas Recipe.

How to Blanch Brussels Sprouts For Freezing

 I received kitchenware from KitchenAid in hopes that I may share a feature including it on my website. No further compensation was provided. All photos and opinions are copyright Momma Told Me Blog 2015.
How to blanch Brussels Sprouts for shocking and flash freezing. Enjoy fresh Brussels Sprouts any time of the year!
Momma Told Me: I'm not exactly cooking for the president.

Growing up there were vegetables with every meal, and usually more than one. Unfortunately, Momma made it amply clear that she had no patience for the cost, or shelf life, of fresh vegetables when cooking for such a small family. I'd wager near 90 percent of the vegetables consumed in my childhood were store-bought frozen or canned; and it's hard to instill a passion for veggies when the highest quality is determined by a manufacturer. Serving fresh vegetables, direct to table, is the surest way to help children and loved ones fall in love with the flavors and textures of these important dietary components. After all, nothing was less appealing than a pile of mushy microwaved carrots in neon orange goop!
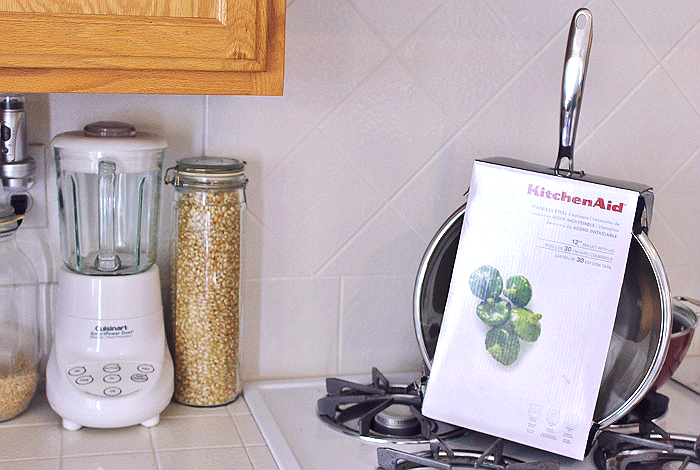
KitchenAid Stainless Steel 12" Skillet #ad
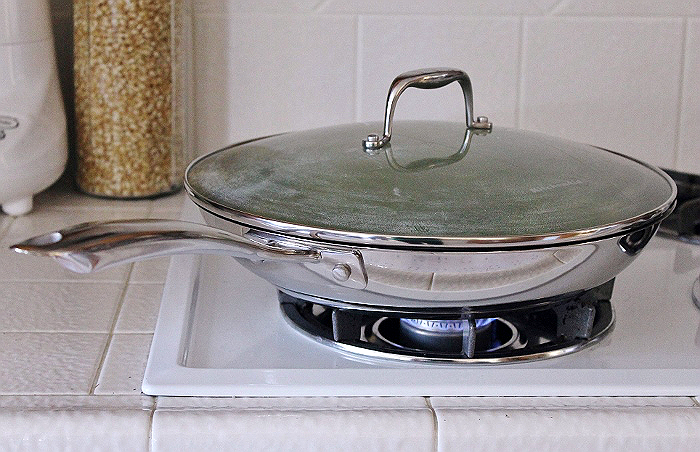
I am far from a master chef, and I certainly reach into my freezer for a frozen pizza more often that I'd like- but I am constantly striving to learn new tools and techniques that will ultimately help me bring fresher food to my family more often. When I received the gorgeous KitchenAid 12" Stainless Steel Skillet with Glass Lid I was immediately intimidated. A skillet of this size and quality could easily become the most used tool in my kitchen for everything from pancakes to sauteed vegetables but it's significant size and heavy build meant I would need to step-up my kitchen skills. Not only is this gorgeous bad boy made with riveted stainless steel handled and a tempered dome glass lid, but it is oven safe up to 500F, opening a whole new world of cooking techniques I look forward to exploring in 2015.
How to blanche Brussels Sprouts for shocking and flash freezing. Enjoy fresh Brussels Sprouts any time of the year! #ad
For now, my first mission was to take some of the beautiful Brussels Sprouts flourishing in season through the end of Fall, and preserve them in Make-Ahead-Meals, and side dishes for the coming Winter. Considered a cabbage, Brussels Sprouts are one of the more criticized side dishes from the vegetable arena. If they are not cooked properly they become dark, tough, and plain unappetizing. Blanching Brussels Sprouts is a great trick to seal in that fresh green snap of color and keep your vegetables as fresh as first pick, even months down the line.

1. Begin by trimming your Brussels Sprouts close to the stem and removing any yellowed leaves. If your sprouts are extra large you may wish to halve them. In a colander, give them a good rinse in room temperature water.
How to blanche Brussels Sprouts for shocking and flash freezing. Enjoy fresh Brussels Sprouts any time of the year! #ad
2. Bring a large pot of salted water to a rolling boil and slowly add your Brussels Sprouts, so as not to splash any hot water which may cause burns.  The water will die down as you add the sprouts, be sure to return it to a boil once all sprouts have been added. Allow your sprouts to boil until crisp and tender (about 3-4 minutes depending on size.) You should be able to pierce the sprout with a fork, allowing a little give, but not cutting clear through.
How to blanch Brussels Sprouts for shocking and flash freezing. Enjoy fresh Brussels Sprouts any time of the year!
3. Carefully transfer Brussels Sprouts from boiling water to a ice bath with a slotted spoon or tongs. This will 'shock' the vegetables, halting the cooking process. Remove the sprouts from the ice bath after 10-20 seconds and place them in freezer safe bags for frozen storage, or straight into a saute or roast pan for immediate preparation and serving. When blanched properly and sealed air-tight, Brussels Sprouts will maintain the peak of freshness for up to 6 months in a freezer, making them perfect for Make-Ahead-Meals and least minute side dish portions.
How to blanch Brussels Sprouts for shocking and flash freezing. Enjoy fresh Brussels Sprouts any time of the year!
Getting the pan to a consistent and quick rolling boil was easy with my new KitchenAid 12" Stainless Steel Skillet, and I love that I can transfer the final batch of blanched Brussels Sprouts directly into the oven with a little bit of butter and garlic. Learning to pre-cook, or blanch and shock fresh vegetables at the peak of freshness is a great skill to master for chefs in busy home kitchens where preparation time is often in short demand. For more time saving tips to great food check out our 7 Meals In 70 Minutes series, complete with printable shopping list and instructions, and click the image below to be taken to our Honey Parmesan Pork Roast Recipe! For more great tips and cooking tools follow KitchenAid on YouTube and Facebook.

What Daughter Says: Learn how to cook first class for your family with simple kitchen shortcuts such as blanching vegetables for freezing.


Honey Parmesan Pork Roast with Blanched Brussels Sprouts and Wild Mushrooms

Smart Cooking w/ Ingrid Hoffmann's Ropa Vieja + Mexican Rice Recipes

Ingrid Hoffmann
Momma Told Me: Smart Buys require Smart Buyers.

Growing up my family never owned a business, or coordinated large family get-togethers. For the most part Momma fed and entertained a party of 3, 365 days a year; and that alone was a challenge. With a disabled parent, and one income, my family relied greatly on Momma's skills to coupon and shop sales to make our budget stretch through the rough patches. Whenever an unexpected expense would pop up, in the form of a medical bill or household repair, I knew we'd be in for some creative meal planning through the following weeks. One of Momma's biggest tricks was buying in bulk, or making a 'smart buy', that is to pay a little more, for a larger quantity of an item, up front, in exchange for the added value over time. In addition to shopping 'club' based stores, she would frequent Smart & Final, where she could stock up on everything from fresh produce to frozen smart buys that would help her make multiple meals at once. She would go on these cooking crazes, where it seemed she wouldn't leave the kitchen for days; and our freezer would magically become stocked with ready to eat, homemade, meals.
Smart and Final
Today I choose Smart and Final for the very same reasons; there is no club membership required and I can save valuable pennies buying everyday items in bulk quantities. For example, my family goes through Teriyaki Glaze like it's water, so we buy our Kikkoman Glaze at Smart & Final, where we pay $.09/oz less than buying individual retail bottles. (And when we eliminate the extra packaging, we're helping out the Earth as well.) Recently I got the 'heads up' on a very exciting promotion that pairs Smart & Final with Procter & Gamble (P&G) favorite products. Running February 13-19, 2013, Smart & Final customers who purchase $25 or more in participating P&G brand products will qualify to receive a free 5.5qt T-Fal Caldero from celebrity chef Ingrid Hoffman's Simply Delicioso cookware line! It's as simple as stopping in to your local Smart & Final store between 2/13-2/19, purchasing $25 or more in the following brands; Always, Bounce, Bounty, Charmin, Cheer, Crest, Dawn, Downy, Dreft, Febreze, Fixodent, Fusion, Gain, Gillette, Glide, H&S, Herbal Essence, Ivory, Joy, Metamucil, Mr.Clean, Olay, Old Spice, Oral B, Pantene, Pepto Bismol, Prilosec, Secret, Swiffer, Tampax, Tide, and Vicks. Then simply print out and mail the rebate form, with required receipt, before 2/26/2013, to receive your Ingrid Hoffmann T-Fal Caldero and Recipe Cards (a $39.99 value) in the mail!

I had a chance to receive Ingrid Hoffman's T-Fal 5.5qt Caldero in advance of the promotion and headed straight to my local Smart & Final to shop for some ingredients to create an inspired recipe. The Simply Delicioso Caldero happened to match my other cookware beautifully, in it's crimson red finish, and features extra deep walls that make it suitable for everyday cooking from browning and frying to pasta and soup making. On the very bottom, inside, the Caldero is a heat indicator that turns bright red when the Caldero has reached the right temperature for cooking. It's slick non-stick surface and extra wide handles make it the perfect companion for long-term recipes that require hours of simmering on the stove; making it perfect for my chosen recipes, Pork Ropa Vieja and Mexican Rice, adapted from Ingrid Hoffmann's library of Cuban cuisine recipes. While the original Ropa Vieja recipe calls for beef, locating Flank steak proved exceedingly difficult, even in my predominantly Mexican local community. I chose to substitute this with a Pork Butt Roast, that shredded as intended with the Flank Steak.
Pork Ropa Vieja Part 1, Delicioso Adobo Rub

Ingredients:

* 2 TBS Garlic Powder
* 2 TBS Onion Powder
* 2 TBS Dried Oregano
* 2 TBS Lemon Pepper
* 2 TBS Parsley Flakes
* 2 TBS Achoite Powder (From Annatto Seed)
* 1 TBS Cumin
*** 1/2 C Worcestershire Sauce


Combine all dry ingredients, then introduce to Worcestershire Sauce to make a paste.
Pork Ropa Vieja Part 2

Ingredients:

* 6lbs Boneless, or Trimmed, Pork Butt Roast
* 6 Bottles/Cans of Beer
* 1/2 C Canola Oil
* 2 Medium Yellow Onions, Chopped
* 2 Red Bell Peppers, Cored, Seeded, Ribbed, Chopped
* 2 Green Bell Peppers, Cored, Seeded, Ribbed, Chopped
* 6 Scallions, White and Light Green Parts Only, Chopped
* 28oz Canned, Diced, Tomatoes
* 6oz Can Tomato Paste
* Salt and Ground Pepper to Taste

Directions:

1.) Cut the Pork Butt into large and even chunks and place them in a large bowl. Rub Adobo Paste into meat generously. Add beer and allow to marinate in fridge 15 minutes.
2.) Transfer the meat, and marinade, into a large pot and bring to a boil over Medium Heat. Reduce heat to Low, Cover, and simmer until the meat is tender (about 3 hours). Be sure to check on meat regularly to ensure the liquid has not boiled off; if fluid is low, add an additional bottle.can of beer.
3.) Remove the meat from the pot and reserve 2C of cooking liquid. Using 2 forks shred the meat and set it aside. Be careful the inside of the meat will be very hot!
4.) Heat oil in large, deep, skillet over Medium-High heat. Add onions, peppers, scallions, and tomatoes and cook until soft, about 10 minutes. Add tomato paste and meat to the pan along with reserve cooking liquid. Cover and simmer until juices cook down, about 15 minutes. Serve over ice and enjoy!
Mexican Rice

Ingredients:

* 2.5 TBS Olive Oil
* 1 Small Onion, Finely Chopped
* 2 Garlic Cloves, Finely Minced
* 2 C Long-Grain White Rice
* 1 Bay Leaf
* 2 C Canned, Chopped, Tomatoes
* 2.5 C Low Sodium Chicken Broth

Directions:

1.) Heat oil in a medium saucepan over Medium-High heat. Add onions and garlic and cook until onions are soft (about 2 minutes). Add Rice and Bay Leaf. Cook and stir until the rice is opaque (about 2 minutes).
2.) Add tomatoes and broth, stirring to combine. Bring to a boil, then reduce heat to Medium-Low.
3.) Cook until the liquid has evaporated to just below the level of the rice (about 10 minutes). Reduce heat to Low, cover and cook until the rice is tender (about 20-25 minutes). Uncover and fluff with a fork. Serve as desired.
#ChooseSmartmexican recipe
Cooking with the Simply Delicioso T-Fal Caldero couldn't have been more convenient; versatile enough for both of these recipes, and it proved especially well suited for cooking large portions! Ingrid Hoffmann's inspired recipes helped put an authentic Mexican-Cuban meal on my family's table, with plenty of leftovers to share with the neighbors (and that's what good cooking is really all about, right?) Be sure to mark your calendars to stop into Smart & Final between 2/13-2/19 to purchase your $25 in participating P&G family products and claim your T-Fal 5.5qt Caldero; you won't want to miss out on this amazing deal! Stay up to date with the chain's upcoming promotions and sales by following Smart & Final on Twitter.

What Daughter Says: Take advantage of Smart Buys and Smart Promotions when you follow your local Smart & Final!


I am a member of the Collective Bias®  Social Fabric® Community.  This shop has been compensated as part of a social shopper insights study for Collective Bias® and Smart&Final.  #CBias #ChooseSmart #SocialFabric.