Momma Told Me

Blog Archive

Why I'm #TeamDishCloth + D.I.Y Burner Covers + Photo Transfers Tutorial

This shop has been compensated by Collective Bias, Inc. and its advertiser. All opinions are mine alone. #MySpringClean #TeamDishCloth #CollectiveBias
Tips to keep your kitchen and home clean with #TeamDishCloth and how to transfer photos onto hard surfaces tutorial. #MySpringClean #AD
 We have 2 basic rules of the kitchen in our house:

#1: Unless you cooked the meal you cannot complain about what is in it or how it tastes.

#2: Dessert cannot be served until all dishes are done, and put away.

It's funny, really. As many of you know we recently moved from our tiny condo into our new (to us) house and we have quite the gorgeous new stainless steel dishwasher. It came with the house. We've been here 5 months and I have yet to use it.

What can I say? The thought of dishes sitting, even rinsed, partially dirty in a metal box in my kitchen just doesn't feel right. So long as I've lived on my own (or attached without kids) I've always just done my dishes after each meal. It's habit, really. But, when you do all those dishes by hand you get a little....particular about the way you want them done.
Tips to keep your kitchen and home clean with #TeamDishCloth and how to transfer photos onto hard surfaces tutorial. #MySpringClean #AD
Momma actually raised me to be loyal to one brand when it came to my dishes and the kitchen sink. Scotch-Brite™ has been a trusted name in our family for generations (I have the photos from pot lucks and baking marathons to prove it). There wasn't a night that passed where our bright green or blue Scotch-Brite™ sponge didn't get put to good use scrubbing up the night's culinary experiment messes.
But I, I am #TeamDishCloth. What is Team Dish Cloth? Well it's the kitchen debate almost as heated at the bathroom's 'over or under' toilet paper argument. There's no right or wrong answer, of course, it's all personal preference- and, in my house the Scotch-Brite® Scrubbing Dish Cloth is the hero of our kitchen. In fact, I'd say it's the hero of the house- there's no cleaning task our scrubbing dish cloths won't conquer since they're machine washable and feature both a gentle cloth side and a tough textured scrubbing side. I use my scrubbing dish clothes in crafts, annual cleaning sprees, and, of course for tough kitchen messes.
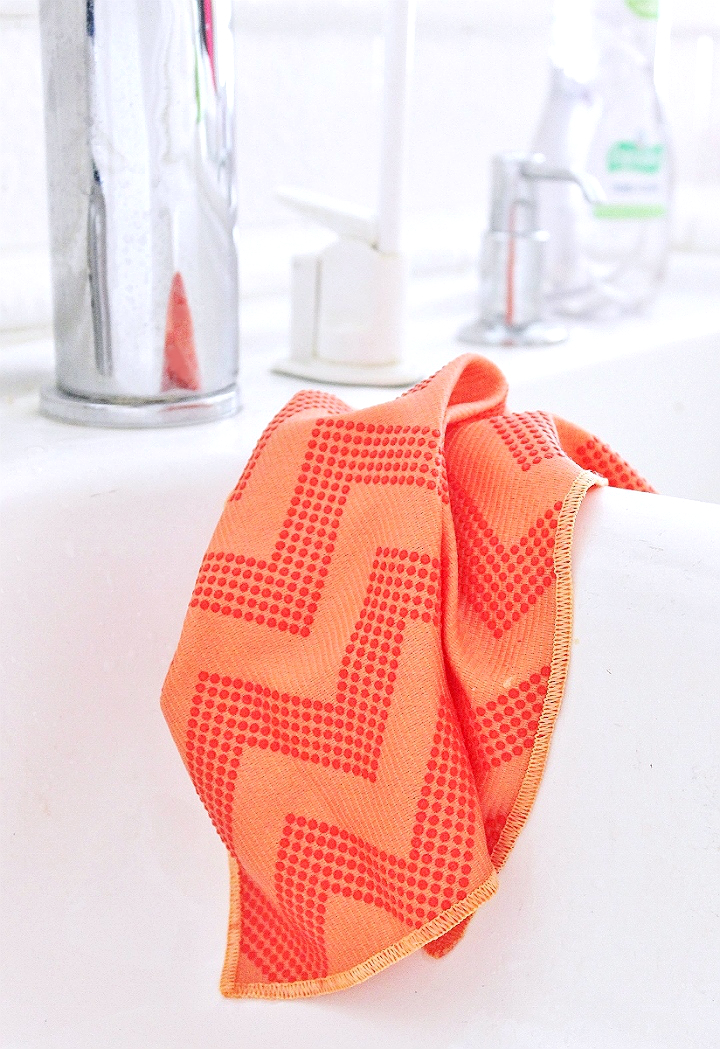
Naturally I want our kitchen to have as much personality as the rest of our house. We're still 'settling in' on the whole 'turning a house into a home' front, but small additions here and there really help make things more personal and cozy. You guessed it- I crave pops of color in my kitchen, too. And the Scotch-Brite® Scrubbing Dish Cloths come in beautifully rich colors such as Navy, Coral, and Mint, when you shop them at Target. You'll find them in the cleaning supplies aisle next to an assortment of other modern design friendly kitchen and home cleaning aid innovations from Scotch-Brite®. As we move into Spring I've been really inspired by the Coral color and love how it matches the fresh Spring blooms we pull in from the garden!
http://cbi.as/7sjq6http://cbi.as/7r9phhttp://cbi.as/7r9os
Speaking of inspiration- Check out the buttons above to take advantage of some awesome Scotch-Brite® promotions, including the Scrubstakes with a $20,000 kitchen remodel prize up for grabs, and some exclusive savings from Coupons.com and Ibotta!
In fact my scrubbing dish clothes even inspired me to dress up my kitchen and stove a little. While on my most recent shopping trip to Target I happened to pick up a new set of white burner covers and some classic white coffee plates. I've been wanting to play with image transfers to hard surfaces for a while and, with Mother's Day coming up, this seemed like the perfect time. After all, my photo albums were still at easy access from the move.
Transfer photos and images with freezer paper and an injet printer- custom photo plates. #MySpringClean #TeamDishCloth #AD
My initial idea of custom coffee plates, with vintage photo transfers, required minimal supplies:

Freezer Paper
Old Photos in Color or Black and White
Clean White Plates
Large Metal Spoon
Scissors

I researched this technique a lot, like a lot a lot, before attempting it- I didn't find much information. The concept of transferring an image to a shiny/sealed surface without a bunch of chemicals or special transfer paper is overwhelming but the Freezer Paper technique will work.

Yes you really can cut freezer paper to the same size as printer paper (8.5" x 11") and run it through your printer and print with no problem. I suggest using a sharp edge (box cutter) to make sure you have precisely cut 'pages' and have found that an ink jet printer works best. You can scan old photos to your printer, or print directly from digital files on your PC. Keep in mind the grainy quality of older photos will contribute to the nice handmade look of the finished product, and darker images tend to work better- but dark backgrounds may wash out your transfer.

Print directly onto the waxy (shiny) side of your  freezer paper. Allow the printed images to dry for 2-3 hours. They will fade, this is normal. Carefully cut out/around your images keeping in mind the ink will smear if touched. Gently lay your image on top of your plate, printed side down, where you want it positioned. With force hold the image down and in place as you use the back of a wide spoon to rub/transfer the image. Keep in mind any movement may cause the image to distort, or the transfer to move. This technique takes practice and patience but clear and whole transfers can be achieved.

If you mess up or feel your transfer wasn't sharp enough simply wash off the ink with some dish soap, dry, and try again. The image will NOT remain permanent unless sealed.

***There are very few 'sealants' that will preserve your image while making the plate safe to touch food. Research your seal/top coat before buying- Shellac is my preferred type of seal as it dries safe enough to seal children's toys and kitchen surfaces for food contact.

To transform my kitchen with a little bit of sass and style I knew I wanted to put that empty space on my stove to good use. I've always thought burner covers to be quite useful, but generally unattractive. Of course, for those of you with infrared stoves, this doesn't apply to you- but this transfer technique will work on pretty much any hard surface. Best of all, this technique can be made permanent, or considered temporary depending on whether you seal and finish or not. This makes it a great technique for holidays and parties. You will need:

A Clean White, Hard Surface (In Our Case, Burner Covers)
A Black And White Image/Design Printed By An Inkjet Printer***
Matte Waterbase Craft Sealer
Water
Scotch-Brite® Scrubbing Dish Cloth 
Scissors

***Grab our FREE Cupcake template here, our FREE Eat Or Starve template here, and our FREE Fun Phrases template here. Please note the templates are inverted so the words transfer legibly onto your projects.
There is a bit of debate as to whether you need to let your ink settle before beginning the transfer process. I allowed my pages to settle overnight THEN realized I hadn't inverted my templates and had to rush to re-print. So, I didn't really allow my pages to dry much more than 15 minutes before beginning- this seemed to work fine.

I also want to note that I printed on high quality color- you're going to want to print on high quality black and white- I found that some 'red' tones of color bled during the last steps of this process as a result of my printer 'mixing' the black color, rather than just using black ink.

Trim your image as close as you can to allow for minimal work later on.
D.I.Y Burner Cover Transfers- How To Transfer Printed Images to Hard Surfaces Tutorial #TeamDishCloth #MySpringClean #AD
Brush a light layer of your matte waterbase craft sealer directly onto the printed side of your image. You don't have to go 'super thin' but you don't want gobs of the sealer buckling the paper and creating bubbles, either.

Carefully lower the printed/sealer side down in position on your surface and gently smooth out any bubbles/ripples. Allow the paper to dry entirely (so as to create complete resistance if you attempt to peel it up). This took about 45 minutes outside in direct sun. Leaving the paper to dry overnight will not harm it, if desired.
D.I.Y Burner Cover Transfers- How To Transfer Printed Images to Hard Surfaces Tutorial #TeamDishCloth #MySpringClean #AD
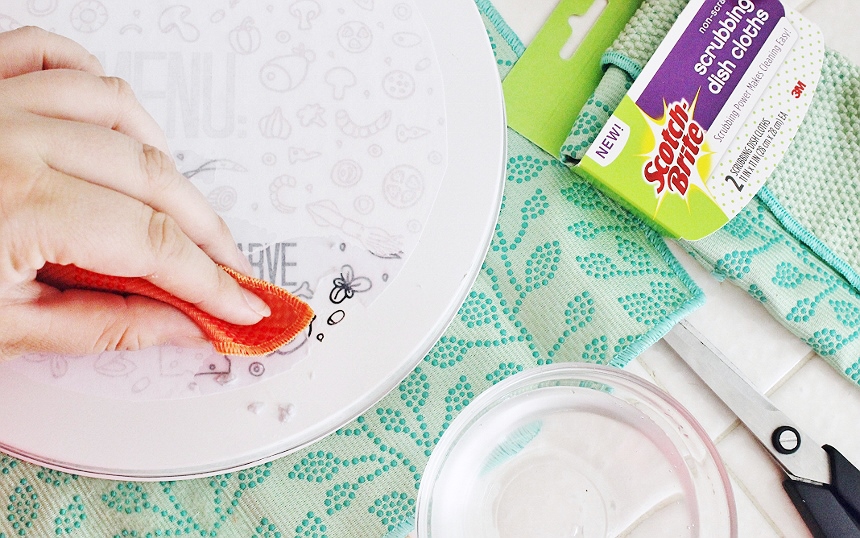
Next is the magical part- removing the paper to reveal the 'transferred' image beneath! With a clean bowl of water gently dab the corner of your scrubbing cloth in water and begin rubbing away the paper. Make slow circular motions with light pressure. If you feel you are removing too much paper at once, or it is gumming up, flip to the soft side of your cloth and continue. I specifically prefer Scotch-Brite® Scrubbing Dish Cloths for this project thanks to the dual sides and the fact that they will NOT scratch up my surfaces. This process will take 30 minutes or more for projects similar in size to these burner covers.

 Patience will reveal a nice clean, solid image so take your time and feel free to change sections when you feel you are beginning to overwork. Ideally you will remove all of the paper layer of your transfer, leaving the thin, hard and dry, layer of sealer with the ink trapped inside. Keep in mind the sealer is water-based and WILL rub off of you work your way down through the layers too fast/rough.
D.I.Y Burner Cover Transfers- How To Transfer Printed Images to Hard Surfaces Tutorial #TeamDishCloth #MySpringClean #AD
I really enjoyed this technique of transferring images with printer paper and craft sealer- it's definitely something that looks very sharp and can be perfected over time. Since I liked the minor imperfections in my images (where I got a little overzealous with my rubbing) I decided to seal my burner covers with a food-safe Shellac coat. I guess you could say they cover up my 'ugly' burners quite nice- but you and I both know those burners are spotless underneath thanks to my Scotch-Brite® Scrubbing Dish Cloth!.
https://drive.google.com/file/d/0B-4tjJzvAMc9ZmlFTy1idDI1cms/view?usp=sharing
Both the freezer paper and printer paper techniques can be used on a variety of hard surfaces- they're especially great for coffee mugs and handmade gifts. If you still need a little inspiration feel free to grab out funny phrases, inspired by Mother's Day, and play around with the techniques yourself! Click HERE to grab the fun FREE printable from above!
D.I.Y Burner Cover Transfers- How To Transfer Printed Images to Hard Surfaces Tutorial #TeamDishCloth #MySpringClean #AD
So there you have it- how I'm dressing up, and cleaning up, my kitchen this Spring with a little help from #TeamDishCloth and the Scotch-Brite® Scrubbing Dish Cloth. Not convinced scrubbing dish cloths are the side for you? Check out more fun recipes and projects to inspire you to declare a side on this great kitchen debate- visit the Social Hub! Even more exciting enter the Scotch-Brite Scrubstakes for your chance to win $20,000 towards a kitchen makeover and grab a special printable coupon good for $1 off 2 Scotch-Brite products (While supplies last) and iBotta rebate offer! Now, tell me what you would do with $20k to renovate your kitchen!


Exploring Meal Kit Delivery: Why It Works For Us

 This content has been sponsored by HelloFresh. Regardless the images an opinions contained below are genuine and copyright Momma Told Me Blog 2017.
Thanks to Momma's helicopter parenting style I was taught essential cooking skills from a very young age.

Okay, what I was really taught was how to do 'prep work' such as washing and peeling potatoes, mixing marinades, trimming chicken, and measuring ingredients. Long before we had magical tablets to bark directions at us in the kitchen there was me, the loyal daughter reading off fine print from Betty Crocker's cook book. Of course I picked up some essential cooking skills too- I learned to add cold oil to a hot pan to prevent sticking, that meats continue to cook after being removed from a hot surface, and to always taste your food when cooking. Things, in my adult life, I've taken for granted as common knowledge. That was, until I met Jay.
https://www.hellofresh.com
In the 5 years we have been together Jay has never made a meal from scratch. It's not from laziness, or lack of wanting, but from a deep rooted fear of mucking things up. I like to think he has this vision of the entire kitchen engulfed in flames from a pot of water catching on fire. So, in our household that has been the main obstacle to eating delicious home cooked meals on a nightly basis. That and the fact that I simply don't have the time to go into the store shop meal-by-meal each week. Schedules change, and some nights I'm happy if I remember to change out of my clothes before bedtime. And let's not discuss the cost and waste involved in trying to meal plan for 2 people 7 nights a week.

So, for those reasons, and so many more, we've been experimenting with the ever-so-popular meal kit delivery trend. There are many companies out there offering these types of services and it can be overwhelming to know where to start or what to expect. I've found HelloFresh is the perfect place to dip your toes, with an easy to navigate online portal and a very relaxed subscription format.
You'll start by heading online- If you've never ordered from HelloFresh before you can enjoy $30 off your first box, plus free shipping, with my exclusive code: MOMMAJ30.

Once online you'll set up a very basic profile identifying whether you typically are shopping for a couple or a family (3-4 people) and your personal palette preferences (classic gourmet meals, family styled meals, or vegetarian). At that point you'll be given a preview of the upcoming week's meals and allowed to select the number of meals which you want delivered (3, 4, or 5). I especially like this option because it gives me the chance to sort of customize and plan my meal plan for the upcoming week. If I was planning on cooking chicken outside of my HelloFresh box then I might decide to go with another protein based meal during my selection process.
https://www.hellofresh.com
You'll choose a delivery date. In order to ensure the freshest ingredients, and prompt delivery, there's only a 3 day delivery window during the week. Of course your box and ingredients will last many more days beyond delivery, when stored properly in your home, so you will have some freedom to plan your meals and nights.

You are never locked into a commitment or contract- After your first box you can delay or cancel as desired- We like to enjoy a meal delivery box once or twice a month as our schedule demands. You can use HelloFresh as often or as little as fits your family's schedule. Pause your deliveries for up to 5 weeks, or opt-out of deliveries on a week to week basis if desired.
When your HelloFresh box arrives it might seem overwhelming and exciting all at once. It's a big box! Inside you'll find the key ingredients for each meal packaged in individual boxes (sectioned by meal). I like to keep everything in their appropriate box until we're ready to cook each meal but not all fridges will accommodate three or more of these smaller boxes. Regardless you will want to check the contents of each box and cross reference the provided ingredients lists to make sure everything arrived in good order. Proteins are not shipped and stored in the smaller meal boxes- we almost threw ours out! Make sure to check under the meal boxes, in between the ice packs, to remove your proteins upon unpacking.
Your box will also include sturdy, illustrated, recipe cards for each of your meals. On this recipe cards you will find the provided ingredients, and portioning, any necessary ingredients or supplies you need to prepare (bowls, cling wrap, water, etc) and step by step instructions to prepare your dishes.

If you are receiving the family (3-4 person) sized boxes most of your ingredients will be doubled. This will be noted on the recipe card under the ingredients but does not always translate to the instructions, which are written for the general base (2 person) recipe. I suggest reading your recipe card ahead of time to make sure any ingredient portioning or prep-work is addressed before you're in the middle of cooking your meal.
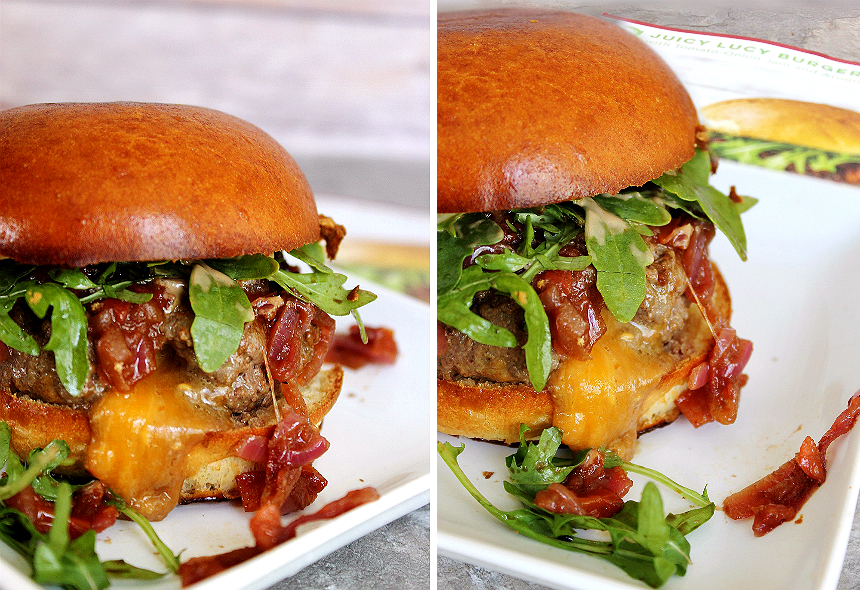
Stuffed Juicy lucy burgers with HellowFresh #AD
One of the things I love especially about HelloFresh is how well the instructions are timed. One person can effectively manage their time in the kitchen without wasting a moment and efficiently prepare a meal with minimal to no experience. Nearly all of your ingredients provided will require some sort of prep on your part, but the recipe card integrates this prep into the instructions at timed intervals that make the most of down time (IE: where your buns are toasting or your water is boiling).
Stuffed Juicy lucy burgers from Hello Fresh #AD
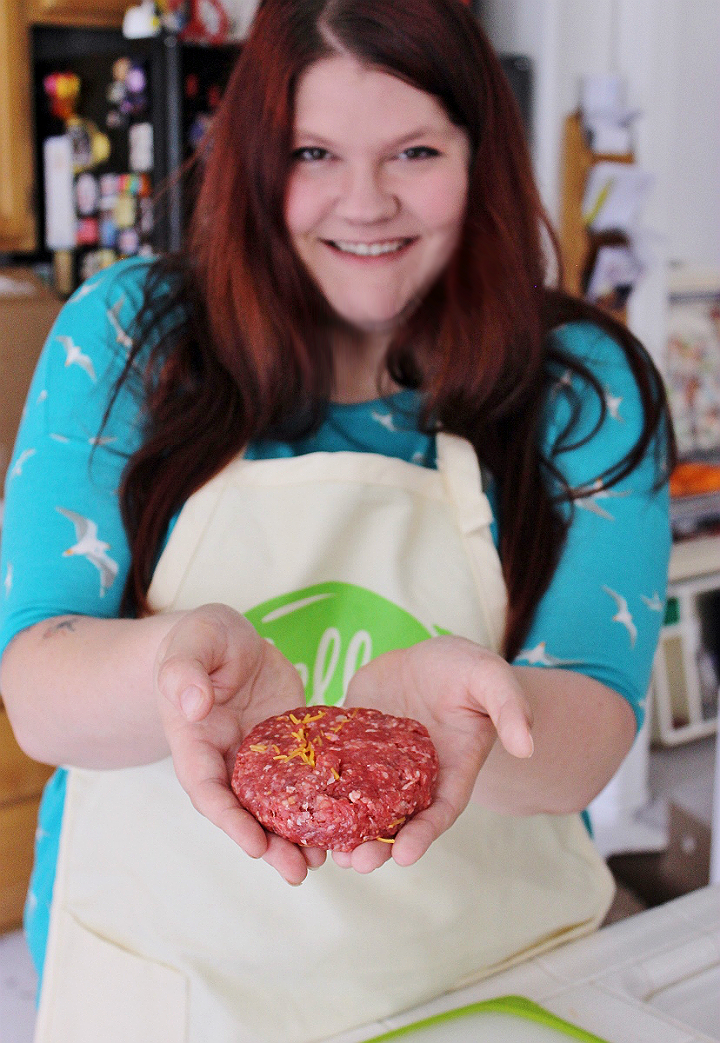
I also love how fun HelloFresh is for both new home cooks and seasoned chefs, such as myself. I've always wanted to make stuffed burgers from scratch but never knew quite where to begin with flavor profiles or the filling. HelloFresh's Juicy Lucy burgers broke the entire process down. I now have the confidence to make them again, perhaps even with a few of my own twists!
And the food? I find the flavor profiles are strong, yet natural- the fresh ingredients keep questionable things out of my meals and really allow true flavors to shine through. If I encounter an ingredient I haven't worked with before I can even learn how to prep and handle it like a pro. In general the service has not only saved me time and money on busy weeknights, but also expanded my confidence in the kitchen and taught me a few new tricks!
https://www.hellofresh.com
Perhaps, best of all for me, it's even inspired Jay to take the apron and cook on his own. In fact, he rather enjoyed the pride that came from preparing meals from scratch, and I've noticed he's gotten a lot more confident with the knife! Having pre-portioned ingredients in addition to the easy-to-follow recipe cards really provides all the tools for success, and even brings back a little bit of fun to the kitchen again!

Have you ever tried HelloFresh? If you've never ordered from HelloFresh head on over now to enjoy $30 off your first box, plus free shipping, with my exclusive code: MOMMAJ30. This code will only be around through the first week of May!


Making A Timeless Mother's Day Gift (Under $10)

This shop has been compensated by Collective Bias, Inc. and its advertiser. All opinions are mine alone. #DoingThe99 #99YourMothersDay #CollectiveBias
This elegant vanity tray was made with materials from the 99 Cents Only Stores for just $6, and everything on it was only another $6! #99YourMothersDay #DoingThe99 #AD
My mother and I don't really do gifts.

There was a time when I would actually get scolded for spending money on her- and not in a cute "oh you shouldn't have" manner, in a very real "I gave birth to you and you'll do as your told, you've offended me greatly" manner.

Through the years she's mellowed a bit. (Don't tell her I said that though, she has a staunch reputation to maintain.) We still do bare minimal for most holidays, and Mother's Day is no exception- but I've found that handmade gifts are accepted much more graciously. After all, she might smack me upside the head for buying her a new blu-ray player but there's not much she can do when I present her with something I crafted from my own two hands.....accept tell me to spend less time and money on it next time.

We have a special relationship.
That being said, whether you are a mother yourself, are the grown child of a mother, or have a friend who is a mother, Mother's Day is rapidly approaching and it's always nice to have a gift in mind that looks like a million bucks but cost you more like a 100 Grand (the candy bar). Regardless of who you're shopping for this Sunday May 14th, you likely need a little inspiration. After all, a macaroni pencil holder or salt dough portrait doesn't quite fly when you're 30.

Luckily, being the savvy 99er that I am, I'm always looking for inspiration for a fun and unique project that would make a great gift. We try to stop by our local 99 Cents Only Stores at least twice a week, since new and exciting things are always hitting the shelves, and the aisles are always packed with amazing essentials as well as seasonal decor and necessities. One of these days I'll make a fresh fruit bouquet from all of the amazing fruit in the produce department! You really can't go wrong whether you're looking to fill in holes on your grocery list or build a gift basket last minute- there are plenty of name brands at amazing prices.
So a few weeks back on Pinterest I saw some 'suggested for you' PINs pop into my feed and one was of a handmade vanity tray. The tray looked amazing, but when I clicked through to check out the materials things began adding up very quickly. The blogger had essentially used a bought tray ($20) and painted/refinished it to fit her decor. It was cute, but I knew I could do better for much cheaper.

The toughest part of my mission, or so I thought, would be finding a sturdy and sizeable surface to be functional at a vanity, or by the tub, while still holding a decent amount of weight without falling apart. Our local 99 Cents Only Store always has a section of aisle (usually across from the kitchen-wares) with home decor such as frames, mirrors, plaques, canvas art and more. Surprisingly I found 3 different options for my tray base that suited my needs.
I ended up deciding on a framed personal wall mirror for $1.99- it had a nice stylish pink border which would have worked great in my home, but not so much my mother's. I knew I wanted to give the tray handles of some kind, to make it easily transportable, but they had to adhere on their own since the tray's surface was essentially a mirror. In the electronics and accessories aisle I found some adorable smartphone 'rings' intended to support up 4lbs weight (each), which self adhered thanks to a sticky back. Then all I needed to do was decide on a color to paint my frame, and pick up a few accents to adorn my finished product.
To begin this very simple, anybody can do it, project I first taped along the inner edges of the mirror to protect from any paint residue during the process of painting the frame. I also wanted to dress up the mirror surface a little so I used my tape to make an inner 'frame' which I could paint over to reveal a designed pattern.
I'd picked up some decorative baubles at my local 99 and wanted to tie in my copper color to them as well- giving the edges, or entire objects, a quick coat of paint really helped tie my finished product together and elevate it to a whole new classy level. How adorable is that ceramic pineapple and sea turtle?
Once my paint had dried I carefully peeled off the tape- it's okay if you weren't perfect on your lines, the mirror surface will often be covered and imperfections give it a handmade feel. You may want to give your mirror a clear coat finish if you are worried about scuffs or scratches in use.

Next I pulled out my smartphone 'rings' and applied them in the center of each of the mirror's shortest ends. Voila! Instant tray! I was surprised how strong the grip of these rings were, and they easily carried a full load of items.
This elegant vanity tray was made with materials from the 99 Cents Only Stores for just $6, and everything on it was only another $6! #99YourMothersDay #DoingThe99 #AD
I have to say pictures don't do this beautiful tray justice. The metallic paint really pops and you can't tell I only spent $6 on it- I definitely want to make one for my own home now, too! It is incredibly sturdy and functional, and if it ever gets damaged no tears will be shed. I don't know about you- but those are some magical features to a mother!
This elegant vanity tray was made with materials from the 99 Cents Only Stores for just $6, and everything on it was only another $6! #99YourMothersDay #DoingThe99 #ADThis elegant vanity tray was made with materials from the 99 Cents Only Stores for just $6, and everything on it was only another $6! #99YourMothersDay #DoingThe99 #AD
I'll admit, I really 'broke the bank' spending an extra couple of bucks at the 99 Cents Only Stores on my accents. What can I say- everything on the tray itself was a whopping $7. I included a few moisturizers and a bamboo bath scrubber to add some functionality to my gift, as well as Godiva chocolates to sweeten the sentiment. This is definitely a gift I'd love to receive; and I know my mother will be proud of (when she hears how little I spent.)
This elegant vanity tray was made with materials from the 99 Cents Only Stores for just $6, and everything on it was only another $6! #99YourMothersDay #DoingThe99 #AD
Some of life's luxuries can still look expensive without really breaking the bank- that's something my frugal mother taught me. Mother's Day  is definitely a day to pamper the mothers in our lives and this $6 Custom Vanity Tray does just that! Of course if I haven't inspired you to creative-ness, you can also visit your local 99 and make an amazing gift basket your mother will love. Now, tell me, what are your plans for this Mother's Day?