
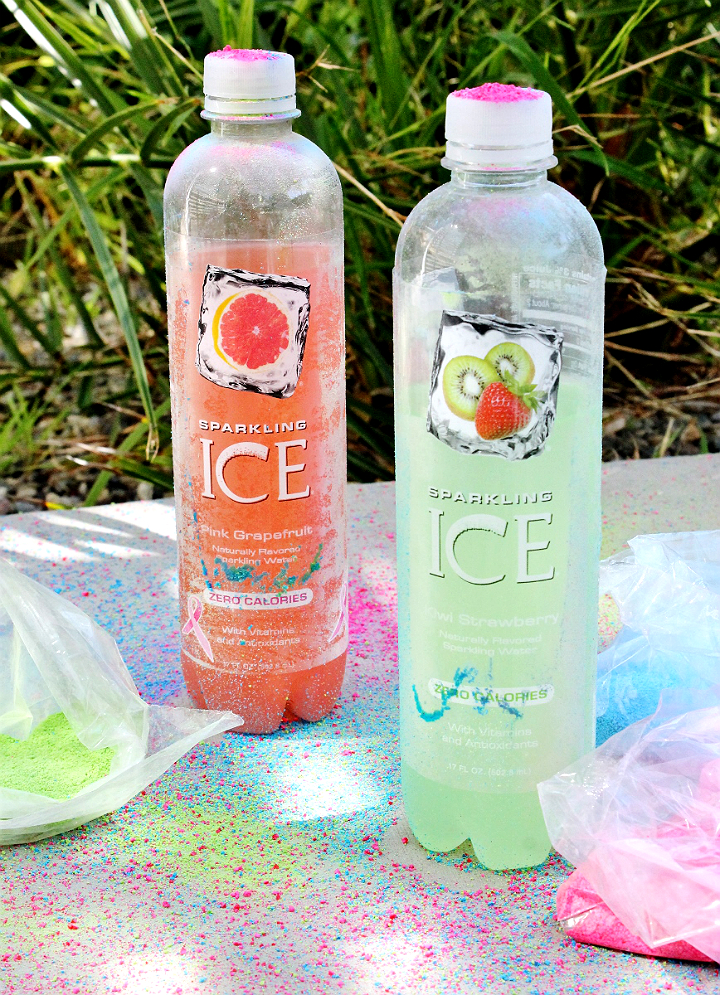
Serious relaxation can be exhausting, ironically. But one thing it should never be is dull. That goes for your afternoon plans AND your beverage. Whether you're watching that beach bod, or simply craving the best variety of flavor to take on your Summer adventures Sparkling ICE should be your official drink of the season. With 10 tempting zero calorie flavors of Sparkling ICE water you'll never get bored of the colorful options to keep you hydrated.
Even better, for those practicing doing absolutely nothing, you can have your favorite Sparkling ICE varieties delivered right to your door, thanks to Amazon Prime. Members can even save up to 15% on each delivery when they sign up to Subscribe and Save!


Much like sparkling flavor shouldn't have to come at the cost of calories, a good old-fashioned modern color toss shouldn't be something reserved
for a once a year event on city streets. No, I need flavor AND color in my life,
and I need them in a big way. How fun would it be to stage gender
announcements with a color toss photo-shoot? Or host a color wars themed
family reunion party? Heck, even the kids would have a barrel of a good
time watching a cloud of color shoot through the sky for no reason
other than it's Tuesday. So I bring you the very simple process for making your own Color Toss powder at home-


1.
Begin with some basic materials- You are going to want 4-5 Cups of
basic cornstarch, depending on how much, and how many colors, you are
attempting to yield. You will also need stain resistant mixing bowls (1
for each color,) gloves to protect your hands from staining, gel based
food colors of choice, and Water. Here is the supply breakdown for 1
batch (Approximately 1 Cup of Color Toss):
1 C Cornstarch
1/3 C Room Temperature Water
6-8 Drops Gel Based Food Color
Stain Resistant Mixing Bowl
Gloves
Baking Sheet (For Drying)


2.
Begin by placing 1 Cup of cornstarch in a mixing bowl. Add the water
slowly, but steadily, stirring as you add. This may be easiest to do
with a second pair of hands to pour as you stir. The mixture will want
to seize and turn into a substance referred to as 'Oooblek'.
Keeping the motion constant will help the mixture maintain its’
liquid-like properties and allow all of the cornstarch to be evenly
absorbed. You may need to add more water if the mixture thickens beyond a
rough slurry. You will know you have reached the correct consistency
when the mixture oozes off a spoon rapidly, but with enough thickness to
coat it in entirety.


3.
If you are lucky, and have that second pair of hands, you can add your
food color without ever stopping stirring. Make the color of the mixture
significantly darker than your desired result as most of the liquid
will evaporate out during the drying process and the powder will be
several shades lighter when done.


4. Repeat
this process for each color your desire to make. As you go you will
quickly find a simple technique and water ratio that works best for you.
By my 4th color I was a pro. Once all of the colors are mixed place the
bowls in a dry place where they can rest for several days. If you are
using large bowls and your liquid pool is shallow your colors will dry
much quicker than smaller, taller, bowls.
 In most cases the colors will
be ready for the next step in 2-3 days- you can 'drain' the excess
liquid every few hours after the color has initially set, to help speed
the process. Otherwise, set them aside and check back in several days
for surface cracks. This is how you will know the color is 'done'. Why not pop onto Amazon and refill your supply of Sparkling ICE while you wait? You don't want to be out of delicious sparkling refreshments when it comes time to reveal your big color toss!
In most cases the colors will
be ready for the next step in 2-3 days- you can 'drain' the excess
liquid every few hours after the color has initially set, to help speed
the process. Otherwise, set them aside and check back in several days
for surface cracks. This is how you will know the color is 'done'. Why not pop onto Amazon and refill your supply of Sparkling ICE while you wait? You don't want to be out of delicious sparkling refreshments when it comes time to reveal your big color toss!

5.
Flip the color 'cakes' out onto a clean baking/cookie sheet. The color
should crumble with light texture and will feel like soft, cool, red
clay to the touch. The texture should remind you of chalk. Pre-heat your
oven to 200F and crumble your color 'cakes' while you wait. Try and
make the crumble as fine and even as possible, spreading it out in a
thin layer along the sheet.


6.
Bake your color in a 200F pre-heated oven for 45-60 minutes. Depending
on how moist your color was upon crumbling, you may need to adjust this
time more or less. The heating process will draw any remaining moisture
out. It is important that you allow your color to 'cool' before the next
step or any humidity from the heating process could make your final
product clumpy or gritty.

7. For
this last step you're going to want a nice food processor. Something
meant to puree. Carefully add one tray's contents to the bin of a food
processor or blender, securing the lid tightly- the color will 'puff'
and 'smoke' around any open edge- you've been warned. Hit a quick
'pulse' then puree or blend on the highest setting for 30 seconds. Over
processing can cause heat and, again, release any residual moisture, so
be careful to take your time and check your product in between steps.

8. Now
you should have a very fine, chalk dust, powder that steaks your hands
when pressed between a few fingers. The color should lift from most
surfaces with ease, unless moisture is added. While it is made with food
grade ingredients you may also want to wear eye-wear, such as
sunglasses, and be mindful of faces when tossing to minimize inhalation.
Unless you don't mind sneezing colors for the next few days, that is.

You
may be wondering what on Earth a person would do with colored powder,
or why in heavens they'd want to stain everything in sight with it. If
you are, then you and I are completely different people. This is okay.
One
of the greatest things about this project is that the color can be
stored in air tight containers for months. Pull some out for a
photo-shoot, celebration, or simply to brighten an otherwise dull day.
And yes, you could even smuggle it into your favorite color marathon
event. I can only imagine the color combinations and color creations
that are possible when one mixes all the beautiful vivid food colors available on Amazon! It's kind of like the range of 10 vibrant calorie-free flavors of Sparkling ICE available on Amazon Prime!

If you're still on the fence- and if you read my blog you're probably ALL OVER THIS and making the shopping list now, but IF you are I have a few things to say...
Because
this color toss recipe is made with simple food grade ingredients,
children, pets, grandparents, neighbors, cars, and more can get in on
the fun. Yes, the powder is VERY fine, and wind WILL give it a mind of
it's own-but the majority of the color lifts WITH the powder and will
wipe off of nearly any surface so long as moisture isn't involved. A
leaf blower, vacuum, or box fan makes clean up a breeze- any residual
color, outdoors, dissipates naturally within a few days.


I've
had a lot of experience shooting color clouds and color events. We
spent about 10 minutes on this photo shoot because my week has been
bananas, and I captured some pretty fun shots. My best tips for staging
photos is to use a high burst setting. If you're going to shoot outdoors
obscured direct lighting is best- shoot for a background that is high
contrast light or high contrast dark. The less going on, the more action
your color will have. Cool tones, such as lime green and electric blue
tend to pop the most on camera. The color will offer a beautiful cloud
effect immediately as it hits a surface, followed by an entirely
un-readable haze. Be fast.


Thoughts that are persuading, thoughts that are logical and thoughts that are engaging Feel free to visit my website;
ReplyDeleteThis article is really contains lot more information about This Topic.
ReplyDeleteTook me time to read all the comments, but I really enjoyed the article.
ReplyDeleteI don’t know how many hours I’ve been searching for a simple article like this.
ReplyDeletewoooow, amazing blog to read, thanks for sharing, and move on.
ReplyDelete
ReplyDeleteThanks for sharing this piece of information. I really enjoyed it. keep up the good work.
ReplyDeleteFabulous! This is just amazing! Not just high quality, however additionally valuable info. And that is rare to come by nowadays!
I wan’t going to comment as this posts a bit old now, but just wanted to say thanks.
ReplyDeleteI really liked it. I wanted to leave a note. I was reading your website. I also tried to share the site.
ReplyDeleteThis is the best way to share the great article with everyone one, so that everyone can able to utilize this information
ReplyDelete
ReplyDeleteAdvanced first aid involves providing immediate care to individuals with serious injuries or medical conditions, stabilizing them until professional medical help arrives. It goes beyond basic first aid by incorporating more complex techniques such as wound care, managing fractures, CPR (Cardiopulmonary Resuscitation), and using medical equipment like AEDs (Automated External Defibrillators). It also covers how to treat burns, spinal injuries, shock, and control severe bleeding.
Advanced first aid responders are trained in assessing life-threatening situations, making quick decisions, and applying appropriate interventions. They are also educated in the importance of infection control and maintaining the safety of both the injured person and the responder. Effective communication with emergency services is essential.